作者:微信小助手
<section data-tool="mdnice编辑器" data-website="https://www.mdnice.com" style="line-height: 1.6;word-break: break-word;text-align: left;padding: 5px;font-size: 16px;color: rgb(53, 53, 53);word-spacing: 0.8px;letter-spacing: 0.8px;border-radius: 16px;font-family: Optima-Regular, Optima, PingFangSC-light, PingFangTC-light, "PingFang SC", Cambria, Cochin, Georgia, Times, "Times New Roman", serif;"> <p data-tool="mdnice编辑器" style="padding-top: 8px;padding-bottom: 8px;line-height: 1.75;margin-top: 0.8em;margin-bottom: 0.8em;">Elasticsearch 是一个实时的分布式搜索与分析引擎,在使用过程中,有一些典型的使用场景,比如分页、遍历等。</p> <p data-tool="mdnice编辑器" style="padding-top: 8px;padding-bottom: 8px;line-height: 1.75;margin-top: 0.8em;margin-bottom: 0.8em;">在使用关系型数据库中,我们被告知要注意甚至被明确禁止使用深度分页,同理,在 Elasticsearch 中,也应该尽量避免使用深度分页。</p> <p data-tool="mdnice编辑器" style="padding-top: 8px;padding-bottom: 8px;line-height: 1.75;margin-top: 0.8em;margin-bottom: 0.8em;">这篇文章主要介绍 Elasticsearch 中分页相关内容!</p> <h2 data-tool="mdnice编辑器" style="font-weight: bold;color: black;font-size: 22px;margin-top: 20px;margin-right: 10px;"><span style="display: none;"></span><span style="font-size: 18px;color: rgb(234, 84, 41);letter-spacing: 0.5444px;padding-bottom: 10px;border-bottom: 2px solid rgb(234, 84, 41);visibility: visible;">From/Size参数</span></h2> <p data-tool="mdnice编辑器" style="padding-top: 8px;padding-bottom: 8px;line-height: 1.75;margin-top: 0.8em;margin-bottom: 0.8em;">在ES中,分页查询默认返回最顶端的10条匹配hits。</p> <p data-tool="mdnice编辑器" style="padding-top: 8px;padding-bottom: 8px;line-height: 1.75;margin-top: 0.8em;margin-bottom: 0.8em;">如果需要分页,需要使用from和size参数。</p> <ul data-tool="mdnice编辑器" style="margin-top: 8px;margin-bottom: 8px;padding-left: 25px;color: rgb(248, 57, 41);" class="list-paddingleft-1"> <li> <section style="margin-top: 5px;margin-bottom: 5px;line-height: 26px;color: rgb(53, 53, 53);"> from参数定义了需要跳过的hits数,默认为0; </section></li> <li> <section style="margin-top: 5px;margin-bottom: 5px;line-height: 26px;color: rgb(53, 53, 53);"> size参数定义了需要返回的hits数目的最大值。 </section></li> </ul> <p data-tool="mdnice编辑器" style="padding-top: 8px;padding-bottom: 8px;line-height: 1.75;margin-top: 0.8em;margin-bottom: 0.8em;">一个基本的ES查询语句是这样的:</p> <pre data-tool="mdnice编辑器" style="margin-top: 10px;margin-bottom: 10px;border-radius: 5px;box-shadow: rgba(0, 0, 0, 0.55) 0px 2px 10px;"><span style="display: block;background: url("https://mmbiz.qpic.cn/mmbiz_svg/A7sq8BD8oezBibiciavS1eDQetDm5vJkjZsSiaiaSh7QrHNmsESCqZKQfIKUpuPFqsibicnQ2YEdpQFQ3ah0aYQaSticP1uyvRiavGA9o/640?wx_fmt=svg") 10px 10px / 40px no-repeat rgb(255, 255, 255);height: 30px;width: 100%;margin-bottom: -7px;border-radius: 5px;"></span><code style="overflow-x: auto;padding: 16px;color: black;display: -webkit-box;font-family: Operator Mono, Consolas, Monaco, Menlo, monospace;font-size: 12px;-webkit-overflow-scrolling: touch;padding-top: 15px;background: #fff;border-radius: 5px;">POST /my_index/my_type/_search<br>{<br> <span style="color: #836C28;line-height: 26px;">"query"</span>: { <span style="color: #836C28;line-height: 26px;">"match_all"</span>: {}},<br> <span style="color: #836C28;line-height: 26px;">"from"</span>: <span style="color: #1c00cf;line-height: 26px;">100</span>,<br> <span style="color: #836C28;line-height: 26px;">"size"</span>: <span style="color: #1c00cf;line-height: 26px;">10</span><br>}<br></code></pre> <p data-tool="mdnice编辑器" style="padding-top: 8px;padding-bottom: 8px;line-height: 1.75;margin-top: 0.8em;margin-bottom: 0.8em;">上面的查询表示从搜索结果中取第100条开始的10条数据。</p> <p data-tool="mdnice编辑器" style="padding-top: 8px;padding-bottom: 8px;line-height: 1.75;margin-top: 0.8em;margin-bottom: 0.8em;"><span style="font-weight: 700;color: rgb(248, 57, 41);">那么,这个查询语句在ES集群内部是怎么执行的呢?</span></p> <p data-tool="mdnice编辑器" style="padding-top: 8px;padding-bottom: 8px;line-height: 1.75;margin-top: 0.8em;margin-bottom: 0.8em;">在ES中,搜索一般包括两个阶段,query 和 fetch 阶段,可以简单的理解,query 阶段确定要取哪些doc,fetch 阶段取出具体的 doc。</p> <blockquote data-tool="mdnice编辑器" style="border-top: none;border-right: none;border-bottom: none;font-size: 0.9em;overflow: auto;color: rgb(106, 115, 125);border-left-width: 2px;padding: 8px 10px 8px 15px;background: rgb(255, 249, 249);border-left-color: rgb(239, 112, 96);margin-top: 0px;margin-bottom: 20px;letter-spacing: 0.5444px;"> <p style="padding-top: 8px;padding-bottom: 8px;line-height: 26px;color: rgb(53, 53, 53);font-size: 16px;margin-right: 10px;margin-left: 10px;">Query阶段</p> </blockquote> <figure data-tool="mdnice编辑器" style="margin-top: 10px;margin-bottom: 10px;display: flex;flex-direction: column;justify-content: center;align-items: center;border-radius: 16px;overflow: hidden;"> <img class="rich_pages wxw-img" data-ratio="0.6985294117647058" data-w="544" style="border-radius: 6px;display: block;margin: 20px auto;max-width: 95%;object-fit: contain;height: auto !important;" src="/upload/aa31286b51b72896c3391a50404a7101.png"> </figure> <p data-tool="mdnice编辑器" style="padding-top: 8px;padding-bottom: 8px;line-height: 1.75;margin-top: 0.8em;margin-bottom: 0.8em;">如上图所示,描述了一次搜索请求的 query 阶段:·</p> <ol data-tool="mdnice编辑器" style="margin-top: 8px;margin-bottom: 8px;padding-left: 25px;color: rgb(248, 57, 41);" class="list-paddingleft-1"> <li> <section style="margin-top: 5px;margin-bottom: 5px;line-height: 26px;color: rgb(53, 53, 53);"> Client 发送一次搜索请求,node1 接收到请求,然后,node1 创建一个大小为 <code style="font-size: 14px;padding: 2px 4px;border-radius: 4px;margin-right: 2px;margin-left: 2px;background-color: rgba(27, 31, 35, 0.05);font-family: "Operator Mono", Consolas, Monaco, Menlo, monospace;word-break: break-all;color: rgb(255, 93, 108);">from + size</code>的优先级队列用来存结果,我们管 node1 叫 coordinating node。 </section></li> <li> <section style="margin-top: 5px;margin-bottom: 5px;line-height: 26px;color: rgb(53, 53, 53);"> coordinating node将请求广播到涉及到的 shards,每个 shard 在内部执行搜索请求,然后,将结果存到内部的大小同样为 <code style="font-size: 14px;padding: 2px 4px;border-radius: 4px;margin-right: 2px;margin-left: 2px;background-color: rgba(27, 31, 35, 0.05);font-family: "Operator Mono", Consolas, Monaco, Menlo, monospace;word-break: break-all;color: rgb(255, 93, 108);">from + size</code> 的优先级队列里,可以把优先级队列理解为一个包含 <code style="font-size: 14px;padding: 2px 4px;border-radius: 4px;margin-right: 2px;margin-left: 2px;background-color: rgba(27, 31, 35, 0.05);font-family: "Operator Mono", Consolas, Monaco, Menlo, monospace;word-break: break-all;color: rgb(255, 93, 108);">top N</code>结果的列表。 </section></li> <li> <section style="margin-top: 5px;margin-bottom: 5px;line-height: 26px;color: rgb(53, 53, 53);"> 每个 shard 把暂存在自身优先级队列里的数据返回给 coordinating node,coordinating node 拿到各个 shards 返回的结果后对结果进行一次合并,产生一个全局的优先级队列,存到自身的优先级队列里。 </section></li> </ol> <p data-tool="mdnice编辑器" style="padding-top: 8px;padding-bottom: 8px;line-height: 1.75;margin-top: 0.8em;margin-bottom: 0.8em;">在上面的例子中,coordinating node 拿到<code style="font-size: 14px;padding: 2px 4px;border-radius: 4px;margin-right: 2px;margin-left: 2px;background-color: rgba(27, 31, 35, 0.05);font-family: "Operator Mono", Consolas, Monaco, Menlo, monospace;word-break: break-all;color: rgb(255, 93, 108);">(from + size) * 6</code>条数据,然后合并并排序后选择前面的<code style="font-size: 14px;padding: 2px 4px;border-radius: 4px;margin-right: 2px;margin-left: 2px;background-color: rgba(27, 31, 35, 0.05);font-family: "Operator Mono", Consolas, Monaco, Menlo, monospace;word-break: break-all;color: rgb(255, 93, 108);">from + size</code>条数据存到优先级队列,以便 fetch 阶段使用。</p> <p data-tool="mdnice编辑器" style="padding-top: 8px;padding-bottom: 8px;line-height: 1.75;margin-top: 0.8em;margin-bottom: 0.8em;">另外,各个分片返回给 coordinating node 的数据用于选出前<code style="font-size: 14px;padding: 2px 4px;border-radius: 4px;margin-right: 2px;margin-left: 2px;background-color: rgba(27, 31, 35, 0.05);font-family: "Operator Mono", Consolas, Monaco, Menlo, monospace;word-break: break-all;color: rgb(255, 93, 108);">from + size</code>条数据,所以,只需要返回唯一标记 doc 的<code style="font-size: 14px;padding: 2px 4px;border-radius: 4px;margin-right: 2px;margin-left: 2px;background-color: rgba(27, 31, 35, 0.05);font-family: "Operator Mono", Consolas, Monaco, Menlo, monospace;word-break: break-all;color: rgb(255, 93, 108);">_id</code>以及用于排序的<code style="font-size: 14px;padding: 2px 4px;border-radius: 4px;margin-right: 2px;margin-left: 2px;background-color: rgba(27, 31, 35, 0.05);font-family: "Operator Mono", Consolas, Monaco, Menlo, monospace;word-break: break-all;color: rgb(255, 93, 108);">_score</code>即可,这样也可以保证返回的数据量足够小。</p> <p data-tool="mdnice编辑器" style="padding-top: 8px;padding-bottom: 8px;line-height: 1.75;margin-top: 0.8em;margin-bottom: 0.8em;">coordinating node 计算好自己的优先级队列后,query 阶段结束,进入 fetch 阶段。</p> <blockquote data-tool="mdnice编辑器" style="border-top: none;border-right: none;border-bottom: none;font-size: 0.9em;overflow: auto;color: rgb(106, 115, 125);border-left-width: 2px;padding: 8px 10px 8px 15px;background: rgb(255, 249, 249);border-left-color: rgb(239, 112, 96);margin-top: 0px;margin-bottom: 20px;letter-spacing: 0.5444px;"> <p style="padding-top: 8px;padding-bottom: 8px;line-height: 26px;color: rgb(53, 53, 53);font-size: 16px;margin-right: 10px;margin-left: 10px;">Fetch阶段</p> </blockquote> <p data-tool="mdnice编辑器" style="padding-top: 8px;padding-bottom: 8px;line-height: 1.75;margin-top: 0.8em;margin-bottom: 0.8em;">query 阶段知道了要取哪些数据,但是并没有取具体的数据,这就是 fetch 阶段要做的。</p> <figure data-tool="mdnice编辑器" style="margin-top: 10px;margin-bottom: 10px;display: flex;flex-direction: column;justify-content: center;align-items: center;border-radius: 16px;overflow: hidden;"> <img class="rich_pages wxw-img" data-ratio="0.7016574585635359" data-w="543" style="border-radius: 6px;display: block;margin: 20px auto;max-width: 95%;object-fit: contain;height: auto !important;" src="/upload/58734840461fd1073a84abeddca28000.png"> </figure> <p data-tool="mdnice编辑器" style="padding-top: 8px;padding-bottom: 8px;line-height: 1.75;margin-top: 0.8em;margin-bottom: 0.8em;">上图展示了 fetch 过程:</p> <ol data-tool="mdnice编辑器" style="margin-top: 8px;margin-bottom: 8px;padding-left: 25px;color: rgb(248, 57, 41);" class="list-paddingleft-1"> <li> <section style="margin-top: 5px;margin-bottom: 5px;line-height: 26px;color: rgb(53, 53, 53);"> coordinating node 发送 GET 请求到相关shards。 </section></li> <li> <section style="margin-top: 5px;margin-bottom: 5px;line-height: 26px;color: rgb(53, 53, 53);"> shard 根据 doc 的 <code style="font-size: 14px;padding: 2px 4px;border-radius: 4px;margin-right: 2px;margin-left: 2px;background-color: rgba(27, 31, 35, 0.05);font-family: "Operator Mono", Consolas, Monaco, Menlo, monospace;word-break: break-all;color: rgb(255, 93, 108);">_id</code>取到数据详情,然后返回给 coordinating node。 </section></li> <li> <section style="margin-top: 5px;margin-bottom: 5px;line-height: 26px;color: rgb(53, 53, 53);"> coordinating node 返回数据给 Client。 </section></li> </ol> <p data-tool="mdnice编辑器" style="padding-top: 8px;padding-bottom: 8px;line-height: 1.75;margin-top: 0.8em;margin-bottom: 0.8em;">coordinating node 的优先级队列里有<code style="font-size: 14px;padding: 2px 4px;border-radius: 4px;margin-right: 2px;margin-left: 2px;background-color: rgba(27, 31, 35, 0.05);font-family: "Operator Mono", Consolas, Monaco, Menlo, monospace;word-break: break-all;color: rgb(255, 93, 108);">from + size</code> 个<code style="font-size: 14px;padding: 2px 4px;border-radius: 4px;margin-right: 2px;margin-left: 2px;background-color: rgba(27, 31, 35, 0.05);font-family: "Operator Mono", Consolas, Monaco, Menlo, monospace;word-break: break-all;color: rgb(255, 93, 108);">_doc _id</code>,但是,在 fetch 阶段,并不需要取回所有数据,在上面的例子中,前100条数据是不需要取的,只需要取优先级队列里的第101到110条数据即可。</p> <p data-tool="mdnice编辑器" style="padding-top: 8px;padding-bottom: 8px;line-height: 1.75;margin-top: 0.8em;margin-bottom: 0.8em;">需要取的数据可能在不同分片,也可能在同一分片,coordinating node 使用 <span style="font-weight: 700;color: rgb(248, 57, 41);">multi-get</span> 来避免多次去同一分片取数据,从而提高性能。</p> <p data-tool="mdnice编辑器" style="padding-top: 8px;padding-bottom: 8px;line-height: 1.75;margin-top: 0.8em;margin-bottom: 0.8em;"><span style="font-weight: 700;color: rgb(248, 57, 41);">这种方式请求深度分页是有问题的:</span></p> <p data-tool="mdnice编辑器" style="padding-top: 8px;padding-bottom: 8px;line-height: 1.75;margin-top: 0.8em;margin-bottom: 0.8em;">我们可以假设在一个有 5 个主分片的索引中搜索。当我们请求结果的第一页(结果从 1 到 10 ),每一个分片产生前 10 的结果,并且返回给 <span style="font-weight: 700;color: rgb(248, 57, 41);">协调节点</span> ,协调节点对 50 个结果排序得到全部结果的前 10 个。</p> <p data-tool="mdnice编辑器" style="padding-top: 8px;padding-bottom: 8px;line-height: 1.75;margin-top: 0.8em;margin-bottom: 0.8em;">现在假设我们请求第 1000 页—结果从 10001 到 10010 。所有都以相同的方式工作除了每个分片不得不产生前10010个结果以外。然后协调节点对全部 50050 个结果排序最后丢弃掉这些结果中的 50040 个结果。</p> <p data-tool="mdnice编辑器" style="padding-top: 8px;padding-bottom: 8px;line-height: 1.75;margin-top: 0.8em;margin-bottom: 0.8em;"><span style="font-weight: 700;color: rgb(248, 57, 41);">对结果排序的成本随分页的深度成指数上升。</span></p> <p data-tool="mdnice编辑器" style="padding-top: 8px;padding-bottom: 8px;line-height: 1.75;margin-top: 0.8em;margin-bottom: 0.8em;"><span style="font-weight: 700;color: rgb(248, 57, 41);">注意1:</span></p> <p data-tool="mdnice编辑器" style="padding-top: 8px;padding-bottom: 8px;line-height: 1.75;margin-top: 0.8em;margin-bottom: 0.8em;">size的大小不能超过<code style="font-size: 14px;padding: 2px 4px;border-radius: 4px;margin-right: 2px;margin-left: 2px;background-color: rgba(27, 31, 35, 0.05);font-family: "Operator Mono", Consolas, Monaco, Menlo, monospace;word-break: break-all;color: rgb(255, 93, 108);">index.max_result_window</code>这个参数的设置,默认为10000。</p> <p data-tool="mdnice编辑器" style="padding-top: 8px;padding-bottom: 8px;line-height: 1.75;margin-top: 0.8em;margin-bottom: 0.8em;">如果搜索size大于10000,需要设置<code style="font-size: 14px;padding: 2px 4px;border-radius: 4px;margin-right: 2px;margin-left: 2px;background-color: rgba(27, 31, 35, 0.05);font-family: "Operator Mono", Consolas, Monaco, Menlo, monospace;word-break: break-all;color: rgb(255, 93, 108);">i
作者:微信小助手
<section data-tool="mdnice编辑器" data-website="https://www.mdnice.com" data-mpa-powered-by="yiban.io" style="padding-right: 10px;padding-left: 10px;outline: 0px;text-wrap: wrap;background-color: rgb(255, 255, 255);font-size: 16px;color: black;line-height: 1.6;letter-spacing: 0px;word-break: break-word;text-align: left;font-family: Optima-Regular, Optima, PingFangSC-light, PingFangTC-light, "PingFang SC", Cambria, Cochin, Georgia, Times, "Times New Roman", serif;visibility: visible;scroll-behavior: auto !important;"> <h2 data-tool="mdnice编辑器" style="margin: 1em auto;padding-left: 10px;outline: 0px;font-weight: bold;font-size: 22px;color: rgb(0, 150, 136);border-left: 3px solid rgb(0, 150, 136);visibility: visible;scroll-behavior: auto !important;">一、MyBatis动态 sql 是什么</h2> <p data-tool="mdnice编辑器" style="padding-top: 8px;padding-bottom: 8px;outline: 0px;line-height: 26px;text-align: justify;visibility: visible;scroll-behavior: auto !important;">动态 SQL 是 MyBatis 的强大特性之一。在 JDBC 或其它类似的框架中,开发人员通常需要手动拼接 SQL 语句。根据不同的条件拼接 SQL 语句是一件极其痛苦的工作。例如,拼接时要确保添加了必要的空格,还要注意去掉列表最后一个列名的逗号。而动态 SQL 恰好解决了这一问题,可以根据场景动态的构建查询。</p> <p data-tool="mdnice编辑器" style="padding-top: 8px;padding-bottom: 8px;outline: 0px;line-height: 26px;text-align: justify;visibility: visible;scroll-behavior: auto !important;">动态SQL(code that is executed dynamically),它一般是根据用户输入或外部条件动态组合的SQL语句块。动态SQL能灵活的发挥SQL强大的功能、方便的解决一些其它方法难以解决的问题。相信使用过动态SQL的人都能体会到它带来的便利,然而动态SQL有时候在执行性能 (效率)上面不如静态SQL,而且使用不恰当,往往会在安全方面存在隐患 (SQL 注入式攻击)。</p> <h3 data-tool="mdnice编辑器" style="margin: 0.6em auto;padding-left: 10px;outline: 0px;font-weight: bold;font-size: 20px;border-left: 2px solid rgb(0, 150, 136);visibility: visible;scroll-behavior: auto !important;">1.Mybatis 动态 sql 是做什么的?</h3> <p data-tool="mdnice编辑器" style="padding-top: 8px;padding-bottom: 8px;outline: 0px;line-height: 26px;text-align: justify;visibility: visible;scroll-behavior: auto !important;">Mybatis 动态 sql 可以让我们在 Xml 映射文件内,以标签的形式编写动态 sql,完成逻辑判断和动态拼接 sql 的功能。</p> <h3 data-tool="mdnice编辑器" style="margin: 0.6em auto;padding-left: 10px;outline: 0px;font-weight: bold;font-size: 20px;border-left: 2px solid rgb(0, 150, 136);visibility: visible;scroll-behavior: auto !important;">2.Mybatis 的 9 种 动 态 sql 标 签有哪些?</h3> <figure data-tool="mdnice编辑器" style="margin-top: 10px;margin-bottom: 10px;outline: 0px;display: flex;flex-direction: column;justify-content: center;align-items: center;visibility: visible;scroll-behavior: auto !important;"> <img class="rich_pages wxw-img" src="/upload/619dbe7242626203e9d9ec515bd52477.png" data-cropx1="0" data-cropx2="499" data-cropy1="0" data-cropy2="262" data-ratio="0.5250501002004008" src="https://mmbiz.qpic.cn/sz_mmbiz_jpg/eZzl4LXykQw893o2Ryk4f0A01x5RAJlg7yhzduS0exFoNpLk6WL8AdedgunAfMEauuL6SYWsWRQHme0He7eCWA/640?wx_fmt=jpeg" data-type="jpeg" data-w="499" style="margin-right: auto;margin-left: auto;outline: 0px;display: block;scroll-behavior: auto !important;visibility: visible !important;width: 499px;height: 262px;"> </figure> <h3 data-tool="mdnice编辑器" style="margin: 0.6em auto;padding-left: 10px;outline: 0px;font-weight: bold;font-size: 20px;border-left: 2px solid rgb(0, 150, 136);visibility: visible;scroll-behavior: auto !important;">3.动态 sql 的执行原理?</h3> <p data-tool="mdnice编辑器" style="padding-top: 8px;padding-bottom: 8px;outline: 0px;line-height: 26px;text-align: justify;scroll-behavior: auto !important;">原理为:使用 OGNL 从 sql 参数对象中计算表达式的值,根据表达式的值动态拼接 sql,以此来完成动态 sql 的功能。</p> <h2 data-tool="mdnice编辑器" style="margin: 1em auto;padding-left: 10px;outline: 0px;font-weight: bold;font-size: 22px;color: rgb(0, 150, 136);border-left: 3px solid rgb(0, 150, 136);scroll-behavior: auto !important;">二、MyBatis标签</h2> <h3 data-tool="mdnice编辑器" style="margin: 0.6em auto;padding-left: 10px;outline: 0px;font-weight: bold;font-size: 20px;border-left: 2px solid rgb(0, 150, 136);scroll-behavior: auto !important;">1.if标签:条件判断</h3> <p data-tool="mdnice编辑器" style="padding-top: 8px;padding-bottom: 8px;outline: 0px;line-height: 26px;text-align: justify;scroll-behavior: auto !important;">MyBatis if 类似于 Java 中的 if 语句,是 MyBatis 中最常用的判断语句。使用 if 标签可以节省许多拼接 SQL 的工作,把精力集中在 XML 的维护上。</p> <p data-tool="mdnice编辑器" style="padding-top: 8px;padding-bottom: 8px;outline: 0px;line-height: 26px;text-align: justify;scroll-behavior: auto !important;"><strong style="outline: 0px;scroll-behavior: auto !important;">1)不使用动态sql</strong></p> <pre data-tool="mdnice编辑器" style="margin-top: 10px;margin-bottom: 10px;outline: 0px;border-radius: 5px;box-shadow: rgba(0, 0, 0, 0.55) 0px 2px 10px;scroll-behavior: auto !important;"><span style="margin-bottom: -7px;outline: 0px;display: block;background: url("https://mmbiz.qpic.cn/mmbiz_svg/GPyw0pGicibl5sEj4cuKR5asffAcRoIbjtLSlth4jWWibIvd7jA9srffR3cLqiaibT3ibSyCxwqXqSyictzYzriciavr5N2ibW6TsnPyza/640?wx_fmt=svg") 10px 10px / 40px no-repeat rgb(40, 44, 52);height: 30px;width: 657px;border-radius: 5px;scroll-behavior: auto !important;"></span><code style="padding: 15px 16px 16px;outline: 0px;overflow-x: auto;color: rgb(171, 178, 191);display: -webkit-box;font-family: "Operator Mono", Consolas, Monaco, Menlo, monospace;font-size: 12px;background: rgb(40, 44, 52);border-radius: 5px;scroll-behavior: auto !important;"><span style="outline: 0px;line-height: 26px;scroll-behavior: auto !important;"><<span style="outline: 0px;color: rgb(224, 108, 117);line-height: 26px;scroll-behavior: auto !important;">select</span> <span style="outline: 0px;color: rgb(209, 154, 102);line-height: 26px;scroll-behavior: auto !important;">id</span>=<span style="outline: 0px;color: rgb(152, 195, 121);line-height: 26px;scroll-behavior: auto !important;">"selectUserByUsernameAndSex"</span><br style="outline: 0px;scroll-behavior: auto !important;"> <span style="outline: 0px;color: rgb(209, 154, 102);line-height: 26px;scroll-behavior: auto !important;">resultType</span>=<span style="outline: 0px;color: rgb(152, 195, 121);line-height: 26px;scroll-behavior: auto !important;">"user"</span> <span style="outline: 0px;color: rgb(209, 154, 102);line-height: 26px;scroll-behavior: auto !important;">parameterType</span>=<span style="outline: 0px;color: rgb(152, 195, 121);line-height: 26px;scroll-behavior: auto !important;">"com.ys.po.User"</span>></span><br style="outline: 0px;scroll-behavior: auto !important;"> <span style="outline: 0px;color: rgb(92, 99, 112);font-style: italic;line-height: 26px;scroll-behavior: auto !important;"><!-- 这里和普通的sql 查询语句差不多,对于只有一个参数,后面的 #{id}表示占位符,里面 不一定要写id,<br style="outline: 0px;scroll-behavior: auto !important;"> 写啥都可以,但是不要空着,如果有多个参数则必须写pojo类里面的属性 --></span><br style="outline: 0px;scroll-behavior: auto !important;"> select * from user where username=#{username} and sex=#{sex}<br style="outline: 0px;scroll-behavior: auto !important;"><span style="outline: 0px;line-height: 26px;scroll-behavior: auto !important;"></<span style="outline: 0px;color: rgb(224, 108, 117);line-height: 26px;scroll-behavior: auto !important;">select</span>></span><br style="outline: 0px;scroll-behavior: auto !important;"></code></pre> <p data-tool="mdnice编辑器" style="padding-top: 8px;padding-bottom: 8px;outline: 0px;line-height: 26px;text-align: justify;scroll-behavior: auto !important;">if 语句使用方法简单,常常与 test 属性联合使用。语法如下:</p> <pre data-tool="mdnice编辑器" style="margin-top: 10px;margin-bottom: 10px;outline: 0px;border-radius: 5px;box-shadow: rgba(0, 0, 0, 0.55) 0px 2px 10px;scroll-behavior: auto !important;"><span style="margin-bottom: -7px;outline: 0px;display: block;background: url("https://mmbiz.qpic.cn/mmbiz_svg/GPyw0pGicibl5sEj4cuKR5asffAcRoIbjtLSlth4jWWibIvd7jA9srffR3cLqiaibT3ibSyCxwqXqSyictzYzriciavr5N2ibW6TsnPyza/640?wx_fmt=svg") 10px 10px / 40px no-repeat rgb(40, 44, 52);height: 30px;width: 657px;border-radius: 5px;scroll-behavior: auto !important;"></span><code style="padding: 15px 16px 16px;outline: 0px;overflow-x: auto;color: rgb(171, 178, 191);display: -webkit-box;font-family: "Operator Mono", Consolas, Monaco, Menlo, monospace;font-size: 12px;background: rgb(40, 44, 52);border-radius: 5px;scroll-behavior: auto !important;"><<span style="outline: 0px;color: rgb(198, 120, 221);line-height: 26px;scroll-behavior: auto !important;">if</span> <span style="outline: 0px;color: rgb(230, 192, 123);line-height: 26px;scroll-behavior: auto !important;">test</span>=<span style="outline: 0px;color: rgb(152, 195, 121);line-height: 26px;scroll-behavior: auto !important;">"判断条件"</span>> SQL语句</<span style="outline: 0px;color: rgb(198, 120, 221);line-height: 26px;scroll-behavior: auto !important;">if</span>><br style="outline: 0px;scroll-behavior: auto !important;"></code></pre> <p data-tool="mdnice编辑器" style="padding-top: 8px;padding-bottom: 8px;outline: 0px;line-height: 26px;text-align: justify;scroll-behavior: auto !important;"><strong style="outline: 0px;scroll-behavior: auto !important;">2)使用动态sql</strong></p> <p data-tool="mdnice编辑器" style="padding-top: 8px;padding-bottom: 8px;outline: 0px;line-height: 26px;text-align: justify;scroll-behavior: auto !important;">上面的查询语句,我们可以发现,如果 <code style="margin-right: 2px;margin-left: 2px;padding: 2px 4px;outline: 0px;font-size: 14px;border-radius: 4px;background-color: rgba(27, 31, 35, 0.05);font-family: "Operator Mono", Consolas, Monaco, Menlo, monospace;word-break: break-all;color: rgb(0, 150, 136);scroll-behavior: auto !important;">#{username}</code> 为空,那么查询结果也是空,如何解决这个问题呢?使用 if 来判断,可多个 if 语句同时使用。</p> <p data-tool="mdnice编辑器" style="padding-top: 8px;padding-bottom: 8px;outline: 0px;line-height: 26px;text-align: justify;scroll-behavior: auto !important;">以下语句表示为可以按照网站名称(name)或者网址(url)进行模糊查询。如果您不输入名称或网址,则返回所有的网站记录。但是,如果你传递了任意一个参数,它就会返回与给定参数相匹配的记录。</p> <pre data-tool="mdnice编辑器" style="margin-top: 10px;margin-bottom: 10px;outline: 0px;border-radius: 5px;box-shadow: rgba(0, 0, 0, 0.55) 0px 2px 10px;scroll-behavior: auto !important;"><span style="margin-bottom: -7px;outline: 0px;display: block;background: url("https://mmbiz.qpic.cn/mmbiz_svg/GPyw0pGicibl5sEj4cuKR5asffAcRoIbjtLSlth4jWWibIvd7jA9srffR3cLqiaibT3ibSyCxwqXqSyictzYzriciavr5N2ibW6TsnPyza/640?wx_fmt=svg") 10px 10px / 40px no-repeat rgb(40, 44, 52);height: 30px;width: 657px;border-radius: 5px;scroll-behavior: auto !important;"></span><code style="padding: 15px 16px 16px;outline: 0px;overflow-x: auto;color: rgb(171, 178, 191);display: -webkit-box;font-family: "Operator Mono", Consolas, Monaco, Menlo, monospace;font-size: 12px;background: rgb(40, 44, 52);border-radius: 5px;scroll-behavior: auto !important;"><span style="outline: 0px;line-height: 26px;scroll-behavior: auto !important;"><<span style="outline: 0px;color: rgb(224, 108, 117);line-height: 26px;scroll-behavior: auto !important;">select</span> <span style="outline: 0px;color: rgb(209, 154, 102);line-height: 26px;scroll-behavior: auto !important;">id</span>=<span style="outline: 0px;color: rgb(152, 195, 121);line-height: 26px;scroll-behavior: auto !important;">"selectAllWebsite"</span> <span style="outline: 0px;color: rgb(209, 154, 102);line-height: 26px;scroll-behavior: auto !important;">resultMap</span>=<span style="outline: 0px;color: rgb(152, 195, 121);line-height: 26px;scroll-behavior: auto !important;">"myResult"</span>></span> <br style="outline: 0px;scroll-behavior: auto !important;"> select id,name,url from website <br style="outline: 0px;scroll-behavior: auto !important;"> where 1=1 <br style="outline: 0px;scroll-behavior: auto !important;"> <span style="outline: 0px;line-height: 26px;scroll-behavior: auto !important;"><<span style="outline: 0px;color: rgb(224, 108, 117);line-height: 26px;scroll-behavior: auto !important;">if</span> <span style="outline: 0px;color: rgb(209, 154, 102);line-height: 26px;scroll-behavior: auto !important;">test</span>=<span style="outline: 0px;color: rgb(152, 195, 121);line-height: 26px;scroll-behavior: auto !important;">"name != null"</span>></span> <br style="outline: 0px;scroll-behavior: auto !important;"> AND name like #{name} <br style="outline: 0px;scroll-behavior: auto !important;"> <span style="outline: 0px;line-height: 26px;scroll-behavior: auto !important;"></<span style="outline: 0px;color: rgb(224, 108, 117);line-height: 26px;scroll-behavior: auto !important;">if</span>></span> <br style="outline: 0px;scroll-behavior: auto !important;"> <span style="outline: 0px;line-height: 26px;scroll-behavior: auto !important;"><<span style="outline: 0px;color: rgb(224, 108, 117);line-height: 26px;scroll-behavior: auto !important;">if</span> <span style="outline: 0px;color: rgb(209, 154, 102);line-height: 26px;scroll-behavior: auto !important;">test</span>=<span style="outline: 0px;color: rgb(152, 195, 121);line-height: 26px;scroll-behavior: auto !important;">"url!= null"</span>></span> <br style="outline: 0px;scroll-behavior: auto !important;"> AND url like #{url} <br style="outline: 0px;scroll-behavior: auto !important;"> <span style="outline: 0px;line-height: 26px;scroll-behavior: auto !important;"></<span style="outline: 0px;color: rgb(224, 108, 117);line-height: 26px;scroll-behavior: auto !important;">if</span>></span><br style="outline: 0px;scroll-behavior: auto !important;"><span style="outline: 0px;line-height: 26px;scroll-behavior: auto !important;"></<span style="outline: 0px;color: rgb(224, 108, 117);line-height: 26px;scroll-behavior: auto !important;">select</span>></span><br style="outline: 0px;scroll-behavior: auto !important;"></code></pre> <h3 data-tool="mdnice编辑器" style="margin: 0.6em auto;padding-left: 10px;outline: 0px;font-weight: bold;font-size: 20px;border-left: 2px solid rgb(0, 150, 136);scroll-behavior: auto !important;">2.where+if标签</h3> <p data-tool="mdnice编辑器" style="padding-top: 8px;padding-bottom: 8px;outline: 0px;line-height: 26px;text-align: justify;scroll-behavior: auto !important;">where、if同时使用可以进行查询、模糊查询</p> <blockquote data-tool="mdnice编辑器" style="margin-top: 20px;margin-bottom: 20px;padding: 10px 10px 10px 1em;outline: 0px;border-left-width: 2px;border-left-color: rgb(136, 136, 136);color: rgb(119, 119, 119);font-size: 0.9em;border-top: none;border-bottom: none;overflow: auto;background: rgba(0, 0, 0, 0.05);border-right: 2px solid rgb(136, 136, 136);scroll-behavior: auto !important;"> <p style="padding-top: 8px;padding-bottom: 8px;outline: 0px;font-size: 16px;text-align: justify;color: black;line-height: 26px;scroll-behavior: auto !important;">注意,<code style="margin-right: 2px;margin-left: 2px;padding: 2px 4px;outline: 0px;font-size: 14px;border-radius: 4px;background-color: rgba(27, 31, 35, 0.05);font-family: "Operator Mono", Consolas, Monaco, Menlo, monospace;word-break: break-all;color: rgb(0, 150, 136);scroll-behavior: auto !important;"><if></code>失败后, <code style="margin-right: 2px;margin-left: 2px;padding: 2px 4px;outline: 0px;font-size: 14px;border-radius: 4px;background-color: rgba(27, 31, 35, 0.05);font-family: "Operator Mono", Consolas, Monaco, Menlo, monospace;word-break: break-all;color: rgb(0, 150, 136);scroll-behavior: auto !important;"><where></code> 关键字只会去掉库表字段赋值前面的and,不会去掉语句后面的and关键字,即注意,<code style="margin-right: 2px;margin-left: 2px;padding: 2px 4px;outline: 0px;font-size: 14px;border-radius: 4px;background-color: rgba(27, 31, 35, 0.05);font-family: "Operator Mono", Consolas, Monaco, Menlo, monospace;word-break: break-all;color: rgb(0, 150, 136);scroll-behavior: auto !important;"><where></code> 只会去掉<code style="margin-right: 2px;margin-left: 2px;padding: 2px 4px;outline: 0px;font-size: 14px;border-radius: 4px;background-color: rgba(27, 31, 35, 0.05);font-family: "Operator Mono", Consolas, Monaco, Menlo, monospace;word-break: break-all;color: rgb(0, 150, 136);scroll-behavior: auto !important;"><if></code> 语句中的最开始的and关键字。所以下面的形式是不可取的</p> </blockquote> <pre data-tool="mdnice编辑器" style="margin-top: 10px;margin-bottom: 10px;outline: 0px;border-radius: 5px;box-shadow: rgba(0, 0, 0, 0.55) 0px 2px 10px;scroll-behavior: auto !important;"><span style="margin-bottom: -7px;outline: 0px;display: block;background: url("https://mmbiz.qpic.cn/mmbiz_svg/GPyw0pGicibl5sEj4cuKR5asffAcRoIbjtLSlth4jWWibIvd7jA9srffR3cLqiaibT3ibSyCxwqXqSyictzYzriciavr5N2ibW6TsnPyza/640?wx_fmt=svg") 10px 10px / 40px no-repeat rgb(40, 44, 52);height: 30px;width: 657px;border-radius: 5px;scroll-behavior: auto !important;"></span><code style="padding: 15px 16px 16px;outline: 0px;overflow-x: auto;color: rgb(171, 178, 191);display: -webkit-box;font-family: "Operator Mono", Consolas, Monaco, Menlo, monospace;font-size: 12px;background: rgb(40, 44, 52);border-radius: 5px;scroll-behavior: auto !important;"><span style="outline: 0px;line-height: 26px;scroll-behavior: auto !important;"><<span style="outline: 0px;color: rgb(224, 108, 117);line-height: 26px;scroll-behavior: auto !important;">select</span> <span style="outline: 0px;color: rgb(209, 154, 102);line-height: 26px;scroll-behavior: auto !important;">id</span>=<span style="outline: 0px;color: rgb(152, 195, 121);line-height: 26px;scroll-behavior: auto !important;">"findQuery"</span> <span style="outline: 0px;color: rgb(209, 154, 102);line-height: 26px;scroll-behavior: auto !important;">resultType</span>=<span style="outline: 0px;color: rgb(152, 195, 121);line-height: 26px;scroll-behavior: auto !important;">"Student"</span>></span><br style="outline: 0px;scroll-behavior: auto !important;"> <span style="outline: 0px;line-height: 26px;scroll-behavior: auto !important;"><<span style="outline: 0px;color: rgb(224, 108, 117);line-height: 26px;scroll-behavior: auto !important;">include</span> <span style="outline: 0px;color: rgb(209, 154, 102);line-height: 26px;scroll-behavior: auto !important;">refid</span>=<span style="outline: 0px;color: rgb(152, 195, 121);line-height: 26px;scroll-behavior: auto !important;">"selectvp"</span>/></span><br style="outline: 0px;scroll-behavior: auto !important;"> <span style="outline: 0px;line-height: 26px;scroll-behavior: auto !important;"><<span style="outline: 0px;color: rgb(224, 108, 117);line-height: 26px;scroll-behavior: auto !important;">where</span>></span><br style="outline: 0px;scroll-behavior: auto !important;"> <span style="outline: 0px;line-height: 26px;scroll-behavior: auto !important;"><<span style="outline: 0px;color: rgb(224, 108, 117);line-height: 26px;scroll-behavior: auto !important;">if</span> <span style="outline: 0px;color: rgb(209, 154, 102);line-height: 26px;scroll-behavior: auto !important;">test</span>=<span style="outline: 0px;color: rgb(152, 195, 121);line-height: 26px;scroll-behavior: auto !important;">"sacc != null"</span>></span><br style="outline: 0px;scroll-behavior: auto !important;"> sacc like concat('%' #{sacc} '%')<br style="outline: 0px;scroll-behavior: auto !important;"> <span style="outline: 0px;line-height: 26px;scroll-behavior: auto !important;"></<span style="outline: 0px;color: rgb(224, 108, 117);line-height: 26px;scroll-behavior: auto !important;">if</span>></span><br style="outline: 0px;scroll-behavior: auto !important;"> <span style="outline: 0px;line-height: 26px;scroll-behavior: auto !important;"><<span style="outline: 0px;color: rgb(224, 108, 117);line-height: 26px;scroll-behavior: auto !important;">if</span> <span style="outline: 0px;color: rgb(209, 154, 102);line-height: 26px;scroll-behavior: auto !important;">test</span>=<span style="outline: 0px;color: rgb(152, 195, 121);line-height: 26px;scroll-behavior: auto !important;">"sname != null"</span>></span><br style="outline: 0px;scroll-behavior: auto !important;"> AND sname like concat('%' #{sname} '%')<br style="outline: 0px;scroll-behavior: auto !important;"> <span style="outline: 0px;line-height: 26px;scroll-behavior: auto !important;"></<span style="outline: 0px;color: rgb(224, 108, 117);line-height: 26px;scroll-behavior: auto !important;">if</span>></span><br style="outline: 0px;scroll-behavior: auto !important;"> <span style="outline: 0px;line-height: 26px;scroll-behavior: auto !important;"><<span style="outline: 0px;color: rgb(224, 108, 117);line-height: 26px;scroll-behavior: auto !important;">if</span> <span style="outline: 0px;color: rgb(209, 154, 102);line-height: 26px;scroll-behavior: auto !important;">test</span>=<span style="outline: 0px;color: rgb(152, 195, 121);line-height: 26px;scroll-behavior: auto !important;">"sex != null"</span>></span><br style="outline: 0px;scroll-behavior: auto !important;"> AND sex=#{sex}<br style="outline: 0px;scroll-behavior: auto !important;"> <span style="outline: 0px;line-height: 26px;scroll-behavior: auto !important;"></<span style="outline: 0px;color: rgb(224, 108, 117);line-height: 26px;scroll-behavior: auto !important;">if</span>></span><br style="outline: 0px;scroll-behavior: auto !important;"> <span style="outline: 0px;line-height: 26px;scroll-behavior: auto !important;"><<span style="outline: 0px;color: rgb(224, 108, 117);line-height: 26px;scroll-behavior: auto !important;">if</span> <span style="outline: 0px;color: rgb(209, 154, 102);line-height: 26px;scroll-behavior: auto !important;">test</span>=<span style="outline: 0px;color: rgb(152, 195, 121);line-height: 26px;scroll-behavior: auto !important;">"phone != null"</span>></span><br style="outline: 0px;scroll-behavior: auto !important;"> AND phone=#{phone}<br style="outline: 0px;scroll-behavior: auto !important;"> <span style="outline: 0px;line-height: 26px;scroll-behavior: auto !important;"></<span style="outline: 0px;color: rgb(224, 108, 117);line-height: 26px;scroll-behavior: auto !important;">if</span>></span><br style="outline: 0px;scroll-behavior: auto !important;"> <span style="outline: 0px;line-height: 26px;scroll-behavior: auto !important;"></<span style="outline: 0px;color: rgb(224, 108, 117);line-height: 26px;scroll-behavior: auto !important;">where</span>></span><br style="outline: 0px;scroll-behavior: auto !important;"><span style="outline: 0px;line-height: 26px;scroll-behavior: auto !important;"></<span style="outline: 0px;color: rgb(224, 108, 117);line-height: 26px;scroll-behavior: auto !important;">select</span>></span><br style="outline: 0px;scroll-behavior: auto !important;"></code></pre> <p data-tool="mdnice编辑器" style="padding-top: 8px;padding-bottom: 8px;outline: 0px;line-height: 26px;text-align: justify;scroll-behavior: auto !important;">这个“where”标签会知道如果它包含的标签中有返回值的话,它就插入一个‘where’。此外,如果标签返回的内容是以AND 或OR 开头的,则它会剔除掉。</p> <h3 data-tool="mdnice编辑器" style="margin: 0.6em auto;padding-left: 10px;outline: 0px;font-weight: bold;font-size: 20px;border-left: 2px solid rgb(0, 150, 136);scroll-behavior: auto !important;">3.set标签</h3> <p data-tool="mdnice编辑器" style="padding-top: 8px;padding-bottom: 8px;outline: 0px;line-height: 26px;text-align: justify;scroll-behavior: auto !important;">set可以用来修改</p> <pre data-tool="mdnice编辑器" style="margin-top: 10px;margin-bottom: 10px;outline: 0px;border-radius: 5px;box-shadow: rgba(0, 0, 0, 0.55) 0px 2px 10px;scroll-behavior: auto !important;"><span style="margin-bottom: -7px;outline: 0px;display: block;background: url("https://mmbiz.qpic.cn/mmbiz_svg/GPyw0pGicibl5sEj4cuKR5asffAcRoIbjtLSlth4jWWibIvd7jA9srffR3cLqiaibT3ibSyCxwqXqSyictzYzriciavr5N2ibW6TsnPyza/640?wx_fmt=svg") 10px 10px / 40px no-repeat rgb(40, 44, 52);height: 30px;width: 657px;border-radius: 5px;scroll-behavior: auto !important;"></span><code style="padding: 15px 16px 16px;outline: 0px;overflow-x: auto;color: rgb(171, 178, 191);display: -webkit-box;font-family: "Operator Mono", Consolas, Monaco, Menlo, monospace;font-size: 12px;background: rgb(40, 44, 52);border-radius: 5px;scroll-behavior: auto !important;"><span style="outline: 0px;line-height: 26px;scroll-behavior: auto !important;"><<span style="outline: 0px;color: rgb(224, 108, 117);line-height: 26px;scroll-behavior: auto !important;">update</span> <span style="outline: 0px;color: rgb(209, 154, 102);line-height: 26px;scroll-behavior: auto !important;">id</span>=<span style="outline: 0px;color: rgb(152, 195, 121);line-height: 26px;scroll-behavior: auto !important;">"upd"</span>></span><br style="outline: 0px;scroll-behavior: auto !important;"> update student<br style="outline: 0px;scroll-behavior: auto !important;"> <span style="outline: 0px;line-height: 26px;scroll-behavior: auto !important;"><<span style="outline: 0px;color: rgb(224, 108, 117);line-height: 26px;scroll-behavior: auto !important;">set</span>></span><br style="outline: 0px;scroll-behavior: auto !important;"> <span style="outline: 0px;line-height: 26px;scroll-behavior: auto !important;"><<span style="outline: 0px;color: rgb(224, 108, 117);line-height: 26px;scroll-behavior: auto !important;">if</span> <span style="outline: 0px;color: rgb(209, 154, 102);line-height: 26px;scroll-behavior: auto !important;">test</span>=<span style="outline: 0px;color: rgb(152, 195, 121);line-height: 26px;scroll-behavior: auto !important;">"sname != null"</span>></span>sname=#{sname},<span style="outline: 0px;line-height: 26px;scroll-behavior: auto !important;"></<span style="outline: 0px;color: rgb(224, 108, 117);line-height: 26px;scroll-behavior: auto !important;">if</span>></span><br style="outline: 0px;scroll-behavior: auto !important;"> <span style="outline: 0px;line-height: 26px;scroll-behavior: auto !important;"><<span style="outline: 0px;color: rgb(224, 108, 117);line-height: 26px;scroll-behavior: auto !important;">if</span> <span style="outline: 0px;color: rgb(209, 154, 102);line-height: 26px;scroll-behavior: auto !important;">test</span>=<span style="outline: 0px;color: rgb(152, 195, 121);line-height: 26px;scroll-behavior: auto !important;">"spwd != null"</span>></span>spwd=#{spwd},<span style="outline: 0px;line-height: 26px;scroll-behavior: auto !important;"></<span style="outline: 0px;color: rgb(224, 108, 117);line-height: 26px;scroll-behavior: auto !important;">if</span>></span><br style="outline: 0px;scroll-behavior: auto !important;"> <span style="outline: 0px;line-height: 26px;scroll-behavior: auto !important;"><<span style="outline: 0px;color: rgb(224, 108, 117);line-height: 26px;scroll-behavior: auto !important;">if</span> <span style="outline: 0px;color: rgb(209, 154, 102);line-height: 26px;scroll-behavior: auto !important;">test</span>=<span style="outline: 0px;color: rgb(152, 195, 121);line-height: 26px;scroll-behavior: auto !important;">"sex != null"</span>></span>sex=#{sex},<span style="outline: 0px;line-height: 26px;scroll-behavior: auto !important;"></<span style="outline: 0px;color: rgb(224, 108, 117);line-height: 26px;scroll-behavior: auto !important;">if</span>></span><br style="outline: 0px;scroll-behavior: auto !important;"> <span style="outline: 0px;line-height: 26px;scroll-behavior: auto !important;"><<span style="outline: 0px;color: rgb(224, 108, 117);line-height: 26px;scroll-behavior: auto !important;">if</span> <span style="outline: 0px;color: rgb(209, 154, 102);line-height: 26px;scroll-behavior: auto !important;">test</span>=<span style="outline: 0px;color: rgb(152, 195, 121);line-height: 26px;scroll-behavior: auto !important;">"phone != null"</span>></span>phone=#{phone}<span style="outline: 0px;line-height: 26px;scroll-behavior: auto !important;"></<span style="outline: 0px;color: rgb(224, 108, 117);line-height: 26px;scroll-behavior: auto !important;">if</span>></span><br style="outline: 0px;scroll-behavior: auto !important;"> sid=#{sid}<br style="outline: 0px;scroll-behavior: auto !important;"> <span style="outline: 0px;line-height: 26px;scroll-behavior: auto !important;"></<span style="outline: 0px;color: rgb(224, 108, 117);line-height: 26px;scroll-behavior: auto !important;">set</span>></span><br style="outline: 0px;scroll-behavior: auto !important;"> where sid=#{sid}<br style="outline: 0px;scroll-behavior: auto !important;"><span style="outline: 0px;line-height: 26px;scroll-behavior: auto !important;"></<span style="outline: 0px;color: rgb(224, 108, 117);line-height: 26px;scroll-behavior: auto !important;">update</span>></span><br style="outline: 0px;scroll-behavior: auto !important;"></code></pre> <h3 data-tool="mdnice编辑器" style="margin: 0.6em auto;padding-left: 10px;outline: 0px;font-weight: bold;font-size: 20px;border-left: 2px solid rgb(0, 150, 136);scroll-behavior: auto !important;">4.choose(when,otherwise) 语句</h3> <p data-tool="mdnice编辑器" style="padding-top: 8px;padding-bottom: 8px;outline: 0px;line-height: 26px;text-align: justify;scroll-behavior: auto !important;">有时候,我们不想用到所有的查询条件,只想选择其中的一个,查询条件有一个满足即可,使用 choose 标签可以解决此类问题,类似于 Java 的 switch 语句</p> <pre data-tool="mdnice编辑器" style="margin-top: 10px;margin-bottom: 10px;outline: 0px;border-radius: 5px;box-shadow: rgba(0, 0, 0, 0.55) 0px 2px 10px;scroll-behavior: auto !important;"><span style="margin-bottom: -7px;outline: 0px;display: block;background: url("https://mmbiz.qpic.cn/mmbiz_svg/GPyw0pGicibl5sEj4cuKR5asffAcRoIbjtLSlth4jWWibIvd7jA9srffR3cLqiaibT3ibSyCxwqXqSyictzYzriciavr5N2ibW6TsnPyza/640?wx_fmt=svg") 10px 10px / 40px no-repeat rgb(40, 44, 52);height: 30px;width: 657px;border-radius: 5px;scroll-behavior: auto !important;"></span><code style="padding: 15px 16px 16px;outline: 0px;overflow-x: auto;color: rgb(171, 178, 191);display: -webkit-box;font-family: "Operator Mono", Consolas, Monaco, Menlo, monospace;font-size: 12px;background: rgb(40, 44, 52);border-radius: 5px;scroll-behavior: auto !important;"><span style="outline: 0px;line-height: 26px;scroll-behavior: auto !important;"><<span style="outline: 0px;color: rgb(224, 108, 117);line-height: 26px;scroll-behavior: auto !important;">select</span> <span style="outline: 0px;color: rgb(209, 154, 102);line-height: 26px;scroll-behavior: auto !important;">id</span>=<span style="outline: 0px;color: rgb(152, 195, 121);line-height: 26px;scroll-behavior: auto !important;">"selectUserByChoose"</span> <span style="outline: 0px;color: rgb(209, 154, 102);line-height: 26px;scroll-behavior: auto !important;">resultType</span>=<span style="outline: 0px;color: rgb(152, 195, 121);line-height: 26px;scroll-behavior: auto !important;">"com.ys.po.User"</span> <span style="outline: 0px;color: rgb(209, 154, 102);line-height: 26px;scroll-behavior: auto !important;">parameterType</span>=<span style="outline: 0px;color: rgb(152, 195, 121);line-height: 26px;scroll-behavior: auto !important;">"com.ys.po.User"</span>></span><br style="outline: 0px;scroll-behavior: auto !important;"> select * from user<br style="outline: 0px;scroll-behavior: auto !important;"> <span style="outline: 0px;line-height: 26px;scroll-behavior: auto !important;"><<span style="outline: 0px;color: rgb(224, 108, 117);line-height: 26px;scroll-behavior: auto !important;">where</span>></span><br style="outline: 0px;scroll-behavior: auto !important;"> <span style="outline: 0px;line-height: 26px;scroll-behavior: auto !important;"><<span style="outline: 0px;color: rgb(224, 108, 117);line-height: 26px;scroll-behavior: auto !important;">choose</span>></span><br style="outline: 0px;scroll-behavior: auto !important;"> <span style="outline: 0px;line-height: 26px;scroll-behavior: auto !important;"><<span style="outline: 0px;color: rgb(224, 108, 117);line-height: 26px;scroll-behavior: auto !important;">when</span> <span style="outline: 0px;color: rgb(209, 154, 102);line-height: 26px;scroll-behavior: auto !important;">test</span>=<span style="outline: 0px;color: rgb(152, 195, 121);line-height: 26px;scroll-behavior: auto !important;">"id !='' and id != null"</span>></span><br style="outline: 0px;scroll-behavior: auto !important;"> id=#{id}<br style="outline: 0px;scroll-behavior: auto !important;"> <span style="outline: 0px;line-height: 26px;scroll-behavior: auto !important;"></<span style="outline: 0px;color: rgb(224, 108, 117);line-height: 26px;scroll-behavior: auto !important;">when</span>></span><br style="outline: 0px;scroll-behavior: auto !important;"> <span style="outline: 0px;line-height: 26px;scroll-behavior: auto !important;"><<span style="outline: 0px;color: rgb(224, 108, 117);line-height: 26px;scroll-behavior: auto !important;">when</span> <span style="outline: 0px;color: rgb(209, 154, 102);line-height: 26px;scroll-behavior: auto !important;">test</span>=<span style="outline: 0px;color: rgb(152, 195, 121);line-height: 26px;scroll-behavior: auto !important;">"username !='' and username != null"</span>></span><br style="outline: 0px;scroll-behavior: auto !important;"> and username=#{username}<br style="outline: 0px;scroll-behavior: auto !important;"> <span style="outline: 0px;line-height: 26px;scroll-behavior: auto !important;"></<span style="outline: 0px;color: rgb(224, 108, 117);line-height: 26px;scroll-behavior: auto !important;">when</span>></span><br style="outline: 0px;scroll-behavior: auto !important;"> <span style="outline: 0px;line-height: 26px;scroll-behavior: auto !important;"><<span style="outline: 0px;color: rgb(224, 108, 117);line-height: 26px;scroll-behavior: auto !important;">otherwise</span>></span><br style="outline: 0px;scroll-behavior: auto !important;"> and sex=#{sex}<br style="outline: 0px;scroll-behavior: auto !important;"> <span style="outline: 0px;line-height: 26px;scroll-behavior: auto !important;"></<span style="outline: 0px;color: rgb(224, 108, 117);line-height: 26px;scroll-behavior: auto !important;">otherwise</span>></span><br style="outline: 0px;scroll-behavior: auto !important;"> <span style="outline: 0px;line-height: 26px;scroll-behavior: auto !important;"></<span style="outline: 0px;color: rgb(224, 108, 117);line-height: 26px;scroll-behavior: auto !important;">choose</span>></span><br style="outline: 0px;scroll-behavior: auto !important;"> <span style="outline: 0px;line-height: 26px;scroll-behavior: auto !important;"></<span style="outline: 0px;color: rgb(224, 108, 117);line-height: 26px;scroll-behavior: auto !important;">where</span>></span><br style="outline: 0px;scroll-behavior: auto !important;"> <span style="outline: 0px;line-height: 26px;scroll-behavior: auto !important;"></<span style="outline: 0px;color: rgb(224, 108, 117);line-height: 26px;scroll-behavior: auto !important;">select</span>></span><br style="outline: 0px;scroll-behavior: auto !important;"></code></pre> <p data-tool="mdnice编辑器" style="padding-top: 8px;padding-bottom: 8px;outline: 0px;line-height: 26px;text-align: justify;scroll-behavior: auto !important;">也就是说,这里我们有三个条件,id、username、sex,只能选择一个作为查询条件</p> <ul data-tool="mdnice编辑器" class="list-paddingleft-1" style="margin-top: 8px;margin-bottom: 8px;padding-left: 25px;outline: 0px;scroll-behavior: auto !important;"> <li style="outline: 0px;scroll-behavior: auto !important;"> <section style="margin-top: 5px;margin-bottom: 5px;outline: 0px;line-height: 26px;color: rgb(1, 1, 1);scroll-behavior: auto !important;"> <p style="padding-top: 8px;padding-bottom: 8px;outline: 0px;line-height: 26px;color: black;text-align: justify;scroll-behavior: auto !important;">如果 id 不为空,那么查询语句为:<code style="margin-right: 2px;margin-left: 2px;padding: 2px 4px;outline: 0px;font-size: 14px;border-radius: 4px;background-color: rgba(27, 31, 35, 0.05);font-family: "Operator Mono", Consolas, Monaco, Menlo, monospace;word-break: break-all;color: rgb(0, 150, 136);scroll-behavior: auto !important;">select * from user where id=?</code></p> </section></li> <li style="outline: 0px;scroll-behavior: auto !important;"> <section style="margin-top: 5px;margin-bottom: 5px;outline: 0px;line-height: 26px;color: rgb(1, 1, 1);scroll-behavior: auto !important;"> <p style="padding-top: 8px;padding-bottom: 8px;outline: 0px;line-height: 26px;color: black;text-align: justify;scroll-behavior: auto !important;">如果 id 为空,那么看username 是否为空,如果不为空,那么语句为<code style="margin-right: 2px;margin-left: 2px;padding: 2px 4px;outline: 0px;font-size: 14px;border-radius: 4px;background-color: rgba(27, 31, 35, 0.05);font-family: "Operator Mono", Consolas, Monaco, Menlo, monospace;word-break: break-all;color: rgb(0, 150, 136);scroll-behavior: auto !important;"> select * from user where username=?;</code></p> </section></li> <li style="outline: 0px;scroll-behavior: auto !important;"> <section style="margin-top: 5px;margin-bottom: 5px;outline: 0px;line-height: 26px;color: rgb(1, 1, 1);scroll-behavior: auto !important;"> <p style="padding-top: 8px;padding-bottom: 8px;outline: 0px;line-height: 26px;color: black;text-align: justify;scroll-behavior: auto !important;">如果 username 为空,那么查询语句为 <code style="margin-right: 2px;margin-left: 2px;padding: 2px 4px;outline: 0px;font-size: 14px;border-radius: 4px;background-color: rgba(27, 31, 35, 0.05);font-family: "Operator Mono", Consolas, Monaco, Menlo, monospace;word-break: break-all;color: rgb(0, 150, 136);scroll-behavior: auto !important;">select * from user where sex=?</code></p> </section></li> </ul> <h3 data-tool="mdnice编辑器" style="margin: 0.6em auto;padding-left: 10px;outline: 0px;font-weight: bold;font-size: 20px;border-left: 2px solid rgb(0, 150, 136);scroll-behavior: auto !important;">5.trim</h3> <p data-tool="mdnice编辑器" style="padding-top: 8px;padding-bottom: 8px;outline: 0px;line-height: 26px;text-align: justify;scroll-behavior: auto !important;">trim标记是一个格式化的标记,可以完成set或者是where标记的功能</p> <p data-tool="mdnice编辑器" style="padding-top: 8px;padding-bottom: 8px;outline: 0px;line-height: 26px;text-align: justify;scroll-behavior: auto !important;"><strong style="outline: 0px;scroll-behavior: auto !important;">①、用 trim 改写上面第二点的 if+where 语句</strong></p> <pre data-tool="mdnice编辑器" style="margin-top: 10px;margin-bottom: 10px;outline: 0px;border-radius: 5px;box-shadow: rgba(0, 0, 0, 0.55) 0px 2px 10px;scroll-behavior: auto !important;"><span style="margin-bottom: -7px;outline: 0px;display: block;background: url("https://mmbiz.qpic.cn/mmbiz_svg/GPyw0pGicibl5sEj4cuKR5asffAcRoIbjtLSlth4jWWibIvd7jA9srffR3cLqiaibT3ibSyCxwqXqSyictzYzriciavr5N2ibW6TsnPyza/640?wx_fmt=svg") 10px 10px / 40px no-repeat rgb(40, 44, 52);height: 30px;width: 657px;border-radius: 5px;scroll-behavior: auto !important;"></span><code style="padding: 15px 16px 16px;outline: 0px;overflow-x: auto;color: rgb(171, 178, 191);display: -webkit-box;font-family: "Operator Mono", Consolas, Monaco, Menlo, monospace;font-size: 12px;background: rgb(40, 44, 52);border-radius: 5px;scroll-behavior: auto !important;"><span style="outline: 0px;line-height: 26px;scroll-behavior: auto !important;"><<span style="outline: 0px;color: rgb(224, 108, 117);line-height: 26px;scroll-behavior: auto !important;">select</span> <span style="outline: 0px;color: rgb(209, 154, 102);line-height: 26px;scroll-behavior: auto !important;">id</span>=<span style="outline: 0px;color: rgb(152, 195, 121);line-height: 26px;scroll-behavior: auto !important;">"selectUserByUsernameAndSex"</span> <span style="outline: 0px;color: rgb(209, 154, 102);line-height: 26px;scroll-behavior: auto !important;">resultType</span>=<span style="outline: 0px;color: rgb(152, 195, 121);line-height: 26px;scroll-behavior: auto !important;">"user"</span> <span style="outline: 0px;color: rgb(209, 154, 102);line-height: 26px;scroll-behavior: auto !important;">parameterType</span>=<span style="outline: 0px;color: rgb(152, 195, 121);line-height: 26px;scroll-behavior: auto !important;">"com.ys.po.User"</span>></span><br style="outline: 0px;scroll-behavior: auto !important;"> select * from user<br style="outline: 0px;scroll-behavior: auto !important;"> <span style="outline: 0px;color: rgb(92, 99, 112);font-style: italic;line-height: 26px;scroll-behavior: auto !important;"><!-- <where><br style="outline: 0px;scroll-behavior: auto !important;"> <if test="username != null"><br style="outline: 0px;scroll-behavior: auto !important;"> username=#{username}<br style="outline: 0px;scroll-behavior: auto !important;"> </if><br style="outline: 0px;scroll-behavior: auto !important;"> <br style="outline: 0px;scroll-behavior: auto !important;"> <if test="username != null"><br style="outline: 0px;scroll-behavior: auto !important;"> and sex=#{sex}<br style="outline: 0px;scroll-behavior: auto !important;"> </if><br style="outline: 0px;scroll-behavior: auto !important;"> </where> --></span><br style="outline: 0px;scroll-behavior: auto !important;"> <span style="outline: 0px;line-height: 26px;scroll-behavior: auto !important;"><<span style="outline: 0px;color: rgb(224, 108, 117);line-height: 26px;scroll-behavior: auto !important;">trim</span> <span style="outline: 0px;color: rgb(209, 154, 102);line-height: 26px;scroll-behavior: auto !important;">prefix</span>=<span style="outline: 0px;color: rgb(152, 195, 121);line-height: 26px;scroll-behavior: auto !important;">"where"</span> <span style="outline: 0px;color: rgb(209, 154, 102);line-height: 26px;scroll-behavior: auto !important;">prefixOverrides</span>=<span style="outline: 0px;color: rgb(152, 195, 121);line-height: 26px;scroll-behavior: auto !important;">"and | or"</span>></span><br style="outline: 0px;scroll-behavior: auto !important;"> <span style="outline: 0px;line-height: 26px;scroll-behavior: auto !important;"><<span style="outline: 0px;color: rgb(224, 108, 117);line-height: 26px;scroll-behavior: auto !important;">if</span> <span style="outline: 0px;color: rgb(209, 154, 102);line-height: 26px;scroll-behavior: auto !important;">test</span>=<span style="outline: 0px;color: rgb(152, 195, 121);line-height: 26px;scroll-behavior: auto !important;">"username != null"</span>></span><br style="outline: 0px;scroll-behavior: auto !important;"> and username=#{username}<br style="outline: 0px;scroll-behavior: auto !important;"> <span style="outline: 0px;line-height: 26px;scroll-behavior: auto !important;"></<span style="outline: 0px;color: rgb(224, 108, 117);line-height: 26px;scroll-behavior: auto !important;">if</span>></span><br style="outline: 0px;scroll-behavior: auto !important;"> <span style="outline: 0px;line-height: 26px;scroll-behavior: auto !important;"><<span style="outline: 0px;color: rgb(224, 108, 117);line-height: 26px;scroll-behavior: auto !important;">if</span> <span style="outline: 0px;color: rgb(209, 154, 102);line-height: 26px;scroll-behavior: auto !important;">test</span>=<span style="outline: 0px;color: rgb(152, 195, 121);line-height: 26px;scroll-behavior: auto !important;">"sex != null"</span>></span><br style="outline: 0px;scroll-behavior: auto !important;"> and sex=#{sex}<br style="outline: 0px;scroll-behavior: auto !important;"> <span style="outline: 0px;line-height: 26px;scroll-behavior: auto !important;"></<span style="outline: 0px;color: rgb(224, 108, 117);line-height: 26px;scroll-behavior: auto !important;">if</span>></span><br style="outline: 0px;scroll-behavior: auto !important;"> <span style="outline: 0px;line-height: 26px;scroll-behavior: auto !important;"></<span style="outline: 0px;color: rgb(224, 108, 117);line-height: 26px;scroll-behavior: auto !important;">trim</span>></span><br style="outline: 0px;scroll-behavior: auto !important;"><span style="outline: 0px;line-height: 26px;scroll-behavior: auto !important;"></<span style="outline: 0px;color: rgb(224, 108, 117);line-height: 26px;scroll-behavior: auto !important;">select</span>></span><br style="outline: 0px;scroll-behavior: auto !important;"></code></pre> <ul data-tool="mdnice编辑器" class="list-paddingleft-1" style="margin-top: 8px;margin-bottom: 8px;padding-left: 25px;outline: 0px;scroll-behavior: auto !important;"> <li style="outline: 0px;scroll-behavior: auto !important;"> <section style="margin-top: 5px;margin-bottom: 5px;outline: 0px;line-height: 26px;color: rgb(1, 1, 1);scroll-behavior: auto !important;"> <p style="padding-top: 8px;padding-bottom: 8px;outline: 0px;line-height: 26px;color: black;text-align: justify;scroll-behavior: auto !important;">prefix:前缀</p> </section></li> <li style="outline: 0px;scroll-behavior: auto !important;"> <section style="margin-top: 5px;margin-bottom: 5px;outline: 0px;line-height: 26px;color: rgb(1, 1, 1);scroll-behavior: auto !important;"> <p style="padding-top: 8px;padding-bottom: 8px;outline: 0px;line-height: 26px;color: black;text-align: justify;scroll-behavior: auto !important;">prefixoverride:去掉第一个and或者是or</p> </section></li> </ul> <p data-tool="mdnice编辑器" style="padding-top: 8px;padding-bottom: 8px;outline: 0px;line-height: 26px;text-align: justify;scroll-behavior: auto !important;"><strong style="outline: 0px;scroll-behavior: auto !important;">②、用 trim 改写上面第三点的 if+set 语句</strong></p> <pre data-tool="mdnice编辑器" style="margin-top: 10px;margin-bottom: 10px;outline: 0px;border-radius: 5px;box-shadow: rgba(0, 0, 0, 0.55) 0px 2px 10px;scroll-behavior: auto !important;"><span style="margin-bottom: -7px;outline: 0px;display: block;background: url("https://mmbiz.qpic.cn/mmbiz_svg/GPyw0pGicibl5sEj4cuKR5asffAcRoIbjtLSlth4jWWibIvd7jA9srffR3cLqiaibT3ibSyCxwqXqSyictzYzriciavr5N2ibW6TsnPyza/640?wx_fmt=svg") 10px 10px / 40px no-repeat rgb(40, 44, 52);height: 30px;width: 657px;border-radius: 5px;scroll-behavior: auto !important;"></span><code style="padding: 15px 16px 16px;outline: 0px;overflow-x: auto;color: rgb(171, 178, 191);display: -webkit-box;font-family: "Operator Mono", Consolas, Monaco, Menlo, monospace;font-size: 12px;background: rgb(40, 44, 52);border-radius: 5px;scroll-behavior: auto !important;"><span style="outline: 0px;color: rgb(92, 99, 112);font-style: italic;line-height: 26px;scroll-behavior: auto !important;"><!-- 根据 id 更新 user 表的数据 --></span><br style="outline: 0px;scroll-behavior: auto !important;"><span style="outline: 0px;line-height: 26px;scroll-behavior: auto !important;"><<span style="outline: 0px;color: rgb(224, 108, 117);line-height: 26px;scroll-behavior: auto !important;">update</span> <span style="outline: 0px;color: rgb(209, 154, 102);line-height: 26px;scroll-behavior: auto !important;">id</span>=<span style="outline: 0px;color: rgb(152, 195, 121);line-height: 26px;scroll-behavior: auto !important;">"updateUserById"</span> <span style="outline: 0px;color: rgb(209, 154, 102);line-height: 26px;scroll-behavior: auto !important;">parameterType</span>=<span style="outline: 0px;color: rgb(152, 195, 121);line-height: 26px;scroll-behavior: auto !important;">"com.ys.po.User"</span>></span><br style="outline: 0px;scroll-behavior: auto !important;"> update user u<br style="outline: 0px;scroll-behavior: auto !important;"> <span style="outline: 0px;color: rgb(92, 99, 112);font-style: italic;line-height: 26px;scroll-behavior: auto !important;"><!-- <set><br style="outline: 0px;scroll-behavior: auto !important;"> <if test="username != null and username != ''"><br style="outline: 0px;scroll-behavior: auto !important;"> u.username = #{username},<br style="outline: 0px;scroll-behavior: auto !important;"> </if><br style="outline: 0px;scroll-behavior: auto !important;"> <if test="sex != null and sex != ''"><br style="outline: 0px;scroll-behavior: auto !important;"> u.sex = #{sex}<br style="outline: 0px;scroll-behavior: auto !important;"> </if><br style="outline: 0px;scroll-behavior: auto !important;"> </set> --></span><br style="outline: 0px;scroll-behavior: auto !important;"> <span style="outline: 0px;line-height: 26px;scroll-behavior: auto !important;"><<span style="outline: 0px;color: rgb(224, 108, 117);line-height: 26px;scroll-behavior: auto !important;">trim</span> <span style="outline: 0px;color: rgb(209, 154, 102);line-height: 26px;scroll-behavior: auto !important;">prefix</span>=<span style="outline: 0px;color: rgb(152, 195, 121);line-height: 26px;scroll-behavior: auto !important;">"set"</span> <span style="outline: 0px;color: rgb(209, 154, 102);line-height: 26px;scroll-behavior: auto !important;">suffixOverrides</span>=<span style="outline: 0px;color: rgb(152, 195, 121);line-height: 26px;scroll-behavior: auto !important;">","</span>></span><br style="outline: 0px;scroll-behavior: auto !important;"> <span style="outline: 0px;line-height: 26px;scroll-behavior: auto !important;"><<span style="outline: 0px;color: rgb(224, 108, 117);line-height: 26px;scroll-behavi
作者:微信小助手
<section data-tool="mdnice编辑器" data-website="https://www.mdnice.com" style="line-height: 1.6;word-break: break-word;text-align: left;padding: 5px;font-size: 16px;color: rgb(53, 53, 53);word-spacing: 0.8px;letter-spacing: 0.8px;border-radius: 16px;font-family: Optima-Regular, Optima, PingFangSC-light, PingFangTC-light, "PingFang SC", Cambria, Cochin, Georgia, Times, "Times New Roman", serif;" data-mpa-powered-by="yiban.io"> <p data-tool="mdnice编辑器" style="padding-top: 8px;padding-bottom: 8px;line-height: 1.75;margin-top: 0.8em;margin-bottom: 0.8em;">在实际应用中,并不是单一的使用本地缓存或者redis,更多是组合使用来满足不同的业务场景,于是如何优雅的组合本地缓存和远程缓存就成了我们要研究的问题,而这一点,阿里开源的<code style="font-size: 14px;padding: 2px 4px;border-radius: 4px;margin-right: 2px;margin-left: 2px;background-color: rgba(27, 31, 35, 0.05);font-family: "Operator Mono", Consolas, Monaco, Menlo, monospace;word-break: break-all;color: rgb(255, 93, 108);">jetcache</code>组件帮我们实现了</p> <p data-tool="mdnice编辑器" style="padding-top: 8px;padding-bottom: 8px;line-height: 1.75;margin-top: 0.8em;margin-bottom: 0.8em;text-align: right;"><span style="color: rgb(248, 57, 41);font-family: Optima-Regular, Optima, PingFangSC-light, PingFangTC-light, "PingFang SC", Cambria, Cochin, Georgia, Times, "Times New Roman", serif;font-size: 16px;font-weight: 700;letter-spacing: 0.8px;text-align: right;word-spacing: 0.8px;text-wrap: wrap;background-color: rgb(255, 255, 255);">Java技术指南:https://java-family.cn</span></p> <h2 data-tool="mdnice编辑器" style="font-weight: bold;color: black;font-size: 22px;margin-top: 20px;margin-right: 10px;"><span style="display: none;"></span><span style="font-size: 18px;color: rgb(234, 84, 41);letter-spacing: 0.5444px;padding-bottom: 10px;border-bottom: 2px solid rgb(234, 84, 41);visibility: visible;">1. jetcache简介</span></h2> <p data-tool="mdnice编辑器" style="padding-top: 8px;padding-bottom: 8px;line-height: 1.75;margin-top: 0.8em;margin-bottom: 0.8em;"><code style="font-size: 14px;padding: 2px 4px;border-radius: 4px;margin-right: 2px;margin-left: 2px;background-color: rgba(27, 31, 35, 0.05);font-family: "Operator Mono", Consolas, Monaco, Menlo, monospace;word-break: break-all;color: rgb(255, 93, 108);">jetcache</code>是阿里开源的基于java开发的缓存框架,支持多种缓存类型:本地缓存、分布式缓存、多级缓存。能够满足不同业务场景的缓存需求。</p> <p data-tool="mdnice编辑器" style="padding-top: 8px;padding-bottom: 8px;line-height: 1.75;margin-top: 0.8em;margin-bottom: 0.8em;">jetcache具有上手简单、性能高效、拓展性强的特点。支持缓存预热 、缓存key前缀等功能。结合spring-cache使用,可以实现十分优雅的缓存类型切换</p> <p data-tool="mdnice编辑器" style="padding-top: 8px;padding-bottom: 8px;line-height: 1.75;margin-top: 0.8em;margin-bottom: 0.8em;">官网地址:https://github.com/alibaba/jetcache</p> <p data-tool="mdnice编辑器" style="padding-top: 8px;padding-bottom: 8px;line-height: 1.75;margin-top: 0.8em;margin-bottom: 0.8em;">官方文档:https://github.com/alibaba/jetcache/tree/master/docs/CN</p> <h2 data-tool="mdnice编辑器" style="font-weight: bold;color: black;font-size: 22px;margin-top: 20px;margin-right: 10px;"><span style="display: none;"></span><span style="font-size: 18px;color: rgb(234, 84, 41);letter-spacing: 0.5444px;padding-bottom: 10px;border-bottom: 2px solid rgb(234, 84, 41);visibility: visible;">2. jetcache使用</span></h2> <p data-tool="mdnice编辑器" style="padding-top: 8px;padding-bottom: 8px;line-height: 1.75;margin-top: 0.8em;margin-bottom: 0.8em;">1、引入依赖,这里我们使用sringboot项目框架,同时使用redis作为远程缓存。于是我们引入<code style="font-size: 14px;padding: 2px 4px;border-radius: 4px;margin-right: 2px;margin-left: 2px;background-color: rgba(27, 31, 35, 0.05);font-family: "Operator Mono", Consolas, Monaco, Menlo, monospace;word-break: break-all;color: rgb(255, 93, 108);">jetcache-starter-redis</code>依赖,这里我的springboot版本为<code style="font-size: 14px;padding: 2px 4px;border-radius: 4px;margin-right: 2px;margin-left: 2px;background-color: rgba(27, 31, 35, 0.05);font-family: "Operator Mono", Consolas, Monaco, Menlo, monospace;word-break: break-all;color: rgb(255, 93, 108);">2.6.13</code></p> <p data-tool="mdnice编辑器" style="padding-top: 8px;padding-bottom: 8px;line-height: 1.75;margin-top: 0.8em;margin-bottom: 0.8em;">如果是非springboot项目可以参考官网说明配置</p> <p><img class="rich_pages wxw-img" data-ratio="0.32133333333333336" src="/upload/10b696674346ebb8b01e06e1580a8273.png" data-type="png" data-w="750"></p> <pre data-tool="mdnice编辑器" style="margin-top: 10px;margin-bottom: 10px;border-radius: 5px;box-shadow: rgba(0, 0, 0, 0.55) 0px 2px 10px;"><span style="display: block;background: none 10px 10px / 40px no-repeat rgb(255, 255, 255);height: 30px;width: 100%;margin-bottom: -7px;border-radius: 5px;"></span><code style="overflow-x: auto;padding: 16px;color: black;display: -webkit-box;font-family: Operator Mono, Consolas, Monaco, Menlo, monospace;font-size: 12px;-webkit-overflow-scrolling: touch;padding-top: 15px;background: #fff;border-radius: 5px;"><span style="color: #aa0d91;line-height: 26px;"><<span style="line-height: 26px;">dependency</span>></span><br> <span style="color: #aa0d91;line-height: 26px;"><<span style="line-height: 26px;">groupId</span>></span>com.alicp.jetcache<span style="color: #aa0d91;line-height: 26px;"></<span style="line-height: 26px;">groupId</span>></span><br> <span style="color: #aa0d91;line-height: 26px;"><<span style="line-height: 26px;">artifactId</span>></span>jetcache-starter-redis<span style="color: #aa0d91;line-height: 26px;"></<span style="line-height: 26px;">artifactId</span>></span><br> <span style="color: #aa0d91;line-height: 26px;"><<span style="line-height: 26px;">version</span>></span>2.7.0<span style="color: #aa0d91;line-height: 26px;"></<span style="line-height: 26px;">version</span>></span><br><span style="color: #aa0d91;line-height: 26px;"></<span style="line-height: 26px;">dependency</span>></span><br><br><span style="color: #007400;line-height: 26px;"><!-- jetcache2.7.x版本需要额外添加该依赖--></span><br><span style="color: #aa0d91;line-height: 26px;"><<span style="line-height: 26px;">dependency</span>></span><br> <span style="color: #aa0d91;line-height: 26px;"><<span style="line-height: 26px;">groupId</span>></span>redis.clients<span style="color: #aa0d91;line-height: 26px;"></<span style="line-height: 26px;">groupId</span>></span><br> <span style="color: #aa0d91;line-height: 26px;"><<span style="line-height: 26px;">artifactId</span>></span>jedis<span style="color: #aa0d91;line-height: 26px;"></<span style="line-height: 26px;">artifactId</span>></span><br> <span style="color: #aa0d91;line-height: 26px;"><<span style="line-height: 26px;">version</span>></span>4.3.1<span style="color: #aa0d91;line-height: 26px;"></<span style="line-height: 26px;">version</span>></span><br><span style="color: #aa0d91;line-height: 26px;"></<span style="line-height: 26px;">dependency</span>></span><br></code></pre> <p data-tool="mdnice编辑器" style="padding-top: 8px;padding-bottom: 8px;line-height: 1.75;margin-top: 0.8em;margin-bottom: 0.8em;">对应的版本说明如下:https://github.com/alibaba/jetcache/blob/master/docs/CN/Compatibility.md</p> <p><img class="rich_pages wxw-img" data-ratio="0.2826666666666667" src="/upload/86e1d48856d9814a6412c56266f843e1.png" data-type="png" data-w="750"></p> <p data-tool="mdnice编辑器" style="padding-top: 8px;padding-bottom: 8px;line-height: 1.75;margin-top: 0.8em;margin-bottom: 0.8em;">2、修改配置文件,配置redis地址和线程数</p> <pre data-tool="mdnice编辑器" style="margin-top: 10px;margin-bottom: 10px;border-radius: 5px;box-shadow: rgba(0, 0, 0, 0.55) 0px 2px 10px;"><span style="display: block;background: none 10px 10px / 40px no-repeat rgb(255, 255, 255);height: 30px;width: 100%;margin-bottom: -7px;border-radius: 5px;"></span><code style="overflow-x: auto;padding: 16px;color: black;display: -webkit-box;font-family: Operator Mono, Consolas, Monaco, Menlo, monospace;font-size: 12px;-webkit-overflow-scrolling: touch;padding-top: 15px;background: #fff;border-radius: 5px;"><span style="color: #836C28;line-height: 26px;">jetcache:</span><br> <span style="color: #007400;line-height: 26px;">## 统计间隔,0表示不统计,开启后定期在控制台输出缓存信息</span><br> <span style="color: #836C28;line-height: 26px;">statIntervalMinutes:</span> <span style="color: #1c00cf;line-height: 26px;">15</span><br> <span style="color: #007400;line-height: 26px;">## 是否把cacheName作为远程缓存key前缀</span><br> <span style="color: #836C28;line-height: 26px;">areaInCacheName:</span> <span style="color: #aa0d91;line-height: 26px;">false</span><br> <span style="color: #007400;line-height: 26px;">## 本地缓存配置</span><br> <span style="color: #836C28;line-height: 26px;">local:</span><br> <span style="color: #836C28;line-height: 26px;">default:</span> <span style="color: #007400;line-height: 26px;">## default表示全部生效,也可以指定某个cacheName</span><br> <span style="color: #007400;line-height: 26px;">## 本地缓存类型,其他可选:caffeine/linkedhashmap</span><br> <span style="color: #836C28;line-height: 26px;">type:</span> <span style="color: #c41a16;line-height: 26px;">linkedhashmap</span><br> <span style="color: #836C28;line-height: 26px;">keyConvertor:</span> <span style="color: #c41a16;line-height: 26px;">fastjson</span><br> <span style="color: #007400;line-height: 26px;">## 远程缓存配置</span><br> <span style="color: #836C28;line-height: 26px;">remote:</span><br> <span style="color: #836C28;line-height: 26px;">default:</span> <span style="color: #007400;line-height: 26px;">## default表示全部生效,也可以指定某个cacheName</span><br> <span style="color: #836C28;line-height: 26px;">type:</span> <span style="color: #c41a16;line-height: 26px;">redis</span><br> <span style="color: #007400;line-height: 26px;">## key转换器方式n</span><br> <span style="color: #836C28;line-height: 26px;">keyConvertor:</span> <span style="color: #c41a16;line-height: 26px;">fastjson</span><br> <span style="color: #836C28;line-height: 26px;">broadcastChannel:</span> <span style="color: #c41a16;line-height: 26px;">projectA</span><br> <span style="color: #007400;line-height: 26px;">## redis序列化方式</span><br> <span style="color: #836C28;line-height: 26px;">valueEncoder:</span> <span style="color: #c41a16;line-height: 26px;">java</span><br> <span style="color: #836C28;line-height: 26px;">valueDecoder:</span> <span style="color: #c41a16;line-height: 26px;">java</span><br> <span style="color: #007400;line-height: 26px;">## redis线程池</span><br> <span style="color: #836C28;line-height: 26px;">poolConfig:</span><br> <span style="color: #836C28;line-height: 26px;">minIdle:</span> <span style="color: #1c00cf;line-height: 26px;">5</span><br> <span style="color: #836C28;line-height: 26px;">maxIdle:</span> <span style="color: #1c00cf;line-height: 26px;">20</span><br> <span style="color: #836C28;line-height: 26px;">maxTotal:</span> <span style="color: #1c00cf;line-height: 26px;">50</span><br> <span style="color: #007400;line-height: 26px;">## redis地址与端口</span><br> <span style="color: #836C28;line-height: 26px;">host:</span> <span style="color: #1c00cf;line-height: 26px;">127.0</span><span style="color: #1c00cf;line-height: 26px;">.0</span><span style="color: #1c00cf;line-height: 26px;">.1</span><br> <span style="color: #836C28;line-height: 26px;">port:</span> <span style="color: #1c00cf;line-height: 26px;">6379</span><br></code></pre> <p data-tool="mdnice编辑器" style="padding-top: 8px;padding-bottom: 8px;line-height: 1.75;margin-top: 0.8em;margin-bottom: 0.8em;">更详细的参数配置可参考官网说明:</p> <p><img class="rich_pages wxw-img" data-ratio="0.8866666666666667" src="/upload/310fb9ca0a59470d5781979e68f056c.png" data-type="png" data-w="750"></p> <p data-tool="mdnice编辑器" style="padding-top: 8px;padding-bottom: 8px;line-height: 1.75;margin-top: 0.8em;margin-bottom: 0.8em;">3、启动类添加注解<code style="font-size: 14px;padding: 2px 4px;border-radius: 4px;margin-right: 2px;margin-left: 2px;background-color: rgba(27, 31, 35, 0.05);font-family: "Operator Mono", Consolas, Monaco, Menlo, monospace;word-break: break-all;color: rgb(255, 93, 108);">@EnableCreateCacheAnnotation</code>,开启缓存,添加<code style="font-size: 14px;padding: 2px 4px;border-radius: 4px;margin-right: 2px;margin-left: 2px;background-color: rgba(27, 31, 35, 0.05);font-family: "Operator Mono", Consolas, Monaco, Menlo, monospace;word-break: break-all;color: rgb(255, 93, 108);">@EnableMethodCache(basePackages = "com.example.jetcachedemo")</code>注解,配置缓存方法扫描路径</p> <p data-tool="mdnice编辑器" style="padding-top: 8px;padding-bottom: 8px;line-height: 1.75;margin-top: 0.8em;margin-bottom: 0.8em;">4、使用缓存可以通过三种方式:</p> <ul data-tool="mdnice编辑器" style="margin-top: 8px;margin-bottom: 8px;padding-left: 25px;color: rgb(248, 57, 41);" class="list-paddingleft-1"> <li> <section style="margin-top: 5px;margin-bottom: 5px;line-height: 26px;color: rgb(53, 53, 53);"> 方式一(推荐)AOP模式:通过 <code style="font-size: 14px;padding: 2px 4px;border-radius: 4px;margin-right: 2px;margin-left: 2px;background-color: rgba(27, 31, 35, 0.05);font-family: "Operator Mono", Consolas, Monaco, Menlo, monospace;word-break: break-all;color: rgb(255, 93, 108);">@Cached</code>, <code style="font-size: 14px;padding: 2px 4px;border-radius: 4px;margin-right: 2px;margin-left: 2px;background-color: rgba(27, 31, 35, 0.05);font-family: "Operator Mono", Consolas, Monaco, Menlo, monospace;word-break: break-all;color: rgb(255, 93, 108);">@CacheUpdate</code>, <code style="font-size: 14px;padding: 2px 4px;border-radius: 4px;margin-right: 2px;margin-left: 2px;background-color: rgba(27, 31, 35, 0.05);font-family: "Operator Mono", Consolas, Monaco, Menlo, monospace;word-break: break-all;color: rgb(255, 93, 108);">@CacheInvalidate</code>注解 </section></li> </ul> <pre data-tool="mdnice编辑器" style="margin-top: 10px;margin-bottom: 10px;border-radius: 5px;box-shadow: rgba(0, 0, 0, 0.55) 0px 2px 10px;"><span style="display: block;background: none 10px 10px / 40px no-repeat rgb(255, 255, 255);height: 30px;width: 100%;margin-bottom: -7px;border-radius: 5px;"></span><code style="overflow-x: auto;padding: 16px;color: black;display: -webkit-box;font-family: Operator Mono, Consolas, Monaco, Menlo, monospace;font-size: 12px;-webkit-overflow-scrolling: touch;padding-top: 15px;background: #fff;border-radius: 5px;"><span style="color: #643820;line-height: 26px;">@RestController</span><br><span style="color: #643820;line-height: 26px;">@RequestMapping</span>(<span style="color: #c41a16;line-height: 26px;">"user"</span>)<br><span style="color: #aa0d91;line-height: 26px;">public</span> <span style="line-height: 26px;"><span style="color: #aa0d91;line-height: 26px;">class</span> <span style="color: #5c2699;line-height: 26px;">UserController</span> </span>{<br><br> <span style="color: #643820;line-height: 26px;">@GetMapping</span>(<span style="color: #c41a16;line-height: 26px;">"getRemote"</span>)<br> <span style="color: #643820;line-height: 26px;">@Cached</span>(name=<span style="color: #c41a16;line-height: 26px;">"userCache:"</span>, key = <span style="color: #c41a16;line-height: 26px;">"#id"</span>, expire = <span style="color: #1c00cf;line-height: 26px;">3600</span>, timeUnit = TimeUnit.SECONDS, cacheType = CacheType.REMOTE)<br> <span style="line-height: 26px;"><span style="color: #aa0d91;line-height: 26px;">public</span> User <span style="color: #1c00cf;line-height: 26px;">getRemote</span><span style="color: #5c2699;line-height: 26px;">(Long id)</span></span>{<br> <span style="color: #007400;line-height: 26px;">// 直接新建用户,模拟从数据库获取数据</span><br> User user = <span style="color: #aa0d91;line-height: 26px;">new</span> User();<br> user.setId(id);<br> user.setName(<span style="color: #c41a16;line-height: 26px;">"用户remote"</span>+id);<br> user.setAge(<span style="color: #1c00cf;line-height: 26px;">23</span>);<br> user.setSex(<span style="color: #1c00cf;line-height: 26px;">1</span>);<br> System.out.println(<span style="color: #c41a16;line-height: 26px;">"第一次获取数据,未走缓存:"</span>+id);<br> <span style="color: #aa0d91;line-height: 26px;">return</span> user;<br> }<br><br> <span style="color: #643820;line-height: 26px;">@GetMapping</span>(<span style="color: #c41a16;line-height: 26px;">"getLocal"</span>)<br> <span style="color: #643820;line-height: 26px;">@Cached</span>(name=<span style="color: #c41a16;line-height: 26px;">"userCache:"</span>, key = <span style="color: #c41a16;line-height: 26px;">"#id"</span>, expire = <span style="color: #1c00cf;line-height: 26px;">3600</span>, timeUnit = TimeUnit.SECONDS, cacheType = CacheType.LOCAL)<br> <span style="line-height: 26px;"><span style="color: #aa0d91;line-height: 26px;">public</span> User <span style="color: #1c00cf;line-height: 26px;">getLocal</span><span style="color: #5c2699;line-height: 26px;">(Long id)</span></span>{<br> <span style="color: #007400;line-height: 26px;">// 直接新建用户,模拟从数据库获取数据</span><br> User user = <span style="color: #aa0d91;line-height: 26px;">new</span> User();<br> user.setId(id);<br> user.setName(<span style="color: #c41a16;line-height: 26px;">"用户local"</span>+id);<br> user.setAge(<span style="color: #1c00cf;line-height: 26px;">23</span>);<br> user.setSex(<span style="color: #1c00cf;line-height: 26px;">1</span>);<br> System.out.println(<span style="color: #c41a16;line-height: 26px;">"第一次获取数据,未走缓存:"</span>+id);<br> <span style="color: #aa0d91;line-height: 26px;">return</span> user;<br> }<br><br> <span style="color: #643820;line-height: 26px;">@GetMapping</span>(<span style="color: #c41a16;line-height: 26px;">"getBoth"</span>)<br> <span style="color: #643820;line-height: 26px;">@Cached</span>(name=<span style="color: #c41a16;line-height: 26px;">"userCache:"</span>, key = <span style="color: #c41a16;line-height: 26px;">"#id"</span>, expire = <span style="color: #1c00cf;line-height: 26px;">3600</span>, timeUnit = TimeUnit.SECONDS, cacheType = CacheType.BOTH)<br> <span style="line-height: 26px;"><span style="color: #aa0d91;line-height: 26px;">public</span> User <span style="color: #1c00cf;line-height: 26px;">getBoth</span><span style="color: #5c2699;line-height: 26px;">(Long id)</span></span>{<br> <span style="color: #007400;line-height: 26px;">// 直接新建用户,模拟从数据库获取数据</span><br> User user = <span style="color: #aa0d91;line-height: 26px;">new</span> User();<br> user.setId(id);<br> user.setName(<span style="color: #c41a16;line-height: 26px;">"用户both"</span>+id);<br> user.setAge(<span style="color: #1c00cf;line-height: 26px;">23</span>);<br> user.setSex(<span style="color: #1c00cf;line-height: 26px;">1</span>);<br> System.out.println(<span style="color: #c41a16;line-height: 26px;">"第一次获取数据,未走缓存:"</span>+id);<br> <span style="color: #aa0d91;line-height: 26px;">return</span> user;<br> }<br><br> <span style="color: #643820;line-height: 26px;">@PostMapping</span>(<span style="color: #c41a16;line-height: 26px;">"updateUser"</span>)<br> <span style="color: #643820;line-height: 26px;">@CacheUpdate</span>(name = <span style="color: #c41a16;line-height: 26px;">"userCache:"</span>, key = <span style="color: #c41a16;line-height: 26px;">"#user.id"</span>, value = <span style="color: #c41a16;line-height: 26px;">"#user"</span>)<br> <span style="line-height: 26px;"><span style="color: #aa0d91;line-height: 26px;">public</span> Boolean <span style="color: #1c00cf;line-height: 26px;">updateUser</span><span style="color: #5c2699;line-height: 26px;">(@RequestBody User user)</span></span>{<br> <span style="color: #007400;line-height: 26px;">// TODO 更新数据库</span><br> <span style="color: #aa0d91;line-height: 26px;">return</span> <span style="color: #aa0d91;line-height: 26px;">true</span>;<br> }<br><br> <span style="color: #643820;line-height: 26px;">@PostMapping</span>(<span style="color: #c41a16;line-height: 26px;">"deleteUser"</span>)<br> <span style="color: #643820;line-height: 26px;">@CacheInvalidate</span>(name = <span style="color: #c41a16;line-height: 26px;">"userCache:"</span>, key = <span style="color: #c41a16;line-height: 26px;">"#id"</span>)<br> <span style="line-height: 26px;"><span style="color: #aa0d91;line-height: 26px;">public</span> Boolean <span style="color: #1c00cf;line-height: 26px;">deleteUser</span><span style="color: #5c2699;line-height: 26px;">(Long id)</span></span>{<br> <span style="color: #007400;line-height: 26px;">// TODO 从数据库删除</span><br> <span style="color: #aa0d91;line-height: 26px;">return</span> <span style="color: #aa0d91;line-height: 26px;">true</span>;<br> }<br><br>}<br></code></pre> <p data-tool="mdnice编辑器" style="padding-top: 8px;padding-bottom: 8px;line-height: 1.75;margin-top: 0.8em;margin-bottom: 0.8em;">这里要注意实体类<code style="font-size: 14px;padding: 2px 4px;border-radius: 4px;margin-right: 2px;margin-left: 2px;background-color: rgba(27, 31, 35, 0.05);font-family: "Operator Mono", Consolas, Monaco, Menlo, monospace;word-break: break-all;color: rgb(255, 93, 108);">User</code>一定要实现序列化,即声明<code style="font-size: 14px;padding: 2px 4px;border-radius: 4px;margin-right: 2px;margin-left: 2px;background-color: rgba(27, 31, 35, 0.05);font-family: "Operator Mono", Consolas, Monaco, Menlo, monospace;word-break: break-all;color: rgb(255, 93, 108);">Serializable</code></p> <pre data-tool="mdnice编辑器" style="margin-top: 10px;margin-bottom: 10px;border-radius: 5px;box-shadow: rgba(0, 0, 0, 0.55) 0px 2px 10px;"><span style="display: block;background: none 10px 10px / 40px no-repeat rgb(255, 255, 255);height: 30px;width: 100%;margin-bottom: -7px;border-radius: 5px;"></span><code style="overflow-x: auto;padding: 16px;color: black;display: -webkit-box;font-family: Operator Mono, Consolas, Monaco, Menlo, monospace;font-size: 12px;-webkit-overflow-scrolling: touch;padding-top: 15px;background: #fff;border-radius: 5px;"><span style="color: #643820;line-height: 26px;">@Data</span><br><span style="color: #aa0d91;line-height: 26px;">public</span> <span style="line-height: 26px;"><span style="color: #aa0d91;line-height: 26px;">class</span> <span style="color: #5c2699;line-height: 26px;">User</span> <span style="color: #aa0d91;line-height: 26px;">implements</span> <span style="color: #5c2699;line-height: 26px;">Serializable</span> </span>{<br><br> <span style="color: #aa0d91;line-height: 26px;">private</span> Long id;<br> <span style="color: #aa0d91;line-height: 26px;">private</span> String name;<br> <span style="color: #aa0d91;line-height: 26px;">private</span> Integer age;<br> <span style="color: #aa0d91;line-height: 26px;">private</span> Integer sex;<br>}<br></code></pre> <ul data-tool="mdnice编辑器" style="margin-top: 8px;margin-bottom: 8px;padding-left: 25px;color: rgb(248, 57, 41);" class="list-paddingleft-1"> <li> <section style="margin-top: 5px;margin-bottom: 5px;line-height: 26px;color: rgb(53, 53, 53);"> 方式二 API模式:通过 <code style="font-size: 14px;padding: 2px 4px;border-radius: 4px;margin-right: 2px;margin-left: 2px;background-color: rgba(27, 31, 35, 0.05);font-family: "Operator Mono", Consolas, Monaco, Menlo, monospace;word-break: break-all;color: rgb(255, 93, 108);">@CreateCache</code>,注:在jetcache 2.7 版本CreateCache注解已废弃,不推荐使用 </section></li> </ul> <pre data-tool="mdnice编辑器" style="margin-top: 10px;margin-bottom: 10px;border-radius: 5px;box-shadow: rgba(0, 0, 0, 0.55) 0px 2px 10px;"><span style="display: block;background: none 10px 10px / 40px no-repeat rgb(255, 255, 255);height: 30px;width: 100%;margin-bottom: -7px;border-radius: 5px;"></span><code style="overflow-x: auto;padding: 16px;color: black;display: -webkit-box;font-family: Operator Mono, Consolas, Monaco, Menlo, monospace;font-size: 12px;-webkit-overflow-scrolling: touch;padding-top: 15px;background: #fff;border-radius: 5px;"><span style="color: #643820;line-height: 26px;">@RestController</span><br><span style="color: #643820;line-height: 26px;">@RequestMapping</span>(<span style="color: #c41a16;line-height: 26px;">"user2"</span>)<br><span style="color: #aa0d91;line-height: 26px;">public</span> <span style="line-height: 26px;"><span style="color: #aa0d91;line-height: 26px;">class</span> <span style="color: #5c2699;line-height: 26px;">User2Controller</span> </span>{<br><br> <span style="color: #643820;line-height: 26px;">@CreateCache</span>(name= <span style="color: #c41a16;line-height: 26px;">"userCache:"</span>, expire = <span style="color: #1c00cf;line-height: 26px;">3600</span>, timeUnit = TimeUnit.SECONDS, cacheType = CacheType.BOTH)<br> <span style="color: #aa0d91;line-height: 26px;">private</span> Cache<Long, Object> userCache;<br><br> <span style="color: #643820;line-height: 26px;">@GetMapping</span>(<span style="color: #c41a16;line-height: 26px;">"get"</span>)<br> <span style="line-height: 26px;"><span style="color: #aa0d91;line-height: 26px;">public</span> User <span style="color: #1c00cf;line-height: 26px;">get</span><span style="color: #5c2699;line-height: 26px;">(Long id)</span></span>{<br> <span style="color: #aa0d91;line-height: 26px;">if</span>(userCache.get(id) != <span style="color: #aa0d91;line-height: 26px;">null</span>){<br> <span style="color: #aa0d91;line-height: 26px;">return</span> (User) userCache.get(id);<br> }<br> User user = <span style="color: #aa0d91;line-height: 26px;">new</span> User();<br> user.setId(id);<br> user.setName(<span style="color: #c41a16;line-height: 26px;">"用户both"</span>+id);<br> user.setAge(<span style="color: #1c00cf;line-height: 26px;">23</span>);<br> user.setSex(<span style="color: #1c00cf;line-height: 26px;">1</span>);<br> userCache.put(id, user);<br> System.out.println(<span style="color: #c41a16;line-height: 26px;">"第一次获取数据,未走缓存:"</span>+id);<br> <span style="color: #aa0d91;line-height: 26px;">return</span> user;<br> }<br><br> <span style="color: #643820;line-height: 26px;">@PostMapping</span>(<span style="color: #c41a16;line-height: 26px;">"updateUser"</span>)<br> <span style="line-height: 26px;"><span style="color: #aa0d91;line-height: 26px;">public</span> Boolean <span style="color: #1c00cf;line-height: 26px;">updateUser</span><span style="color: #5c2699;line-height: 26px;">(@RequestBody User user)</span></span>{<br> <span style="color: #007400;line-height: 26px;">// TODO 更新数据库</span><br> userCache.put(user.getId(), user);<br> <span style="color: #aa0d91;line-height: 26px;">return</span> <span style="color: #aa0d91;line-height: 26px;">true</span>;<br> }<br><br> <span style="color: #643820;line-height: 26px;">@PostMapping</span>(<span style="color: #c41a16;line-height: 26px;">"deleteUser"</span>)<br> <span style="line-height: 26px;"><span style="color: #aa0d91;line-height: 26px;">public</span> Boolean <span style="color: #1c00cf;line-height: 26px;">deleteUser</span><span style="color: #5c2699;line-height: 26px;">(Long id)</span></span>{<br> <span style="color: #007400;line-height: 26px;">// TODO 从数据库删除</span><br> userCache.remove(id);<br> <span style="color: #aa0d91;line-height: 26px;">return</span> <span style="color: #aa0d91;line-height: 26px;">true</span>;<br> }<br><br>}<br></code></pre> <ul data-tool="mdnice编辑器" style="margin-top: 8px;margin-bottom: 8px;padding-left: 25px;color: rgb(248, 57, 41);" class="list-paddingleft-1"> <li> <section style="margin-top: 5px;margin-bottom: 5px;line-height: 26px;color: rgb(53, 53, 53);"> 方式三 高级API模式:通过 <code style="font-size: 14px;padding: 2px 4px;border-radius: 4px;margin-right: 2px;margin-left: 2px;background-color: rgba(27, 31, 35, 0.05);font-family: "Operator Mono", Consolas, Monaco, Menlo, monospace;word-break: break-all;color: rgb(255, 93, 108);">CacheManager</code>,2.7 版本才可使用 </section></li> </ul> <p data-tool="mdnice编辑器" style="padding-top: 8px;padding-bottom: 8px;line-height: 1.75;margin-top: 0.8em;margin-bottom: 0.8em;">(1)添加依赖</p> <pre data-tool="mdnice编辑器" style="margin-top: 10px;margin-bottom: 10px;border-radius: 5px;box-shadow: rgba(0, 0, 0, 0.55) 0px 2px 10px;"><span style="display: block;background: none 10px 10px / 40px no-repeat rgb(255, 255, 255);height: 30px;width: 100%;margin-bottom: -7px;border-radius: 5px;"></span><code style="overflow-x: auto;padding: 16px;color: black;display: -webkit-box;font-family: Operator Mono, Consolas, Monaco, Menlo, monospace;font-size: 12px;-webkit-overflow-scrolling: touch;padding-top: 15px;background: #fff;border-radius: 5px;"><span style="color: #aa0d91;line-height: 26px;"><<span style="line-height: 26px;">dependency</span>></span><br> <span style="color: #aa0d91;line-height: 26px;"><<span style="line-height: 26px;">groupId</span>></span>com.alibaba<span style="color: #aa0d91;line-height: 26px;"></<span style="line-height: 26px;">groupId</span>></span><br> <span style="color: #aa0d91;line-height: 26px;"><<span style="line-height: 26px;">artifactId</span>></span>fastjson<span style="color: #aa0d91;line-height: 26px;"></<span style="line-height: 26px;">artifactId</span>></span><br> <span style="color: #aa0d91;line-height: 26px;"><<span style="line-height: 26px;">version</span>></span>2.0.25<span style="color: #aa0d91;line-height: 26px;"></<span style="line-height: 26px;">version</span>></span><br><span style="color: #aa0d91;line-height: 26px;"></<span style="line-height: 26px;">dependency</span>></span><br></code></pre> <p data-tool="mdnice编辑器" style="padding-top: 8px;padding-bottom: 8px;line-height: 1.75;margin-top: 0.8em;margin-bottom: 0.8em;">(2)书写配置类</p> <pre data-tool="mdnice编辑器" style="margin-top: 10px;margin-bottom: 10px;border-radius: 5px;box-shadow: rgba(0, 0, 0, 0.55) 0px 2px 10px;"><span style="display: block;background: none 10px 10px / 40px no-repeat rgb(255, 255, 255);height: 30px;width: 100%;margin-bottom: -7px;border-radius: 5px;"></span><code style="overflow-x: auto;padding: 16px;color: black;display: -webkit-box;font-family: Operator Mono, Consolas, Monaco, Menlo, monospace;font-size: 12px;-webkit-overflow-scrolling: touch;padding-top: 15px;background: #fff;border-radius: 5px;"><span style="color: #643820;line-height: 26px;">@Configuration</span><br><span style="color: #aa0d91;line-height: 26px;">public</span> <span style="line-height: 26px;"><span style="color: #aa0d91;line-height: 26px;">class</span> <span style="color: #5c2699;line-height: 26px;">JetcacheConfig</span> </span>{<br><br> <span style="color: #643820;line-height: 26px;">@Autowired</span><br> <span style="color: #aa0d91;line-height: 26px;">private</span> CacheManager cacheManager;<br> <span style="color: #aa0d91;line-height: 26px;">private</span> Cache<Long, Object> userCache;<br><br> <span style="color: #643820;line-height: 26px;">@PostConstruct</span><br> <span style="line-height: 26px;"><span style="color: #aa0d91;line-height: 26px;">public</span> <span style="color: #aa0d91;line-height: 26px;">void</span> <span style="color: #1c00cf;line-height: 26px;">init</span><span style="color: #5c2699;line-height: 26px;">()</span></span>{<br> QuickConfig qc = QuickConfig.newBuilder(<span style="color: #c41a16;line-height: 26px;">"userCache:"</span>)<br> .expire(Duration.ofSeconds(<span style="color: #1c00cf;line-height: 26px;">3600</span>))<br> .cacheType(CacheType.BOTH)<br> <span style="color: #007400;line-height: 26px;">// 本地缓存更新后,将在所有的节点中删除缓存,以保持强一致性</span><br> .syncLocal(<span style="color: #aa0d91;line-height: 26px;">false</span>)<br> .build();<br> userCache = cacheManager.getOrCreateCache(qc);<br> }<br><br> <span style="color: #643820;line-height: 26px;">@Bean</span><br> <span style="line-height: 26px;"><span style="color: #aa0d91;line-height: 26px;">public</span> Cache<Long, Object> <span style="color: #1c00cf;line-height: 26px;">getUserCache</span><span style="color: #5c2699;line-height: 26px;">()</span></span>{<br> <span style="color: #aa0d91;line-height: 26px;">return</span> userCache;<br> }<br>}<br></code></pre> <p data-tool="mdnice编辑器" style="padding-top: 8px;padding-bottom: 8px;line-height: 1.75;margin-top: 0.8em;margin-bottom: 0.8em;">(3)调用代码</p> <pre data-tool="mdnice编辑器" style="margin-top: 10px;margin-bottom: 10px;border-radius: 5px;box-shadow: rgba(0, 0, 0, 0.55) 0px 2px 10px;"><span style="display: block;background: none 10px 10px / 40px no-repeat rgb(255, 255, 255);height: 30px;width: 100%;margin-bottom: -7px;border-radius: 5px;"></span><code style="overflow-x: auto;padding: 16px;color: black;display: -webkit-box;font-family: Operator Mono, Consolas, Monaco, Menlo, monospace;font-size: 12px;-webkit-overflow-scrolling: touch;padding-top: 15px;background: #fff;border-radius: 5px;"><span style="color: #643820;line-height: 26px;">@RestController</span><br><span style="color: #643820;line-height: 26px;">@RequestMapping</span>(<span style="color: #c41a16;line-height: 26px;">"user3"</span>)<br><span style="color: #aa0d91;line-height: 26px;">public</span> <span style="line-height: 26px;"><span style="color: #aa0d91;line-height: 26px;">class</span> <span style="color: #5c2699;line-height: 26px;">User3Controller</span> </span>{<br><br> <span style="color: #643820;line-height: 26px;">@Autowired</span><br> JetcacheConfig jetcacheConfig;<br> <span style="color: #643820;line-height: 26px;">@Autowired</span><br> <span style="color: #aa0d91;line-height: 26px;">private</span> Cache<Long, Object> userCache;<br><br> <span style="color: #643820;line-height: 26px;">@GetMapping</span>(<span style="color: #c41a16;line-height: 26px;">"get"</span>)<br> <span style="line-height: 26px;"><span style="color: #aa0d91;line-height: 26px;">public</span> User <span style="color: #1c00cf;line-height: 26px;">get</span><span style="color: #5c2699;line-height: 26px;">(Long id)</span></span>{<br> <span style="color: #aa0d91;line-height: 26px;">if</span>(userCache.get(id) != <span style="color: #aa0d91;line-height: 26px;">null</span>){<br> <span style="color: #aa0d91;line-height: 26px;">return</span> (User) userCache.get(id);<br> }<br> User user = <span style="color: #aa0d91;line-height: 26px;">new</span> User();<br> user.setId(id);<br> user.setName(<span style="color: #c41a16;line-height: 26px;">"用户both"</span>+id);<br> user.setAge(<span style="color: #1c00cf;line-height: 26px;">23</span>);<br> user.setSex(<span style="color: #1c00cf;line-height: 26px;">1</span>);<br> userCache.put(id, user);<br> System.out.println(<span style="color: #c41a16;line-height: 26px;">"第一次获取数据,未走缓存:"</span>+id);<br> <span style="color: #aa0d91;line-height: 26px;">return</span> user;<br> }<br><br> <span style="color: #643820;line-height: 26px;">@PostMapping</span>(<span style="color: #c41a16;line-height: 26px;">"updateUser"</span>)<br> <span style="line-height: 26px;"><span style="color: #aa0d91;line-height: 26px;">public</span> Boolean <span style="color: #1c00cf;line-height: 26px;">updateUser</span><span style="color: #5c2699;line-height: 26px;">(@RequestBody User user)</span></span>{<br> <span style="color: #007400;line-height: 26px;">// TODO 更新数据库</span><br> userCache.put(user.getId(), user);<br> <span style="color: #aa0d91;line-height: 26px;">return</span> <span style="color: #aa0d91;line-height: 26px;">true</span>;<br> }<br><br> <span style="color: #643820;line-height: 26px;">@PostMapping</span>(<span style="color: #c41a16;line-height: 26px;">"deleteUser"</span>)<br> <span style="line-height: 26px;"><span style="color: #aa0d91;line-height: 26px;">public</span> Boolean <span style="color: #1c00cf;line-height: 26px;">deleteUser</span><span style="color: #5c2699;line-height: 26px;">(Long id)</span></span>{<br> <span style="color: #007400;line-height: 26px;">// TODO 从数据库删除</span><br> userCache.remove(id);<br> <span style="color: #aa0d91;line-height: 26px;">return</span> <span style="color: #aa0d91;line-height: 26px;">true</span>;<br> }<br><br>}<br></code></pre> <p data-tool="mdnice编辑器" style="padding-top: 8px;padding-bottom: 8px;line-height: 1.75;margin-top: 0.8em;margin-bottom: 0.8em;">多级缓存的形式,会先从本地缓存获取数据,本地获取不到会从远程缓存获取;<span style="letter-spacing: 0.8px;word-spacing: 0.8px;">关注工众号:码猿技术专栏,回复关键词:1111 获取阿里内部Java性能调优手册!</span></p> <p data-tool="mdnice编辑器" style="padding-top: 8px;padding-bottom: 8px;line-height: 1.75;margin-top: 0.8em;margin-bottom: 0.8em;">5、启动redis,启动演示项目</p> <blockquote data-tool="mdnice编辑器" style="border-top: none;border-right: none;border-bottom: none;font-size: 0.9em;overflow: auto;color: rgb(106, 115, 125);border-left-width: 2px;padding: 8px 10px 8px 15px;background: rgb(255, 249, 249);border-left-color: rgb(239, 112, 96);margin-top: 0px;margin-bottom: 20px;letter-spacing: 0.5444px;"> <p style="padding-top: 8px;padding-bottom: 8px;line-height: 26px;color: rgb(53, 53, 53);font-size: 16px;margin-right: 10px;margin-left: 10px;">注意,如果启动出现<code style="font-size: 14px;padding: 2px 4px;border-radius: 4px;margin-right: 2px;margin-left: 2px;background-color: rgba(27, 31, 35, 0.05);font-family: "Operator Mono", Consolas, Monaco, Menlo, monospace;word-break: break-all;color: rgb(255, 93, 108);">NoClassDefFoundError: redis/clients/util/Pool</code>或<code style="font-size: 14px;padding: 2px 4px;border-radius: 4px;margin-right: 2px;margin-left: 2px;background-color: rgba(27, 31, 35, 0.05);font-family: "Operator Mono", Consolas, Monaco, Menlo, monospace;word-break: break-all;color: rgb(255, 93, 108);">NoClassDefFoundError: redis/clients/jedis/UnifiedJedis</code>报错,说明springboot与jetcache版本不一致,对应关系可参考上述第一步中的说明 同时如果使用的是jetcache2.7.x版本,因为该版本中有jedis包的依赖,需要额外添加如下依赖,或者将jetcache版本将至2.6.5以下</p> </blockquote> <pre data-tool="mdnice编辑器" style="margin-top: 10px;margin-bottom: 10px;border-radius: 5px;box-shadow: rgba(0, 0, 0, 0.55) 0px 2px 10px;"><span style="display: block;background: none 10px 10px / 40px no-repeat rgb(255, 255, 255);height: 30px;width: 100%;margin-bottom: -7px;border-radius: 5px;"></span><code style="overflow-x: auto;padding: 16px;color: black;display: -webkit-box;font-family: Operator Mono, Consolas, Monaco, Menlo, monospace;font-size: 12px;-webkit-overflow-scrolling: touch;padding-top: 15px;background: #fff;border-radius: 5px;"><span style="color: #aa0d91;line-height: 26px;"><<span style="line-height: 26px;">dependency</span>></span><br> <span style="color: #aa0d91;line-height: 26px;"><<span style="line-height: 26px;">groupId</span>></span>redis.clients<span style="color: #aa0d91;line-height: 26px;"></<span style="line-height: 26px;">groupId</span>></span><br> <span style="color: #aa0d91;line-height: 26px;"><<span style="line-height: 26px;">artifactId</span>></span>jedis<span style="color: #aa0d91;line-height: 26px;"></<span style="line-height: 26px;">artifactId</span>></span><br> <span style="color: #aa0d91;line-height: 26px;"><<span style="line-height: 26px;">version</span>></span>4.3.1<span style="color: #aa0d91;line-height: 26px;"></<span style="line-height: 26px;">version</span>></span><br><span style="color: #aa0d91;line-height: 26px;"></<span style="line-height: 26px;">dependency</span>></span><br></code></pre> <h2 data-tool="mdnice编辑器" style="font-weight: bold;color: black;font-size: 22px;margin-top: 20px;margin-right: 10px;"><span style="display: none;"></span><span style="font-size: 18px;color: rgb(234, 84, 41);letter-spacing: 0.5444px;padding-bottom: 10px;border-bottom: 2px solid rgb(234, 84, 41);visibility: visible;">3. 测试</span></h2> <h4 data-tool="mdnice编辑器" style="margin-top: 30px;margin-bottom: 15px;font-weight: bold;color: black;font-size: 18px;"><span style="display: none;"></span>3.1 方式一测试<span style="display: none;"></span></h4> <p data-tool="mdnice编辑器" style="padding-top: 8px;padding-bottom: 8px;line-height: 1.75;margin-top: 0.8em;margin-bottom: 0.8em;">1、访问localhost:8088/user/getRemote?id=1</p> <p><img class="rich_pages wxw-img" data-ratio="0.7426666666666667" src="/upload/216715bc6150079c819d88c0c241005.png" data-type="png" data-w="750"></p> <p data-tool="mdnice编辑器" style="padding-top: 8px;padding-bottom: 8px;line-height: 1.75;margin-top: 0.8em;margin-bottom: 0.8em;">因为配置的是远程缓存,在redis中也能看到对应的key</p> <p><img class="rich_pages wxw-img" data-ratio="0.332" src="/upload/e94aec08b7121ef9338c5a388ed768e9.png" data-type="png" data-w="750"></p> <p data-tool="mdnice编辑器" style="padding-top: 8px;padding-bottom: 8px;line-height: 1.75;margin-top: 0.8em;margin-bottom: 0.8em;">2、访问localhost:8088/user/getLocal?id=1,这个方法是从本地缓存获取的,现在只有远程缓存上有数据,我们调用发现缓存数据还是拿到了,这说明当我们在配置文件中配置了本地缓存和远程缓存后,方式一中本地缓存和远程缓存会自动相互调用</p> <p data-tool="mdnice编辑器" style="padding-top: 8px;padding-bottom: 8px;line-height: 1.75;margin-top: 0.8em;margin-bottom: 0.8em;">比如本地缓存有这个key,redis中没有,通过远程缓存方式访问时,会先从redis获取,如果没有会自动获取本地缓存,但是数据还是存储在本地缓存,并不会同步到redis上,这样更加灵活的实现了多级缓存架构</p> <p><img class="rich_pages wxw-img" data-ratio="0.6706666666666666" src="/upload/a6d2d8bf938e873d147de04c4881ea72.png" data-type="png" data-w="750"></p> <h4 data-tool="mdnice编辑器" style="margin-top: 30px;margin-bottom: 15px;font-weight: bold;color: black;font-size: 18px;"><span style="display: none;"></span>3.2 方式二测试<span style="display: none;"></span></h4> <p data-tool="mdnice编辑器" style="padding-top: 8px;padding-bottom: 8px;line-height: 1.75;margin-top: 0.8em;margin-bottom: 0.8em;">1、再测试下<code style="font-size: 14px;padding: 2px 4px;border-radius: 4px;margin-right: 2px;margin-left: 2px;background-color: rgba(27, 31, 35, 0.05);font-family: "Operator Mono", Consolas, Monaco, Menlo, monospace;word-break: break-all;color: rgb(255, 93, 108);">CreateCache</code>的形式:localhost:8088/user2/get?id=4</p> <p><img class="rich_pages wxw-img" data-ratio="0.5706666666666667" src="/upload/7fdae38cc768fc5cc5b84b95a37f72e8.png" data-type="png" data-w="750"></p> <p data-tool="mdnice编辑器" style="padding-top: 8px;padding-bottom: 8px;line-height: 1.75;margin-top: 0.8em;margin-bottom: 0.8em;">正常获取了,并且redis中也有了对应的值</p> <p data-tool="mdnice编辑器" style="padding-top: 8px;padding-bottom: 8px;line-height: 1.75;margin-top: 0.8em;margin-bottom: 0.8em;"><img class="rich_pages wxw-img" data-ratio="0.37466666666666665" src="/upload/e4d580f5f4d2052eade6b35d56c123ed.png" data-type="png" data-w="750"> 而当我们把缓存方式更改为<code style="font-size: 14px;padding: 2px 4px;border-radius: 4px;margin-right: 2px;margin-left: 2px;background-color: rgba(27, 31, 35, 0.05);font-family: "Operator Mono", Consolas, Monaco, Menlo, monospace;word-break: break-all;color: rgb(255, 93, 108);">LOCAL</code>后,再访问localhost:8088/user2/get?id=5</p> <pre data-tool="mdnice编辑器" style="margin-top: 10px;margin-bottom: 10px;border-radius: 5px;box-shadow: rgba(0, 0, 0, 0.55) 0px 2px 10px;"><span style="display: block;background: none 10px 10px / 40px no-repeat rgb(255, 255, 255);height: 30px;width: 100%;margin-bottom: -7px;border-radius: 5px;"></span><code style="overflow-x: auto;padding: 16px;color: black;display: -webkit-box;font-family: Operator Mono, Consolas, Monaco, Menlo, monospace;font-size: 12px;-webkit-overflow-scrolling: touch;padding-top: 15px;background: #fff;border-radius: 5px;"><span style="color: #643820;line-height: 26px;">@CreateCache</span>(name= <span style="color: #c41a16;line-height: 26px;">"userCache:"</span>, expire = <span style="color: #1c00cf;line-height: 26px;">3600</span>, timeUnit = TimeUnit.SECONDS, cacheType = CacheType.LOCAL)<br></code></pre> <p data-tool="mdnice编辑器" style="padding-top: 8px;padding-bottom: 8px;line-height: 1.75;margin-top: 0.8em;margin-bottom: 0.8em;">会发现redis中就没有对应缓存了,只在本地缓存存在,说明我们指定本地缓存的形式成功了</p> <p><img class="rich_pages wxw-img" data-ratio="0.8825347758887172" src="/upload/fcdfd1a3c08cd06812bb370a3830aead.png" data-type="png" data-w="647"></p> <h2 data-tool="mdnice编辑器" style="font-weight: bold;color: black;font-size: 22px;margin-top: 20px;margin-right: 10px;"><span style="display: none;"></span><span style="font-size: 18px;color: rgb(234, 84, 41);letter-spacing: 0.5444px;padding-bottom: 10px;border-bottom: 2px solid rgb(234, 84, 41);visibility: visible;">3.3 方式三测试</span></h2> <p data-tool="mdnice编辑器" style="padding-top: 8px;padding-bottom: 8px;line-height: 1.75;margin-top: 0.8em;margin-bottom: 0.8em;">1、调用localhost:8088/user3/get?id=11</p> <p><img class="rich_pages wxw-img" data-ratio="0.6706666666666666" src="/upload/61831090bf05a24fd91079a531fb15be.png" data-type="png" data-w="750"></p> <p data-tool="mdnice编辑器" style="padding-top: 8px;padding-bottom: 8px;line-height: 1.75;margin-top: 0.8em;margin-bottom: 0.8em;">redis中缓存设置成功!</p> <p><img class="rich_pages wxw-img" data-ratio="0.32133333333333336" src="/upload/61c4cbda701de608c9a6e72d0aaca17a.png" data-type="png" data-w="750"></p> <h2 data-tool="mdnice编辑器" style="font-weight: bold;color: black;font-size: 22px;margin-top: 20px;margin-right: 10px;"><span style="display: none;"></span><span style="font-size: 18px;color: rgb(234, 84, 41);letter-spacing: 0.5444px;padding-bottom: 10px;border-bottom: 2px solid rgb(234, 84, 41);visibility: visible;">4. 常见报错</span></h2> <p data-tool="mdnice编辑器" style="padding-top: 8px;padding-bottom: 8px;line-height: 1.75;margin-top: 0.8em;margin-bottom: 0.8em;">1、 <code style="font-size: 14px;padding: 2px 4px;border-radius: 4px;margin-right: 2px;margin-left: 2px;background-color: rgba(27, 31, 35, 0.05);font-family: "Operator Mono", Consolas, Monaco, Menlo, monospace;word-break: break-all;color: rgb(255, 93, 108);">ClassNotFoundException: com.alibaba.fastjson.JSON</code> 解决:添加依赖</p> <pre data-tool="mdnice编辑器" style="margin-top: 10px;margin-bottom: 10px;border-radius: 5px;box-shadow: rgba(0, 0, 0, 0.55) 0px 2px 10px;"><span style="display: block;background: none 10px 10px / 40px no-repeat rgb(255, 255, 255);height: 30px;width: 100%;margin-bottom: -7px;border-radius: 5px;"></span><code style="overflow-x: auto;padding: 16px;color: black;display: -webkit-box;font-family: Operator Mono, Consolas, Monaco, Menlo, monospace;font-size: 12px;-webkit-overflow-scrolling: touch;padding-top: 15px;background: #fff;border-radius: 5px;"><span style="color: #aa0d91;line-height: 26px;"><<span style="line-height: 26px;">dependency</span>></span><br> <span style="color: #aa0d91;line-height: 26px;"><<span style="line-height: 26px;">groupId</span>></span>com.alibaba<span style="color: #aa0d91;line-height: 26px;"></<span style="line-height: 26px;">groupId</span>></span><br> <span style="color: #aa0d91;line-height: 26px;"><<span style="line-height: 26px;">artifactId</span>></span>fastjson<span style="color: #aa0d91;line-height: 26px;"></<span style="line-height: 26px;">artifactId</span>></span><br> <span style="color: #aa0d91;line-height: 26px;"><<span style="line-height: 26px;">version</span>></span>2.0.25<span style="color: #aa0d91;line-height: 26px;"></<span style="line-height: 26px;">version</span>></span><br><span style="color: #aa0d91;line-height: 26px;"></<span style="line-height: 26px;">dependency</span>></span><br></code></pre> <p data-tool="mdnice编辑器" style="padding-top: 8px;padding-bottom: 8px;line-height: 1.75;margin-top: 0.8em;margin-bottom: 0.8em;">2、<code style="font-size: 14px;padding: 2px 4px;border-radius: 4px;margin-right: 2px;margin-left: 2px;background-color: rgba(27, 31, 35, 0.05);font-family: "Operator Mono", Consolas, Monaco, Menlo, monospace;word-break: break-all;color: rgb(255, 93, 108);">NoClassDefFoundError: redis/clients/jedis/UnifiedJedis</code> 解决: 添加依赖</p> <pre data-tool="mdnice编辑器" style="margin-top: 10px;margin-bottom: 10px;border-radius: 5px;box-shadow: rgba(0, 0, 0, 0.55) 0px 2px 10px;"><span style="display: block;background: none 10px 10px / 40px no-repeat rgb(255, 255, 255);height: 30px;width: 100%;margin-bottom: -7px;border-radius: 5px;"></span><code style="overflow-x: auto;padding: 16px;color: black;display: -webkit-box;font-family: Operator Mono, Consolas, Monaco, Menlo, monospace;font-size: 12px;-webkit-overflow-scrolling: touch;padding-top: 15px;background: #fff;border-radius: 5px;"><span style="color: #aa0d91;line-height: 26px;"><<span style="line-height: 26px;">dependency</span>></span><br> <span style="color: #aa0d91;line-height: 26px;"><<span style="line-height: 26px;">groupId</span>></span>redis.clients<span style="color: #aa0d91;line-height: 26px;"></<span style="line-height: 26px;">groupId</span>></span><br> <span style="color: #aa0d91;line-height: 26px;"><<span style="line-height: 26px;">artifactId</span>></span>jedis<span style="color: #aa0d91;line-height: 26px;"></<span style="line-height: 26px;">artifactId</span>></span><br> <span style="color: #aa0d91;line-height: 26px;"><<span style="line-height: 26px;">version</span>></span>4.3.1<span style="color: #aa0d91;line-height: 26px;"></<span style="line-height: 26px;">version</span>></span><br><span style="color: #aa0d91;line-height: 26px;"></<span style="line-height: 26px;">dependency</span>></span><br></code></pre> <p data-tool="mdnice编辑器" style="padding-top: 8px;padding-bottom: 8px;line-height: 1.75;margin-top: 0.8em;margin-bottom: 0.8em;">或者将jetcache版本降低至2.6.5以下</p> <p data-tool="mdnice编辑器" style="padding-top: 8px;padding-bottom: 8px;line-height: 1.75;margin-top: 0.8em;margin-bottom: 0.8em;text-align: left;"><span style="font-size: 14px;color: rgb(178, 178, 178);">来源:https://juejin.cn/post/7247151913437937701</span></p> <blockquote data-tool="mdnice编辑器" style="border-top: none;border-right: none;border-bottom: none;font-size: 0.9em;overflow: auto;color: rgb(106, 115, 125);border-left-width: 2px;padding: 8px 10px 8px 15px;background: rgb(255, 249, 249);border-left-color: rgb(239, 112, 96);margin-top: 0px;margin-bottom: 20px;letter-spacing: 0.5444px;"></blockquote> </section>
作者:じ☆ve不哭
## 1. 拉取项目:将项目所有分支拉下来 (单分支 直接clone即可) ``` git clone xxx # 默认拉取master分支 cd xx #进入拉取的文件夹 git branch -r | grep -v '\->' | while read remote; do git branch --track "${remote#origin/}" "$remote"; done git fetch --all #如果无人提交代码,可以不拉 git pull --all #如果无人提交代码,可以不拉 ``` **查看删除前大小** ``` $ git count-objects -vH warning: garbage found: .git/objects/80/tmp_obj_RmCfwe count: 124 size: 30.14 KiB in-pack: 5507 packs: 1 size-pack: 20.42 MiB prune-packable: 0 garbage: 1 size-garbage: 172 bytes ``` ## 2. 查找大文件 ``` git rev-list --objects --all | grep "$(git verify-pack -v .git/objects/pack/*.idx | sort -k 3 -n | tail -10 | awk '{print$1}')" ``` ``` $ git rev-list --objects --all | grep "$(git verify-pack -v .git/objects/pack/*.idx | sort -k 3 -n | tail -10 | awk '{print$1}')" 21f94c21a02afa2e28dbbcb13640bf77aba59c7f videochat4user/src/main/assets/apu.mp4 cead7aeea3e606ba158e96d02b2ff43eeffda3ca videochat4user/proguardMapping.txt 2b34b6945d81fdc86f72af9e8e58c7b3645b50b2 videochat4user/proguardMapping.txt 9533dfddf0c3dece13e81831c62161bcf9d9f493 videochat4user/proguardMapping.txt 53ee920749181d51f6969b160cc0e38f2ef0d147 videochat4user/proguardMapping.txt 01553b94780b057bbd54d6dfb8025f1f21083541 videochat4user/proguardMapping.txt b72ff924ecef61b2ba3990b6d60a12f8a519bcc0 videochat4user/proguardMapping.txt 50699882ff36cca85520c372da930c747425b0f6 videochat4user/proguardMapping.txt c6b4d9d3f07a3da43444dc9f16c2fb694f96a074 videochat4user/proguardMapping.txt 9130775fe603c6834f474ab105307fc1bee94be3 videochat4user/src/main/jniLibs/armeabi-v7a/libopencv_java4.so ``` ## 3.删除大文件 可以用通配符, 这里用\*/proguardMapping.txt > :warning:一次只能删除一个文件或者文件夹 ``` git filter-branch --force --index-filter "git rm -r --cached --ignore-unmatch */proguardMapping.txt" --prune-empty --tag-name-filter cat -- --all ``` ``` WARNING: git-filter-branch has a glut of gotchas generating mangled history rewrites. Hit Ctrl-C before proceeding to abort, then use an alternative filtering tool such as 'git filter-repo' (https://github.com/newren/git-filter-repo/) instead. See the filter-branch manual page for more details; to squelch this warning, set FILTER_BRANCH_SQUELCH_WARNING=1. Proceeding with filter-branch... Rewrite 1ab5a65a4c80d6c196f486925584fd501c382fac (428/510) (206 seconds passed, remaining 39 predicted) rm 'camerafix/.gitignore' rm 'camerafix/README.md' rm 'camerafix/build.gradle' rm 'camerafix/proguard-rules.pro' ``` 删除每个commit中包含的文件, 出现rm表示该commit包含文件同时删除成功 **同时回收本地空间** ``` git for-each-ref --format='delete %(refname)' refs/original | git update-ref --stdin && git reflog expire --expire=now --all|git gc --prune=now ``` **查看删除后大小** ``` $ git count-objects -vH count: 0 size: 0 bytes in-pack: 4510 packs: 1 size-pack: 12.07 MiB prune-packable: 0 garbage: 0 size-garbage: 0 bytes ``` ### 4.强制推送到服务器 (分支需要取消保护) ``` git push origin --force "refs/heads/*" --tags ``` ### 5.已有本地代码强制同步 ``` git fetch --all && git reset --hard origin/master && git pull ``` ### 6.清除服务缓存 ``` # 进入git服务器-->这个操作需要root权限,不然连文件夹都进不去 cd /var/opt/gitlab/git-data/repositories #根据项目,进入对应的git项目文件夹 # 进入 项目.git文件,就可以看到和本地的.git目录中一样的目目录了 #查询git项目大小 git count-objects -vH # 此时还是旧的大小 git gc --prune=now # 清理无效文件 git count-objects -vH # 此时就和本地一样,从库减小了 ``` > :warning:清理完之后,每个人一定要删掉之前拉取的项目,重新从git上拉项目。不要使用之前的项目了!!!之前的项目中的.git文件会将已将删除的文件重新加进来,甚至变的更大 [参考](https://www.freesion.com/article/23591313490/)
作者:じ☆ve不哭
### git clone --depth=1后 怎么获取完整提交的记录? 修改`.git`文件夹内`config`文件的`[remote "origin"]`节的内容 ``` [remote "origin"] url = https://xxx.com/abc/xxx.git -- fetch = +refs/heads/master:refs/remotes/origin/master ++ fetch = +refs/heads/*:refs/remotes/origin/* ``` 或者使用命令 ``` git config remote.origin.fetch "+refs/heads/*:refs/remotes/origin/*" ``` 最后获取 ``` git fetch -pv ``` ### Git-永久删除某个重要文件或文件夹 (包括历史记录) 强制 提交错误的文件后,又将文件删除后重新提交,虽然文件不在了,**但是历史记录还保存着文件for revert** , 如果文件过大可能会导致git clone失败 ``` git rev-list --objects --all | grep "$(git verify-pack -v .git/objects/pack/*.idx | sort -k 3 -n | tail -50 | awk '{print$1}')" ``` #### 从你的资料库中清除文件 删除多余的文件或者文件夹 file2remove (都不能以 '/' 开头, 文件夹需要加 -r参数 ,可以使用 * 通配符) ``` git filter-branch --force --index-filter 'git rm --cached --ignore-unmatch file2giremove' --prune-empty --tag-name-filter cat -- --all git filter-branch --force --index-filter 'git rm -r --cached --ignore-unmatch */proguardMapping.txt' --prune-empty --tag-name-filter cat -- --all git filter-branch --force --index-filter 'git rm -r --cached --ignore-unmatch doc' --prune-empty --tag-name-filter cat -- --all ```  #### 删除后推送到远程服务器,每个分支都需要提交 [gitlab](https://docs.gitlab.com/ee/user/project/repository/reducing_the_repo_size_using_git.html#reducing-the-repository-size-using-git) ``` git push origin --force 'refs/heads/*' ```  #### **清理和回收空间** ``` git for-each-ref --format='delete %(refname)' refs/original | git update-ref --stdin && git reflog expire --expire=now --all|git gc --prune=now ```  执行后,发现.git目录文件大小显著减少 130M -->16.8M (webKernal文件100M+) ### git clone、git pull和git fetch的用法及区别 - git clone 将其他仓库克隆到本地,**`包括被clone仓库的版本变化`** clone操作是一个从无到有的**克隆**操作,不需要`git init`初始化。 - git fetch 理解 fetch 的关键, 是理解 FETCH_HEAD,FETCH_HEAD指的是: 某个branch在服务器上的最新状态’。这个列表保存在 .git/FETCH_HEAD 文件中, 其中每一行对应于远程服务器的一个分支。 - git pull 拉取远程分支更新到本地仓库的操作.git pull是相当于从远程仓库获取最新版本,然后再与本地分支merge(合并) 即:`git pull = git fetch + git merge` `git clone下来的项目可以直接推送到远程,git pull 和 git fetch 需要先执行 git remote add 添加远程仓库后才能 push。` ### fatal: refusing to merge unrelated histories 因为远程仓库已经存在代码记录了,并且那部分代码没有和本地仓库进行关联,我们可以使用如下操作允许pull未关联的远程仓库旧代码 ``` git pull origin master --allow-unrelated-histories ``` 注意可能需要解决下冲突 ### 多个仓库配置 ``` git remote add origin 第一个仓库地址 git remote set-url --add origin 第二个仓库地址 git push -u origin master //推送命令 ``` ### 统计 ``` # 统计当前作者今天(从凌晨 1 点开始)提交次数 $ git log --author="$(git config --get user.name)" --no-merges --since=1am --stat # 按提交作者统计,按提交次数排序 $ git shortlog -sn $ git shortlog --numbered --summary # 只看某作者提交的 commit 数 $ git log --author="faker" --oneline --shortstat # 按提交作者统计,提交数量排名前 5(看全部,去掉 head 管道即可) $ git log --pretty='% aN' | sort | uniq -c | sort -k1 -n -r | head -n 5 # 按提交者邮箱统计,提交数量排名前 5 $ git log --pretty=format:% ae | gawk -- '{ ++c [$0]; } END { for (cc in c) printf "%5d % s\n",c [cc],cc; }' | sort -u -n -r | head -n 5 # 统计贡献者数量 $ git log --pretty='% aN' | sort -u | wc -l # 统计提交数量 $ git log --oneline | wc -l ``` ### [OpenSSL SSL_read: Connection was reset, errno 10054](https://www.cnblogs.com/jfen625/p/12995408.html) 这是服务器的SSL证书没有经过第三方机构的签署,所以报错。 解决办法: ``` git config --global http.sslVerify "false" ``` ### [解决 Failed to connect to github.com port 443:connection timed out](https://blog.csdn.net/Hodors/article/details/103226958) gfw拦截了,需要走代理或者配置下[hosts](https://raw.fastgit.org/Leon406/pyutil/master/github/hosts) ``` git config --global http.proxy http://127.0.0.1:1080 git config --global https.proxy http://127.0.0.1:1080 ``` 取消代理 ``` git config --global --unset http.proxy git config --global --unset https.proxy ``` ### error: invalid path ``` git config core.protectNTFS false ``` ### 强制本地代码 ``` git fetch --all && git reset --hard origin/master && git pull ``` ### SSH登录 - git bash 输入 ``` ssh-keygen -t rsa -C "自己的邮箱" ``` 三次回车,结果如下  复制公钥 /c/Users/Leon/.ssh/id_rsa.pub内容 到github/gitlab ssh配置页面,即可 ## no matching host key type found - 找到git安装目录 - 进入 etc目录,找到ssh目录ssh_config文件 - 新增 ``` Host *.对应的域名.com HostkeyAlgorithms +ssh-rsa PubkeyAcceptedAlgorithms +ssh-rsa ``` ## File name too long ``` git config --system core.longpaths true ``` ### 参考 [git clone --depth=1 后获取其他分支](https://www.cnblogs.com/zhangyiqiu/p/12295572.html) [Git-永久删除某个重要文件或文件夹 (包括历史记录) 强制](https://blog.51cto.com/phpervip/2497305?source=dra) [git clone、git pull和git fetch的用法及区别](https://www.cnblogs.com/lalalagq/p/9968949.html) [Git同时推送多个远程仓库](https://www.jianshu.com/p/a74c5ab4fdfc) [Git统计操作](https://yelog.org/2017/05/16/Git%E7%BB%9F%E8%AE%A1%E6%93%8D%E4%BD%9C/) [git error:invalid path问题解决(win下)](https://www.cnblogs.com/GyForever1004/p/13702643.html) [no matching host key type found](https://www.jianshu.com/p/fdd8c6a1c2a5)
作者:じ☆ve不哭
## 准备 [Typora官网 (Markdown 编辑查看软件)](https://typora.io/) 下载安装 [PicGo (图床工具) github](https://github.com/Molunerfinn/PicGo/releases) 下载安装 [nodejs (PicGo 插件下载需要)](https://nodejs.org/en/) 下载安装 以上windows系统均可以通过 [scoop 命令安装](https://gitee.com/LeonShih/notes/blob/master/other/Windows%20Scoop%E5%AE%89%E8%A3%85.md) ## 配置 ### nodejs安装后配置 设置npm镜像,国内加速 ``` npm config set registry https://registry.npm.taobao.org ``` ### PicGo配置 插件设置 下载 搜索 github-plus (支持gitee 和github) 版本是1.2.0 - repo github仓库名称 - branch 项目分支 默认 master即可 - token github access token - path github 仓库的目录 不填为主目录, - customUrl 主要用于github cdn加速 如https://github.com/Leon406/jsdelivr customUrl地址 https://cdn.jsdelivr.net/gh/Leon406/jsdelivr cdn.jsdelivr.net/gh替换github.com即可 - origin 选择github ,可选gitee 下载完配置如下  #### 新建github仓库 [github加速](https://gitee.com/LeonShih/notes/blob/master/other/github%E5%8A%A0%E9%80%9F.md) 如下图的 repo 为 Leon406/Img  #### 获取token 设置--开发者设置 -- 个人 access token  配置好后,点击上传区, 拖动文件到PicGo进行上传 ### Typora 配置 <kbd>Ctrl</kbd>+<kbd>,</kbd> 进入偏好设置  上传配置 - 插入图片时 上传图片 - 上传服务设置PicGo app - 再配置下picgo路径 - 最后验证图片上传选项 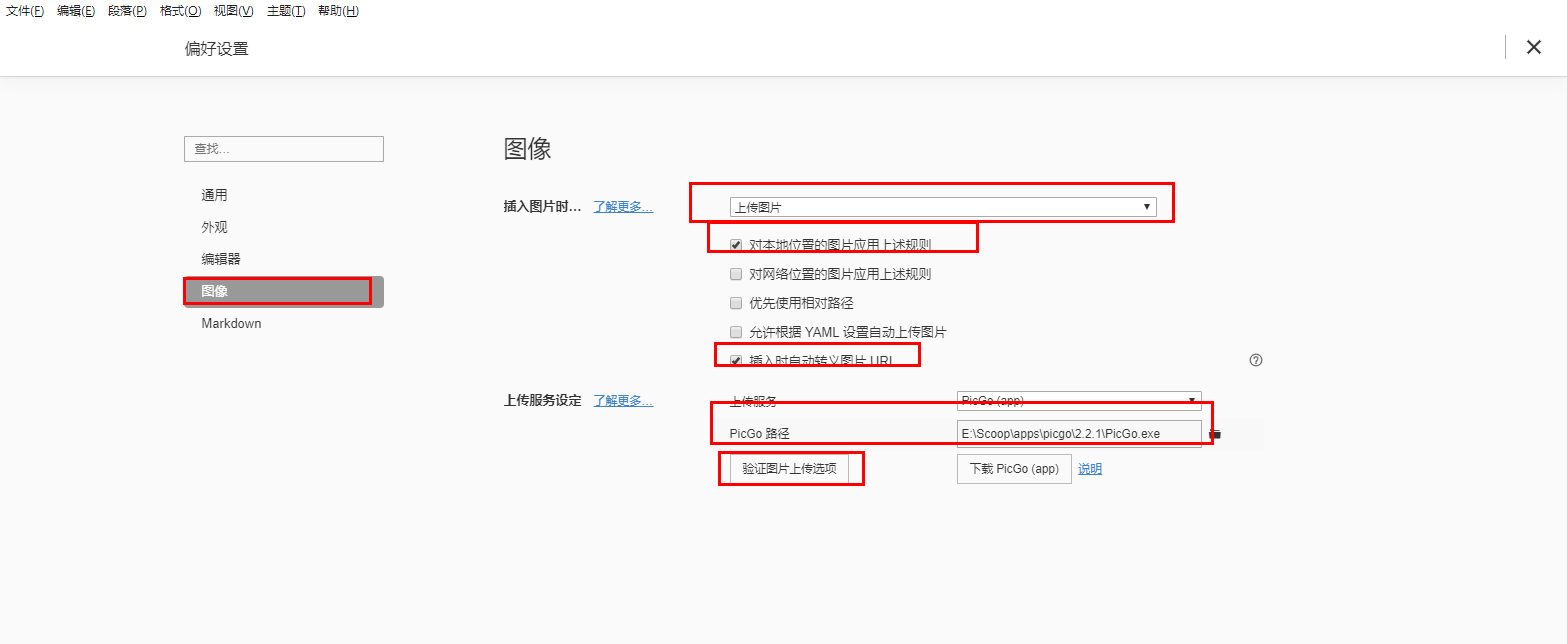 ## 使用 直接拖动图片到typora,或者截图后直接复制到typora会自动进行图片上传 自动上传脚本windows git项目根目录新建 upload.bat,写入以下内容 ``` @echo off tree /f .|findstr /V "卷" >doc_tree.md git add . git commit -m "commit from auto upload shell" git push pause ``` git项目根目录新建 pull.bat,写入以下内容 ``` git pull ``` 以后写好笔记后,双击 upload.bat即可 ## 参考 [GithubPlus+PicGo + Typora 一键式图床](http://www.mamicode.com/info-detail-2995230.html) [个人笔记项目](https://gitee.com/LeonShih/notes.git)
作者:じ☆ve不哭
### 平时用到的库 | 仓库名 | 地址 | 备注 | | -------------- | ------------------------------------------------------------ | -------------------------------------------------------- | | mavenCentral | https://repo1.maven.org/maven2/<br/>https://repo.maven.apache.org/maven2/ | 全区最大的maven库,第二个为apache的镜像库, gradle默认地址 | | jcenter | https://jcenter.bintray.com/anverus/tools/ | bintray私有库 兼容mavenCentral中心仓库,且性能更优 | | google | https://dl.google.com/dl/android/maven2/ | google私有库 | | jitpack | https://www.jitpack.io | 自动构建库github,及其他git 项目,自带cdn加速 | | mavenLocal | ~/.m2/repository | 本地仓库 | | Spring | https://repo.spring.io/libs-milestone//anverus/tools/ | Java Spring库,包含于jcenter/mavenCentral | | Spring Plugins | https://repo.spring.io/plugins-release/ | Java Spring 插件库,包含于jcenter/mavenCentral | ## 国内阿里云镜像库 | 仓库名称 | 代理源地址 | 使用地址 | | :------------ | :------------------------------------- | :------------------------------------------------ | | central | https://repo1.maven.org/maven2/ | https://maven.aliyun.com/repository/central | | jcenter | http://jcenter.bintray.com/ | https://maven.aliyun.com/repository/jcenter | | public | central/jcenter 聚合仓 | https://maven.aliyun.com/repository/public | | google | https://maven.google.com/ | https://maven.aliyun.com/repository/google | | gradle-plugin | https://plugins.gradle.org/m2/ | https://maven.aliyun.com/repository/gradle-plugin | | spring | http://repo.spring.io/libs-milestone/ | https://maven.aliyun.com/repository/spring | | spring-plugin | http://repo.spring.io/plugins-release/ | https://maven.aliyun.com/repository/spring-plugin | ### 加速配置 将central/jcenter/google 换成阿里云地址即可 #### maven配置 打开maven的配置文件(windows机器一般在maven安装目录的conf/settings.xml),在`<mirrors></mirrors>`标签添加mirror子节点: ``` <mirror> <id>aliyunmaven</id> <mirrorOf>*</mirrorOf> <name>阿里云公共仓库</name> <url>https://maven.aliyun.com/repository/public</url> </mirror> ``` 如果想使用其它代理仓库,可在`<repositories></repositories>`节点中加入对应的仓库使用地址。以使用google代理仓为例: ``` <repository> <id>spring</id> <url>https://maven.aliyun.com/repository/google</url> <releases> <enabled>true</enabled> </releases> <snapshots> <enabled>true</enabled> </snapshots> </repository> ``` #### gradle配置 在build.gradle文件中加入以下代码: ``` allprojects { repositories { maven { url 'https://maven.aliyun.com/repository/public/' } maven { url 'https://maven.aliyun.com/repository/google/' } mavenLocal() } } ``` ### 参考 [maven repo排名](https://mvnrepository.com/repos) [阿里云效文档](https://help.aliyun.com/document_detail/102512.html?spm=a2c40.aliyun_maven_repo.0.0.36183054XM40LO#h2-u914Du7F6Eu6307u53572) [阿里云repositories 一览](https://maven.aliyun.com/mvn/view)
作者:じ☆ve不哭
# Sonatype Nexus 3.x Maven 私服搭建 ## 0.准备 [Nexus]: https://www.sonatype.com/download-oss-sonatype ### 1.解压nexus文件 将下载的nexus-3.14.0-04-win64.zip解压到自定义目录即可。 ### 2.配置nexus的端口和上下文路径 打开zip解压文件下的 ../nexus-3.14.0-04-win64/nexus-3.14.0-04/etc/nexus-default.properties。 如下属性可以自定义修改。 - application-host : Nexus服务监听的主机 - application-port: Nexus服务监听的端口, - nexus-context-path : Nexus服务的上下文路径 通常可以不做任何修改,但个人习惯于修改 application-host 为127.0.0.1。 ### 3.nexus 启动 在.../nexus-3.14.0-04-win64/nexus-3.14.0-04/bin 目录下,以管理员身份运行cmd 1. nexus.exe /run 命令可以启动nexus服务(参考[官方文档](https://help.sonatype.com/repomanager3/installation/installation-methods)) 2. nexus.exe /install 命令来启动(推荐使用这种方式,参考[官方文档](https://help.sonatype.com/repomanager3/installation/run-as-a-service)),。 ### 4.登录网页 启动成功后,输入配置的地址,如127.0.0.1:8081,登录用户名admin,密码 admin123 #### 参考 https://blog.csdn.net/u010015108/article/details/54945125 https://www.cnblogs.com/hujunzheng/p/9807646.html
作者:じ☆ve不哭
# 1.OpenGL简介 ## 1.1简介 - 应用程序编程接口 - 对图形硬件设备特性进行访问的软件库 - 与硬件无关,可以通过软件的方式实现OpenGL接口 - 不包含任何执行窗口任务,或者处理用户输入的函数 - 不提供三维物体,几何图元来创建三维空间物体 - API是过程性 - 可以软件实现,也可以硬件实现 ## 1.2 应用 - 视频 图形 图片处理 - 2D/3D游戏引擎开发 - 科学可视化,医学软件的开发 - CAD(计算机辅助技术) - 虚拟实境(AR VR) - AI人工智能 ## 1.3 OpenGL 与OpenGL ES OpenGL ES是一个在移动平台上能够支持 OpenGL 最基本功能的精简规范。 ## 1.4 OpenGL ES Android 支持版本 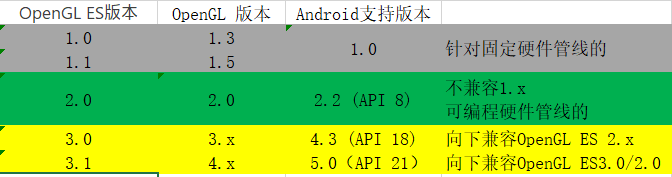 ## 1.5 OpenGL绘制流程 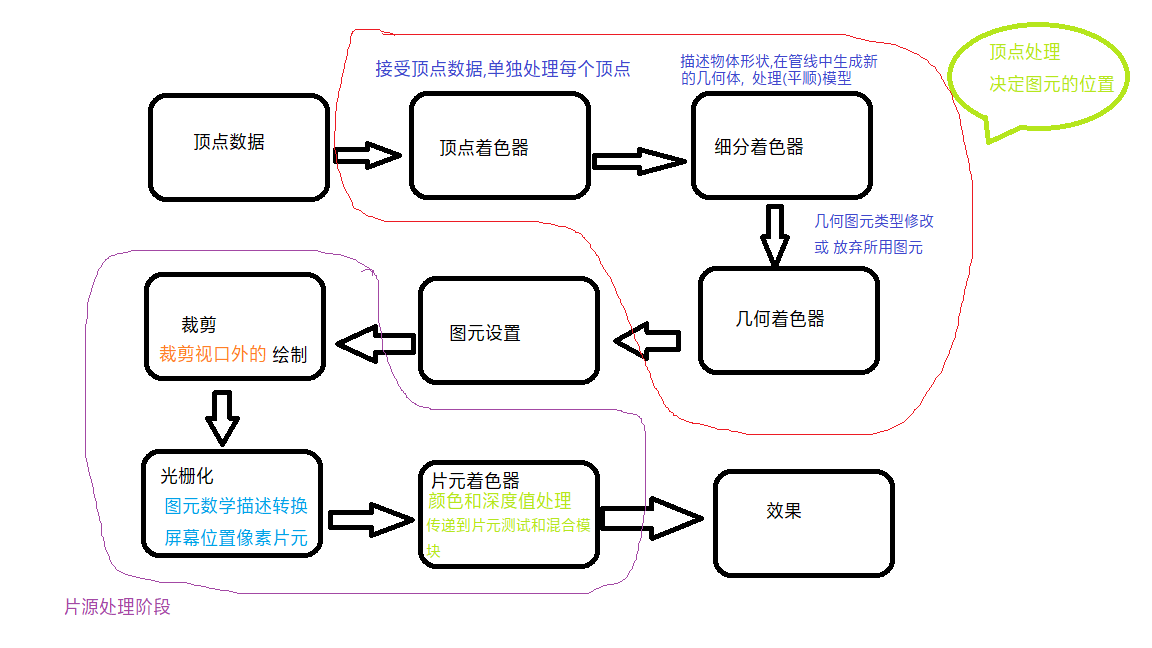 1. 从OpenGL的几何图元中设置数据,用于构建形状 2. 用不同的着色器对输入的图元数据执行计算操作,判断位置,颜色以及其他渲染属性 3. 输入图元的数学描述 转换为与屏幕位置对应的像素片元,也称**光栅化** 4. 针对光栅化过程产生的每个片元,执行 片元着色器,从而决定这个片元的最终颜色和位置 5. 如果有必要 可以对片元执行一些额外操作(判断片元对应的对象是否可见,或者将片元的颜色与当前屏幕位置的颜色进行融合。) # 2.GLSL ## 2.1 着色器介绍 - 顶点着色器------- 将虚拟空间三维坐标 映射到 屏幕显示二维坐标 +Z-buffer深度信息 模型如下: 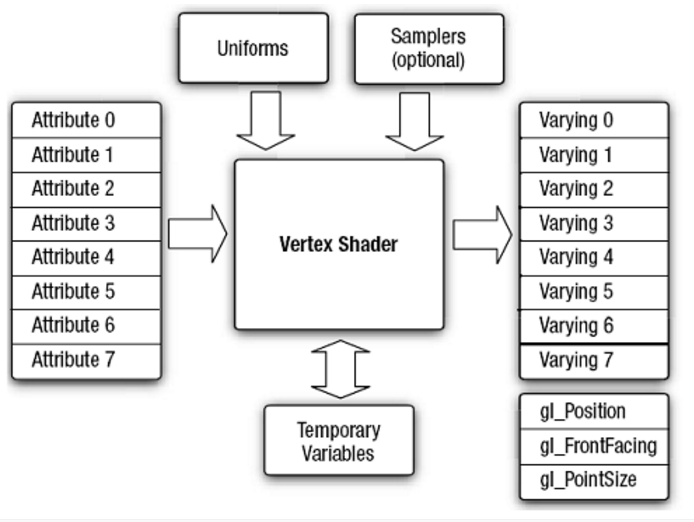 - 片元着色器 --------计算每个像素的颜色和其它属性 (如光照值,贴图,阴影) 模型如下: 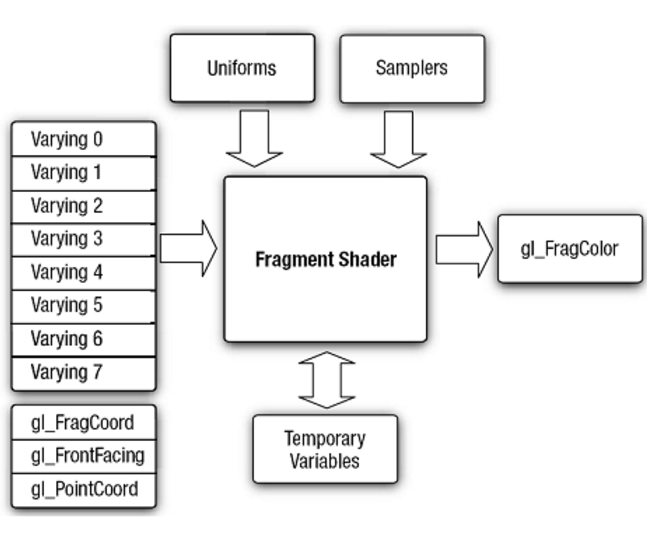 ## 2.2 七大数据类型 1. 标量----基本数据类型 - int 32位 - float 32位 - bool 8位 2. 向量----常用于表示颜色,纹理,坐标  3. 矩阵----常用于位移,旋转,缩放操作 - 类型 mat2 mat3 mat4 - 填充顺序从下向下,从左往右 4. 采样器----纹理采样 (用在片元着色器,在宿主(java)中初始化) - 3类采样器 sampler2D sampler3D samplerCube(立体贴图,需要手动开启功能) 5. 结构体----简化运算 ``` struct info { vec3 a; vec2 b; vec3 c } ``` 6. 数组----float f[] 7. 空类型 ----void ## 2.3 类型修饰符 - attribute (**顶点着色器特有**,一般用于各个顶点各不相同的量) - uniform (一般用于对于3D物体中所有顶点都相同的量) - varing (一般用于顶点着色器传递到片元着色器的量) - const (常量) - in/out/inout (输入输出修饰符,默认in) ## 2.4 浮点精度 | precision | 描述 | 位数(位) | | --------- | ---- | ----- | | lowp | 低精度 | 8 | | mediump | 中精度 | 10 | | highp | 高精度 | 16 | # 3.绘制及纹理映射 ## 3.1绘制方式 | 绘制方式 | 说明 | | ----------------- | ------------------------------------- | | GL_POINTS | 点类下唯一的绘制方式,用来绘制点。 | | GL_LINES | 将着色器传入的顶点按顺序两个一组来绘制成线段 | | GL_LINES_STRIP | 按照顶点顺序连接顶点。(不封口) | | GL_LINES_LOOP | 按照顶点顺序连接顶点,并将第一个顶点和最后一个顶点相连。(封口) | | GL_TRIANGLES | 按照顶点顺序每3个点组成三角形进行绘制 | | GL_TRIANGLE_STRIP | 顶点按照顺序依次组织成三角形进行绘制, 最后实际形成的是一个三角形带。若有 | | GL_TRIANGLE_FAN | 将第一个点作为中心点其他点作为边缘点,绘制一系列组成扇形的相邻三角形 | ## 3.2 纹理映射 ### 3.2.1 映射原理 1. 为顶点指定纹理坐标 2. 通过纹理坐标确认纹理区域 3. 将选定区域根据纹理坐标映射到图元上 ### 3.3.2 注意 - 坐标范围 0-1 - 纹理图片 宽高必须是2^n ### 3.3.3纹理拉伸和截取 ``` //1============================================================= 重复拉伸 GLES20.glTexParameterf(GLES20.GL_TEXTURE_2D ,GLES20.GL_TEXTURE_WRAP_S ,GLES20.GL_REPEAT); GLES20.glTexParameterf(GLES20.GL_TEXTURE_2D ,GLES20.GL_TEXTURE_WRAP_T ,GLES20.GL_REPEAT); //2================================================================= 截取拉伸 GLES20.glTexParameterf(GLES20.GL_TEXTURE_2D, GLES20.GL_TEXTURE_WRAP_S, GLES20.GL_CLAMP_TO_EDGE); GLES20.glTexParameterf(GLES20.GL_TEXTURE_2D, GLES20.GL_TEXTURE_WRAP_T, GLES20.GL_CLAMP_TO_EDGE); ``` ### 3.3.4纹理采样 | | 最近点采样 | 线性采样 | | ---- | --------------- | -------- | | 基本原理 | 对应像素点 | 加权平均 | | 优点 | 简单 采样快 | 线性平滑 | | 缺点 | 将小图映射到大图上,会产生锯齿 | 容易造成线条模糊 | ``` 【1】最近点采样 GLES20.glTexParameterf(GLES20.GL_TEXTURE_2D, GLES20.GL_TEXTURE_MIN_FILTER, GLES20.GL_NEAREST); GLES20.glTexParameterf(GLES20.GL_TEXTURE_2D ,GLES20.GL_TEXTURE_MAG_FILTER ,GLES20.GL_NEAREST); 【2】线性采样 GLES20.glTexParameterf(GLES20.GL_TEXTURE_2D, GLES20.GL_TEXTURE_MIN_FILTER, GLES20.GL_LINEAR); GLES20.glTexParameterf(GLES20.GL_TEXTURE_2D, GLES20.GL_TEXTURE_MAG_FILTER, GLES20.GL_LINEAR); ``` #### MIN与MAG采样 当纹理图中的一个像素对应到待映射图元上的多个片元时,采用MAG采样;反之则采用MIN采样。 通俗版:纹理比图元小,采用MAG采样纹理设置。纹理比图元大,用MIN采样纹理设置 配合:MIN与最近点,MAG与线性采样 # 4.光照 - 环境光 = 材质反射系数*环境光强度 - 散射光 = 材质反射系数 * 散射光强度*max(cos(入射角),0) ``` vec4 pointLight(vec3 normal,vec3 lightLocation, vec4 lightDiffuse){ vec3 vp=normalize(lightLocation‐(vMatrix*vec4(vPosition,1)).xyz); vec3 newTarget=normalize((vMatrix*vec4(normal+vPosition,1)).xyz ‐ (vMatrix*vec4(vPosition,1)).xyz); return lightDiffuse* max(0.0,dot(newTarget,vp)); } ``` - 镜面光 = 材质反射系数 * 镜面光强度 * max(cos(入射角)^粗糙度 ,0) ``` void pointLight( //定位光光照计算的方法 in vec3 normal, //法向量 inout vec4 specular, //镜面反射光分量 in vec3 lightLocation, //光源位置 in vec4 lightSpecular //镜面光强度 ){ vec3 normalTarget=aPosition+normal; vec3 newNormal=(uMMatrix*vec4(normalTarget,1)).xyz‐(uMMatrix*vec4(aPosition,1)).xyz; newNormal=normalize(newNormal); vec3 eye= normalize(uCamera‐(uMMatrix*vec4(aPosition,1)).xyz); vec3 vp= normalize(lightLocation‐(uMMatrix*vec4(aPosition,1)).xyz); vp=normalize(vp); vec3 halfVector=normalize(vp+eye); float shininess=50.0; float nDotViewHalfVector=dot(newNormal,halfVector); float powerFactor=max(0.0,pow(nDotViewHalfVector,shininess)); specular=lightSpecular*powerFactor; } ``` - 定位光 ``` void directionalLight( in vec3 normal, inout vec4 ambient, inout vec4 diffuse, inout vec4 specular, in vec3 lightDirection, in vec4 lightAmbient, in vec4 lightDiffuse, in vec4 lightSpecular ){ ambient=lightAmbient; //环境光 //计算变之后的法向量 vec3 normalTarget=aPosition+normal; vec3 newNormal=(uMMatrix*vec4(normalTarget,1)).xyz‐(uMMatrix*vec4(aPosition,1)).xyz; newNormal=normalize(newNormal); //计算表面点到照相机的向量 vec3 eye= normalize(uCamera‐(uMMatrix*vec4(aPosition,1)).xyz); //规格化定向光方向向量 vec3 vp= normalize(lightDirection); vec3 halfVector=normalize(vp+eye); //求视线与光线的半向量 float shininess=50.0; //粗糙度 ,越小越光滑 ///散射光=材质反射系数 * 散射光强度*max(cos(入射角),0) float nDotViewPosition=max(0.0,dot(newNormal,vp)); //求法向量vp的点积与0的最大值 diffuse=lightDiffuse*nDotViewPosition; //镜面光=材质反射系数 * 镜面光强度 * max(cos(入射角)粗糙度 ,0) float nDotViewHalfVector=dot(newNormal,halfVector); //点积(法线与半向量的点积) float powerFactor=max(0.0,pow(nDotViewHalfVector,shininess));//镜面光反射强度的因子 specular=lightSpecular*powerFactor; } ``` # 5.图片处理 | 算法 | 原理 | | :-----: | :--------------------------------------- | | 灰度 | 1.**浮点算法:Gray= R * 0.3+G * 0.59 +B * 0.114** 2.整数算法:Gray=( R * 30+G * 59 +B * 11) 3.仅取绿色:Gray=G 4.平均值:Gray=( R+G +B )/3 5.位移算法:Gray=( R * 76+G * 59 +B * 28)>>8 | | 冷暖 色调 | 冷色调:增加单一的蓝色分量 暖色调:增加单一的红色和绿色色分量 | | 模糊 处理 | 普通模糊:平均 高斯模糊:加权平均 | | 放大 | 纹理坐标范围变小 ( s/2.0,t/2.0) | | 颠倒 | 1.0-T的坐标 | | 扭曲 | 不同半径位置旋转角度不同 (-(r/R)*(r/R)+1.0) | | 浮雕 | 当前点的RGB值减去相邻的RGB值然后加上128作为新的RGB值! | | 马赛克 | 把图片的一个区域用同一个点的颜色来表示,(大规模降低分辨率,隐藏图像细节) | | 对比度增强 | x(1-a)+ya(线性插值) | | 膨胀 腐蚀 | 亮的更亮,反之 | # 6 OBJ文件和MTL文件 ## 6.1 obj文件 | # | 说明 | | --------------------------- | ------------------------------ | | v --vertex | 顶点坐标 | | vt --vertex texture | 纹理坐标 | | vn --vertex normal | 顶点法向量 | | g --group | 组 | | f --face | 面 1/2/3 分布代表 顶点索引 纹理索引 顶点法向量索引 | ## 6.2 mtl文件 | # | 说明 | | -------------------- | ------------------------------------ | | Ka /Kd/ Ks | 光照强度 a--环境光 d--散射光 s--镜面光 | | newmtl _5___Default | 材质名 | | illum | 材质光照模型 | | Ns | 材质反射系数 | | bump | 为材质指定凹凸的纹理文件 | | map_KA/map_KS/map_Kd | 为对应光匹配的指定纹理文件 a--环境光 d--散射光 s--镜面光 | | map_d | 为消隐指数指定标量纹理文件 | | refl | 指定一个球体区域,将指定的纹理反射到映射物体上 | # 7 混合 ## 7.1 源因子和目标因子 输入片元,当前存储在帧缓存中的像素颜色值和 ## 7.2 混合原理 ``` 源颜色(Rs,Gs,Bs,As) 目标颜色(Rd,Gd,Bd,Ad) 设源因子 为(Sr,Sg,Sb,Sa) 设目标因子 为(Dr,Dg,Db,Da) 混合表达式: 混合效果=(Rs * Sr + Rd * Dr , Gs * Sg+Gd * Db , Bs * Sb + Bd * Db,As * Sa + Ad * Da) ``` ## 7.3 代码 ``` //开启混合 gl.glEnable(GL10.GL_BLEND); //定义像素算法(源混合因子,目标混合因子) gl.glBlendFunc(GL10.GL_ONE, GL10.GL_ONE_MINUS_DST_ALPHA); ``` # 8 雾 1. 数学模型 ``` 线性算法:f=max(min((end‐dist)/(end‐start),1.0),1.0) f : 雾化因子(1不浓,0浓) dist: 当前要绘制的片元到照相机的距离 start:特定距离,当前片元距离照相机距离小于start的时候 ,f=1 end: 特定距离,当前片元距离照相机距离大于end的时候 ,f=0 非线性算法:f=1.0‐smoothstep( start, end, dist ) smoothstep函数 如果:dist<=start 返回0.0 如果:dist>=end 返回1.0 如果:start < dist< end 执行0‐1之间的平滑埃尔米特插值 如果:start 》= end 没效果(未定应) ``` 2. 代码 ``` float get(){ //计算顶点到照相机的距离 float fogDistance=length( uCamera‐(uMMatrix*vec4(aPosition,1.0)).xyz); const float end=490.0;//雾的结束位置 const float start=350.0;//雾的开始位置 //计算雾因子 float tmp=1.0‐smoothstep(start,end,fogDistance); return tmp; } ``` # 9 压缩纹理 (1)图片占用内存公式 内存大小=宽高每一个像素的位数 (2)核心代码 ``` // 读取ZipInputStream 并且创建纹理( ETC1Util.ETC1Texture) ETC1Util.ETC1Texture t = getNextTexture(); ETC1Util.ETC1Texture tAlpha = getNextTexture(); //加载ETC1纹理 ETC1Util.loadTexture(GLES20.GL_TEXTURE_2D , 0//纹理层次 , 0//边框大小。通常为0. , GLES20.GL_RGB//格式使用ETC1纹理压缩,如果不支持。必须gl_rgb。 //要使用的类型如果ETC1纹理压缩不支持。 // 可以gl_unsigned_short_5_6_5, // 这意味着每个像素的16位或gl_unsigned_byte,这意味着每像素24位。 , GLES20.GL_UNSIGNED_SHORT_5_6_5 , t);//ETC1Util.ETC1Texture ETC1Util.loadTexture(GLES20.GL_TEXTURE_2D, 0, 0, GLES20.GL_RGB, GLES20 .GL_UNSIGNED_SHORT_5_6_5, tAlpha); ``` # 10 FBO (1)Frame Buffer和Render Buffer (2)核心代码 ``` //创建缓冲帧 GLES20.glGenFramebuffers(1, fFrame, 0); GLES20.glGenRenderbuffers(1, fRender, 0); //绑定RenderBuffer GLES20.glBindRenderbuffer(GLES20.GL_RENDERBUFFER, fRender[0]); //为深度的Render Buffer,并传入大小 GLES20.glRenderbufferStorage(GLES20.GL_RENDERBUFFER , GLES20.GL_DEPTH_COMPONENT16, mBitmap.getWidth(), mBitmap.getHeight());//渲染缓存图像的像素维度 //创建的渲染缓冲区挂载到帧缓冲区上 GLES20.glFramebufferRenderbuffer(GLES20.GL_FRAMEBUFFER, GLES20.GL_DEPTH_ATTACHMENT, GLES20.GL_RENDERBUFFER, fRender[0]); //解绑Render Buffer GLES20.glBindRenderbuffer(GLES20.GL_RENDERBUFFER, 0); //绑定FrameBuffer GLES20.glBindFramebuffer(GLES20.GL_FRAMEBUFFER, fFrame[0]); GLES20.glFramebufferTexture2D( GLES20.GL_FRAMEBUFFER , GLES20.GL_COLOR_ATTACHMENT0 , GLES20.GL_TEXTURE_2D // 附加的纹理对象ID , fTexture[1] , 0); //为FrameBuffer挂载fRender[0]来存储深度 GLES20.glFramebufferRenderbuffer(GLES20.GL_FRAMEBUFFER,//帧缓冲类型的目标 GLES20.GL_DEPTH_ATTACHMENT,// 附着点 GLES20.GL_RENDERBUFFER,// 必须为GL_RENDERBUFFER fRender[0]); // 渲染缓冲区对象 //设置视口 GLES20.glViewport(0, 0, mBitmap.getWidth(), mBitmap.getHeight()); //绘制 帧缓存里读取一个像素块 draw(); GLES20.glReadPixels(0, 0//定义图像区域左下角点的坐标 //图像的高度和宽度 , mBitmap.getWidth(), mBitmap.getHeight() //所读象素数据元素的格式 , GLES20.GL_RGBA, //数据类型 GLES20.GL_UNSIGNED_BYTE,//每个元素的数据类型 mBuffer);//图片 //删除纹理 GLES20.glDeleteTextures(2, fTexture, 0); //删除Render Buffer GLES20.glDeleteRenderbuffers(1, fRender, 0); //删除Frame Buffer GLES20.glDeleteFramebuffers(1, fFrame, 0); ```
作者:じ☆ve不哭
## Windows Batch ### 0x00 命令一览 help | more ``` >help | more 有关某个命令的详细信息,请键入 HELP 命令名 ASSOC 显示或修改文件扩展名关联。 ATTRIB 显示或更改文件属性。 BREAK 设置或清除扩展式 CTRL+C 检查。 BCDEDIT 设置启动数据库中的属性以控制启动加载。 CACLS 显示或修改文件的访问控制列表(ACL)。 CALL 从另一个批处理程序调用这一个。 CD 显示当前目录的名称或将其更改。 CHCP 显示或设置活动代码页数。 CHDIR 显示当前目录的名称或将其更改。 CHKDSK 检查磁盘并显示状态报告。 CHKNTFS 显示或修改启动时间磁盘检查。 CLS 清除屏幕。 CMD 打开另一个 Windows 命令解释程序窗口。 COLOR 设置默认控制台前景和背景颜色。 COMP 比较两个或两套文件的内容。 COMPACT 显示或更改 NTFS 分区上文件的压缩。 CONVERT 将 FAT 卷转换成 NTFS。你不能转换当前驱动器。 COPY 将至少一个文件复制到另一个位置。 DATE 显示或设置日期。 DEL 删除至少一个文件。 DIR 显示一个目录中的文件和子目录。 DISKPART 显示或配置磁盘分区属性。 DOSKEY 编辑命令行、撤回 Windows 命令并创建宏。 DRIVERQUERY 显示当前设备驱动程序状态和属性。 ECHO 显示消息,或将命令回显打开或关闭。 ENDLOCAL 结束批文件中环境更改的本地化。 ERASE 删除一个或多个文件。 EXIT 退出 CMD.EXE 程序(命令解释程序)。 FC 比较两个文件或两个文件集并显示它们之间的不同。 FIND 在一个或多个文件中搜索一个文本字符串。 FINDSTR 在多个文件中搜索字符串。 FOR 为一组文件中的每个文件运行一个指定的命令。 FORMAT 格式化磁盘,以便用于 Windows。 FSUTIL 显示或配置文件系统属性。 FTYPE 显示或修改在文件扩展名关联中使用的文件类型。 GOTO 将 Windows 命令解释程序定向到批处理程序中某个带标签的行。 GPRESULT 显示计算机或用户的组策略信息。 GRAFTABL 使 Windows 在图形模式下显示扩展字符集。 HELP 提供 Windows 命令的帮助信息。 ICACLS 显示、修改、备份或还原文件和目录的 ACL。 IF 在批处理程序中执行有条件的处理操作。 LABEL 创建、更改或删除磁盘的卷标。 MD 创建一个目录。 MKDIR 创建一个目录。 MKLINK 创建符号链接和硬链接 MODE 配置系统设备。 MORE 逐屏显示输出。 MOVE 将一个或多个文件从一个目录移动到另一个目录。 OPENFILES 显示远程用户为了文件共享而打开的文件。 PATH 为可执行文件显示或设置搜索路径。 PAUSE 暂停批处理文件的处理并显示消息。 POPD 还原通过 PUSHD 保存的当前目录的上一个值。 PRINT 打印一个文本文件。 PROMPT 更改 Windows 命令提示。 PUSHD 保存当前目录,然后对其进行更改。 RD 删除目录。 RECOVER 从损坏的或有缺陷的磁盘中恢复可读信息。 REM 记录批处理文件或 CONFIG.SYS 中的注释(批注)。 REN 重命名文件。 RENAME 重命名文件。 REPLACE 替换文件。 RMDIR 删除目录。 ROBOCOPY 复制文件和目录树的高级实用工具 SET 显示、设置或删除 Windows 环境变量。 SETLOCAL 开始本地化批处理文件中的环境更改。 SC 显示或配置服务(后台进程)。 SCHTASKS 安排在一台计算机上运行命令和程序。 SHIFT 调整批处理文件中可替换参数的位置。 SHUTDOWN 允许通过本地或远程方式正确关闭计算机。 SORT 对输入排序。 START 启动单独的窗口以运行指定的程序或命令。 SUBST 将路径与驱动器号关联。 SYSTEMINFO 显示计算机的特定属性和配置。 TASKLIST 显示包括服务在内的所有当前运行的任务。 TASKKILL 中止或停止正在运行的进程或应用程序。 TIME 显示或设置系统时间。 TITLE 设置 CMD.EXE 会话的窗口标题。 TREE 以图形方式显示驱动程序或路径的目录结构。 TYPE 显示文本文件的内容。 VER 显示 Windows 的版本。 VERIFY 告诉 Windows 是否进行验证,以确保文件正确写入磁盘。 VOL 显示磁盘卷标和序列号。 XCOPY 复制文件和目录树。 WMIC 在交互式命令 shell 中显示 WMI 信息。 ``` 如何查看命令解释----- 命令 help [子命令] 或者命令 /? ### 0x01批处理基础 #### 0x0100 常用批处理内部命令简介 ##### 预热一下 ``` @echo off rem say hello echo hello batch pause ``` ##### REM 和 :: 注释 - rem 可回显 - :: 不回显 ##### ECHO 和 @ 回显 及隐藏命令 ``` >help echo 显示消息,或者启用或关闭命令回显。 ECHO [ON | OFF] ECHO [message] ``` @字符放在命令前将关闭该命令回显,无论此时 echo 是否为打开状态。 通常以@echo off作为批处理程序的首行 ##### PAUSE 暂停 ``` C:\Users\Leon>pause 请按任意键继续. . . :: 修改提示语 >echo 继续 & pause>nul 继续 ``` ##### ERRORLEVEL ``` :: 默认是0 无效命令时值为9009 >echo %errorlevel% 0 >dd 'dd' 不是内部或外部命令,也不是可运行的程序 或批处理文件。 >echo %errorlevel% 9009 ``` ##### TITLE 修改标题 ``` >title hello :: 注意窗口的标题变化 ``` ##### COLOR > 设置默认的控制台前景和背景颜色。 > > COLOR [attr] > > attr 指定控制台输出的颜色属性。 > > 颜色属性由两个十六进制数字指定 -- 第一个 > 对应于背景,第二个对应于前景。每个数字 > 可以为以下任何值: > > 0 = 黑色 8 = 灰色 > 1 = 蓝色 9 = 淡蓝色 > 2 = 绿色 A = 淡绿色 > 3 = 浅绿色 B = 淡浅绿色 > 4 = 红色 C = 淡红色 > 5 = 紫色 D = 淡紫色 > 6 = 黄色 E = 淡黄色 > 7 = 白色 F = 亮白色 > > 如果没有给定任何参数,此命令会将颜色还原到 CMD.EXE 启动时 > 的颜色。这个值来自当前控制台 > 窗口、/T 命令行开关或 DefaultColor 注册表 > 值。 > > 如果尝试使用相同的 > 前景和背景颜色来执行 > COLOR 命令,COLOR 命令会将 ERRORLEVEL 设置为 1。 ``` >color fc :: 注意命令窗口的背景及字体变化 ``` ##### mode 配置系统设备 > 配置系统设备。 > > 串行端口: MODE COMm[:] [BAUD=b] [PARITY=p] [DATA=d] [STOP=s] > [to=on|off] [xon=on|off] [odsr=on|off] > [octs=on|off] [dtr=on|off|hs] > [rts=on|off|hs|tg] [idsr=on|off] > > 设备状态: MODE [device] [/STATUS] > > 打印重定向: MODE LPTn[:]=COMm[:] > > 选择代码页: MODE CON[:] CP SELECT=yyy > > 代码页状态: MODE CON[:] CP [/STATUS] > > 显示模式: MODE CON[:] [COLS=c] [LINES=n] > > 击键率: MODE CON[:] [RATE=r DELAY=d] ``` >mode con cols=113 lines=15 & color 9f ::此命令设置 DOS 窗口大小:15 行,113 列 ``` ##### GOTO 和 : 跳转标签 > 将 cmd.exe 定向到批处理程序中带标签的行。 > > GOTO label > > label 指定批处理程序中用作标签的文字字符串。 > > 标签必须单独一行,并且以冒号打头。 > > 如果命令扩展被启用,GOTO 会如下改变: > > GOTO 命令现在接受目标标签 :EOF,这个标签将控制转移到当前 > 批脚本文件的结尾。不定义就退出批脚本文件,这是一个容易的 > 办法。有关能使该功能有用的 CALL 命令的扩展描述,请键入 ``` @echo off :start set /a var+=1 echo %var% if %var% leq 3 GOTO start pause :: 输出 1 2 3 4 ``` ##### FIND > 在文件中搜索字符串。 > > FIND [/V] [/C] [/N] [/I] [/OFF[LINE]] "string" [[drive:][path]filename[ ...]] > > /V 显示所有未包含指定字符串的行。 > /C 仅显示包含字符串的行数。 > /N 显示行号。 > /I 搜索字符串时忽略大小写。 > /OFF[LINE] 不要跳过具有脱机属性集的文件。 > "string" 指定要搜索的文本字符串。 > [drive:][path]filename > 指定要搜索的文件。 > > 如果没有指定路径,FIND 将搜索在提示符处键入 > 的文本或者由另一命令产生的文本。 find 常与type 一起使用 ``` @echo off echo 111 >test.txt echo 222 >>test.txt find "111" test.txt type test.txt|find "222" pause del test.txt pause ``` ##### FINDSTR > 在文件中寻找字符串。 > > FINDSTR [/B] [/E] [/L] [/R] [/S] [/I] [/X] [/V] [/N] [/M] [/O] [/P] [/F:file] > [/C:string] [/G:file] [/D:dir list] [/A:color attributes] [/OFF[LINE]] > strings [[drive:][path]filename[ ...]] > > /B 在一行的开始配对模式。 > /E 在一行的结尾配对模式。 > /L 按字使用搜索字符串。 > /R 将搜索字符串作为一般表达式使用。 > /S 在当前目录和所有子目录中搜索匹配文件。 > /I 指定搜索不分大小写。 > /X 打印完全匹配的行。 > /V 只打印不包含匹配的行。 > /N 在匹配的每行前打印行数。 > /M 如果文件含有匹配项,只打印其文件名。 > /O 在每个匹配行前打印字符偏移量。 > /P 忽略有不可打印字符的文件。 > /OFF[LINE] 不跳过带有脱机属性集的文件。 > /A:attr 指定有十六进位数字的颜色属性。请见 "color /?" > /F:file 从指定文件读文件列表 (/ 代表控制台)。 > /C:string 使用指定字符串作为文字搜索字符串。 > /G:file 从指定的文件获得搜索字符串。 (/ 代表控制台)。 > /D:dir 查找以分号为分隔符的目录列表 > strings 要查找的文字。 > [drive:][path]filename > 指定要查找的文件。 > > 除非参数有 /C 前缀,请使用空格隔开搜索字符串。 > 例如: 'FINDSTR "hello there" x.y' 在文件 x.y 中寻找 "hello" 或 > "there"。'FINDSTR /C:"hello there" x.y' 文件 x.y 寻找 > "hello there"。 > > 一般表达式的快速参考: > . 通配符: 任何字符 > * 重复: 以前字符或类出现零或零以上次数 > ^ 行位置: 行的开始 > $ 行位置: 行的终点 > [class] 字符类: 任何在字符集中的字符 > [^class] 补字符类: 任何不在字符集中的字符 > [x-y] 范围: 在指定范围内的任何字符 > \x Escape: 元字符 x 的文字用法 > \<xyz 字位置: 字的开始 > xyz\> 字位置: 字的结束 > > 有关 FINDSTR 常见表达法的详细情况,请见联机命令参考。 ``` findstr "111" test.txt type test.txt|findstr "222" ``` ##### START > 启动一个单独的窗口以运行指定的程序或命令。 ``` >start cmd :: 打开命令行 ``` ##### assoc 和 ftype 显示或修改文件扩展名关联 > ASSOC [.ext[=[fileType]]] > > .ext 指定跟文件类型关联的文件扩展名 > fileType 指定跟文件扩展名关联的文件类型 > > 键入 ASSOC 而不带参数,显示当前文件关联。如果只用文件扩展 > 名调用 ASSOC,则显示那个文件扩展名的当前文件关联。如果不为 > 文件类型指定任何参数,命令会删除文件扩展名的关联。 ``` assoc #显示所有'文件扩展名'关联 assoc.txt #显示.txt 代表的'文件类型',结果显示 .txt=txtfile assoc.doc #显示.doc代表的'文件类型',结果显示 .doc=Word.Document.8 assoc.exe #显示.exe代表的'文件类型',结果显示 .exe=exefile ftype #显示所有'文件类型'关联 ftypeexefile #显示 exefile 类型关联的命令行,结果显示 exefile="%1" %* assoc.txt=Word.Document.8 设置.txt 为 word 类型的文档,可以看到.txt 文件的图标都变了 assoc.txt=txtfile 恢复.txt 的正确关联 ftypeexefile="%1" %* 恢复 exefile 的正确关联 如果该关联已经被破坏,可以运行 command.com , ``` ##### pushd 和 popd 切换当前目录 ``` @echo off c: & cd\ & md mp3 #在 C:\ 建立 mp3 文件夹 md d:\mp4 #在 D:\ 建立 mp4 文件夹 cd /d d:\mp4 #更改当前目录为 d:\mp4 pushd c:\mp3 #保存当前目录,并切换当前目录为 c:\mp3 popd #恢复当前目录为刚才保存的 d:\mp4 一般用处不大,在当前目录名不确定时,会有点帮助。(dos 编程中很有用) ``` ##### CALL > 从批处理程序调用另一个批处理程序。 > > CALL [drive:][path]filename [batch-parameters] > > batch-parameters 指定批处理程序所需的命令行信息。 > > 如果命令扩展被启用,CALL 会如下改变: > > CALL 命令现在将卷标当作 CALL 的目标接受。语法是: > > CALL:label arguments > > 一个新的批文件上下文由指定的参数所创建,控制在卷标被指定 > 后传递到语句。你必须通过达到批脚本文件末两次来 "exit" 两次。 > 第一次读到文件末时,控制会回到 CALL 语句的紧后面。第二次 > 会退出批脚本。键入 GOTO /?,参看 GOTO :EOF 扩展的描述, > 此描述允许你从一个批脚本返回。 > > 另外,批脚本文本参数参照(%0、%1、等等)已如下改变: > > > 批脚本里的 %* 指出所有的参数(如 %1 %2 %3 %4 %5 ...) > > 批参数(%n)的替代已被增强。你可以使用以下语法: > > %~1 - 删除引号("),扩展 %1 > %~f1 - 将 %1 扩展到一个完全合格的路径名 > %~d1 - 仅将 %1 扩展到一个驱动器号 > %~p1 - 仅将 %1 扩展到一个路径 > %~n1 - 仅将 %1 扩展到一个文件名 > %~x1 - 仅将 %1 扩展到一个文件扩展名 > %~s1 - 扩展的路径只含有短名 > %~a1 - 将 %1 扩展到文件属性 > %~t1 - 将 %1 扩展到文件的日期/时间 > %~z1 - 将 %1 扩展到文件的大小 > %~$PATH:1 - 查找列在 PATH 环境变量的目录,并将 %1 > 扩展到找到的第一个完全合格的名称。如果 > 环境变量名未被定义,或者没有找到文件, > 此修改符会扩展到空字符串 > > 可以组合修改符来取得多重结果: > > %~dp1 - 只将 %1 扩展到驱动器号和路径 > %~nx1 - 只将 %1 扩展到文件名和扩展名 > %~dp$PATH:1 - 在列在 PATH 环境变量中的目录里查找 %1, > 并扩展到找到的第一个文件的驱动器号和路径。 > %~ftza1 - 将 %1 扩展到类似 DIR 的输出行。 > > 在上面的例子中,%1 和 PATH 可以被其他有效数值替换。 > %~ 语法被一个有效参数号码终止。%~ 修定符不能跟 %*使用 ``` @echo off chcp 65001 Echo 产生一个临时文件 > tmp.txt Rem 下行先保存当前目录,再将 c:\windows设为当前目录 pushd c:\windows Call :sub tmp.txt Rem 下行恢复前次的当前目录 Popd Call :sub tmp.txt pause Del tmp.txt :sub Echo 删除引号: %~1 Echo 扩充到路径: %~f1 Echo 扩充到一个驱动器号: %~d1 Echo 扩充到一个路径: %~p1 Echo 扩充到一个文件名: %~n1 Echo 扩充到一个文件扩展名: %~x1 Echo 扩充的路径指含有短名: %~s1 Echo 扩充到文件属性: %~a1 Echo 扩充到文件的日期/时间: %~t1 Echo 扩充到文件的大小: %~z1 Echo 扩展到驱动器号和路径:%~dp1 Echo 扩展到文件名和扩展名:%~nx1 Echo 扩展到类似 DIR 的输出行:%~ftza1 Echo. Goto :eof ``` ##### shift > 更改批处理文件中可替换参数的位置。 > > SHIFT [/n] > > 如果命令扩展被启用,SHIFT 命令支持/n 命令行开关;该命令行开关告诉 > 命令从第 n 个参数开始移位;n 介于零和八之间。例如: > > SHIFT /2 > > 会将 %3 移位到 %2,将 %4 移位到 %3,等等;并且不影响 %0 和 %1。 ##### IF > 执行批处理程序中的条件处理。 > > IF [NOT] ERRORLEVEL number command > IF [NOT] string1==string2 command > IF [NOT] EXIST filen > > ame command > > NOT 指定只有条件为 false 的情况下,Windows 才 > 应该执行该命令。 > > ERRORLEVEL number 如果最后运行的程序返回一个等于或大于 > 指定数字的退出代码,指定条件为 true。 > > string1==string2 如果指定的文字字符串匹配,指定条件为 true。 > > EXIST filename 如果指定的文件名存在,指定条件为 true。 > > command 如果符合条件,指定要执行的命令。如果指定的 > 条件为 FALSE,命令后可跟 ELSE 命令,该命令将 > 在 ELSE 关键字之后执行该命令。 > > ELSE 子句必须出现在同一行上的 IF 之后。例如: > > IF EXIST filename. ( > del filename. > ) ELSE ( > echo filename. missing. > ) > > 由于 del 命令需要用新的一行终止,因此以下子句不会有效: > > IF EXIST filename. del filename. ELSE echo filename. missing > > 由于 ELSE 命令必须与 IF 命令的尾端在同一行上,以下子句也 > 不会有效: > > IF EXIST filename. del filename. > ELSE echo filename. missing > 如果都放在同一行上,以下子句有效: > > IF EXIST filename. (del filename.) ELSE echo filename. missing > > 如果命令扩展被启用,IF 会如下改变: > > IF [/I] string1 compare-op string2 command > IF CMDEXTVERSION number command > IF DEFINED variable command > > 其中, compare-op 可以是: > > EQU - 等于 > NEQ - 不等于 > LSS - 小于 > LEQ - 小于或等于 > GTR - 大于 > GEQ - 大于或等于 > > 而 /I 开关(如果指定)说明要进行的字符串比较不分大小写。 > /I 开关可以用于 IF 的 string1==string2 的形式上。这些 > 比较都是通用的;原因是,如果 string1 和 string2 都是 > 由数字组成的,字符串会被转换成数字,进行数字比较。 > > CMDEXTVERSION 条件的作用跟 ERRORLEVEL 的一样,除了它 > 是在跟与命令扩展有关联的内部版本号比较。第一个版本 > 是 1。每次对命令扩展有相当大的增强时,版本号会增加一个。 > 命令扩展被停用时,CMDEXTVERSION 条件不是真的。 > > 如果已定义环境变量,DEFINED 条件的作用跟 EXIST 的一样, > 除了它取得一个环境变量,返回的结果是 true。 > > 如果没有名为 ERRORLEVEL 的环境变量,%ERRORLEVEL% > 会扩充为 ERROLEVEL 当前数值的字符串表达式;否则,你会得到 > 其数值。运行程序后,以下语句说明 ERRORLEVEL 的用法: > > goto answer%ERRORLEVEL% > :answer0 > echo Program had return code 0 > :answer1 > echo Program had return code 1 > > 你也可以使用以上的数字比较: > > IF %ERRORLEVEL% LEQ 1 goto okay > > 如果没有名为 CMDCMDLINE 的环境变量,%CMDCMDLINE% > 将在 CMD.EXE 进行任何处理前扩充为传递给 CMD.EXE 的原始 > 命令行;否则,你会得到其数值。 > > 如果没有名为 CMDEXTVERSION 的环境变量, > %CMDEXTVERSION% 会扩充为 CMDEXTVERSION 当前数值的 > 字串符表达式;否则,你会得到其数值。 ##### setlocal 与 变量延迟 > 开始批处理文件中环境改动的本地化操作。在执行 SETLOCAL 之后 > 所做的环境改动只限于批处理文件。要还原原先的设置,必须执 > 行 ENDLOCAL。达到批处理文件结尾时,对于该批处理文件的每个 > 尚未执行的 SETLOCAL 命令,都会有一个隐含的 ENDLOCAL 被执行。 > > SETLOCAL > > 如果启用命令扩展,则 SETLOCAL 更改如下: > > SETLOCAL 批命令现在可以接受可选参数: > ENABLEEXTENSIONS / DISABLEEXTENSIONS > 启用或禁用命令处理器扩展。这些 > 参数比 CMD /E:ON 或 /E:OFF > 开关有优先权。请参阅 CMD /? 获取详细信息。 > ENABLEDELAYEDEXPANSION / DISABLEDELAYEDEXPANSION > 启用或禁用延缓环境变量 > 扩展。这些参数比 CMD > /V:ON 或 /V:OFF 开关有优先权。请参阅 CMD /? 获取详细信息。 > 无论在 SETLOCAL 命令之前的设置是什么,这些修改会一直 > 生效,直到出现相应的 ENDLOCAL 命令。 > > 在给定参数的情况下, > SETLOCAL 命令将设置 ERRORLEVEL 值。如果给定两个有效参数中的一个,另一个未给定, > 则该值为零。 > 通过以下方法,你可以在批脚本中 > 使用此项来确定扩展是否可用: > > VERIFY OTHER 2>nul > SETLOCAL ENABLEEXTENSIONS > IF ERRORLEVEL 1 echo Unable to enable extensions > > 此方法之所以有效,是因为在 CMD.EXE 的旧版本上,SETLOCAL > 不设置 ERRORLEVEL 值。如果参数不正确,VERIFY 命令会将 > ERRORLEVEL 值初始化为非零值。 ``` set a=4 set a=5 & echo %a% pause :: 显示4 setlocal enabledelayedexpansion set a=4 set a=5 & echo !a! ::显示5 pause for /l %%i in (1,1,5) do ( set a=%%i echo !a! ) :: 显示 1 2 3 4 5 ``` #### 0x0101 常用特殊符号 ##### 1、@ 命令行回显屏蔽符 ##### 2、% 批处理变量引导符 > 引用变量用%var%,调用程序外部参数用%1 至%9 等等 > %0 %1 %2 %3 %4 %5 %6 %7 %8 %9 %*为命令行传递给批处理的参数 > %0 批处理文件本身,包括完整的路径和扩展名 > > ``` > 例:最简单的复制文件自身的方法 > copy %0 d:\wind.bat > ``` > > ##### 3、> 重定向符 > 这个字符的意思是传递并且覆盖,他所起的作用是将运行的结果传递到后面的范围(后边可 > 以是文件,也可以是默认的系统控制台) > 在 NT 系列命令行中,重定向的作用范围由整个命令行转变为单个命令语句,受到了命 > 令分隔符&,&&,||和语句块的制约限制。 > 比如: > 使用命令:echo hello >1.txt 将建立文件 1.txt,内容为”hello “(注意行尾有一空格) > 使用命令:echo hello>1.txt 将建立文件 1.txt,内容为”hello“(注意行尾没有空格) ##### 4、>> 重定向符 追加 ``` echo hello > 1.txt echo world >>1.txt 这时候 1.txt 内容如下 : hello world ``` ##### 5、<、>&、<& 重定向符 了解 > <,输入重定向命令,从文件中读入命令输入,而不是从键盘中读入。 > > &,将一个句柄的输出写入到另一个句柄的输入中。 > > <&,刚好和>&相反,从一个句柄读取输入并将其写入到另一个句柄输出中。 > > 常用句柄:0、1、2,未定义句柄:3—9 > 1>nul 表示禁止输出正确的信息 > 2>nul 表示禁止输出错误信息。 ##### 6、| 命令管道符 > 格式:第一条命令 | 第二条命令 [| 第三条命令...] > 将第一条命令的结果作为第二条命令的参数来使用,记得在 unix 中这种方式很常见 ``` dir c:\|find "txt" dir c:\|findstr "txt" ::必须双引号 echo y|format a: /s /q /v:system ::格式化 ``` ##### 7、 ^ 转义字符 > ^ 是对特殊符号<,>,&的前导字符,在命令中他将以上 3 个符号的特殊功能去掉,仅仅只把他 > 们当成符号而不使用他们的特殊意义。 ``` echo test ^>1.txt 结果则是:test > 1.txt ``` > 另外,此转义字符还可以用作续行符号。 ``` @echo off echo 英雄 ^ 是 ^ 好 ^ 男人 pause ``` ##### 8、& 组合命令 > 语法:第一条命令 & 第二条命令 [& 第三条命令...] > &、&&、||为组合命令,顾名思义,就是可以把多个命令组合起来当一个命令来执行。这在 > 批处理脚本里是允许的,而且用的非常广泛 > > **允许在一行中使用 2 个以上不同的命令,当第一个命令执行失败了,也不影响后边** > **的命令执行。** ``` dir z:\ & dir y:\ & dir c:\ ``` ##### 9、&& 组合命令 > 语法:第一条命令 && 第二条命令 [&& 第三条命令...] > > 可以同时执行多条命令,当碰到执行**出错**的命令后**将不执行后面**的命令,如果一 > 直没有出错则一直执行完所有命令 ``` dir z:\ && dir y:\ && dir c:\ ``` ##### 10、|| 组合命令 > 语法:第一条命令 || 第二条命令 [|| 第三条命令...] > 可以同时执行多条命令,**当一条命令失败后才执行第二条命令**,当碰到执行正确的命令后将不执行后面的命令,如果没有出现正确的命令则一直执行完所有命令; > > 注意: 管道命令的优先级高于重定向命令 ##### 11、"" 字符串界定符 > 双引号允许在字符串中包含空格,进入一个特殊目录可以用如下方法 ``` cd "program files" cd progra~1 cd pro ``` ##### 12、, 逗号 > 逗号相当于空格,在某些情况下“,”可以用来当做空格使 ``` dir,c:\ ``` ##### 13、; 分号 > 当命令相同时,可以将不同目标用;来隔离,但执行效果不变,如执行过程中发生错 > 误,则只返回错误报告,但程序仍会执行。 ``` dir c:\;d:\;e:\;z:\ :: 找不到路径报错 dir c:\;d:\;e:\1.txt ::e盘存在,有错误提示,但命令仍会执行 ``` ##### 14、() 括号 > 小括号在批处理编程中有特殊的作用,左右括号必须成对使用,括号中可以包括多行命令 , > 这些命令将被看成一个整体,视为一条命令行。 > 括号在 for语句和 if 语句中常见,用来嵌套使用循环或条件语句,其实括号()也可以单独使用 ``` ( echo 1 echo 2 echo 3 ) 注意:这种多条命令被视为一条命令行时,如果其中有变量,就涉及到变量延迟的问题。 ``` ##### 15、! 感叹号 > 在变量延迟问题中,用来表示变量,即%var%应该表示为!var! ### 0x02 FOR 命令详解 > 对一组文件中的每一个文件执行某个特定命令。 > > FOR %variable IN (set) DO command [command-parameters] > > %variable 指定一个单一字母可替换的参数。 > (set) 指定一个或一组文件。可以使用通配符。 > command 指定对每个文件执行的命令。 > command-parameters > 为特定命令指定参数或命令行开关。 > > 在批处理程序中使用 FOR 命令时,指定变量请使用 %%variable > 而不要用 %variable。变量名称是区分大小写的,所以 %i 不同于 %I. > > 如果启用命令扩展,则会支持下列 FOR 命令的其他格式: > > FOR /D %variable IN (set) DO command [command-parameters] > > 如果集中包含通配符,则指定与目录名匹配,而不与文件名匹配。 > > FOR /R [[drive:]path] %variable IN (set) DO command [command-parameters] > > 检查以 [drive:]path 为根的目录树,指向每个目录中的 FOR 语句。 > 如果在 /R 后没有指定目录规范,则使用当前目录。如果集仅为一个单点(.)字符, > 则枚举该目录树。 > > FOR /L %variable IN (start,step,end) DO command [command-parameters] > > 该集表示以增量形式从开始到结束的一个数字序列。因此,(1,1,5)将产生序列 > 1 2 3 4 5,(5,-1,1)将产生序列(5 4 3 2 1) > > FOR /F ["options"] %variable IN (file-set) DO command [command-parameters] > FOR /F ["options"] %variable IN ("string") DO command [command-parameters] > FOR /F ["options"] %variable IN ('command') DO command [command-parameters] > > 或者,如果有 usebackq 选项: > > FOR /F ["options"] %variable IN (file-set) DO command [command-parameters] > FOR /F ["options"] %variable IN ("string") DO command [command-parameters] > FOR /F ["options"] %variable IN ('command') DO command [command-parameters] > > fileset 为一个或多个文件名。继续到 fileset 中的下一个文件之前, > 每份文件都被打开、读取并经过处理。处理包括读取文件,将其分成一行行的文字, > 然后将每行解析成零或更多的符号。然后用已找到的符号字符串变量值调用 For 循环。 > 以默认方式,/F 通过每个文件的每一行中分开的第一个空白符号。跳过空白行。 > 你可通过指定可选 "options" 参数替代默认解析操作。这个带引号的字符串包括一个 > 或多个指定不同解析选项的关键字。这些关键字为: > > eol=c - 指一个行注释字符的结尾(就一个) > skip=n - 指在文件开始时忽略的行数。 > delims=xxx - 指分隔符集。这个替换了空格和制表符的 > 默认分隔符集。 > tokens=x,y,m-n - 指每行的哪一个符号被传递到每个迭代 > 的 for 本身。这会导致额外变量名称的分配。m-n > 格式为一个范围。通过 nth 符号指定 mth。如果 > 符号字符串中的最后一个字符星号, > 那么额外的变量将在最后一个符号解析之后 > 分配并接受行的保留文本。 > usebackq - 指定新语法已在下类情况中使用: > 在作为命令执行一个后引号的字符串并且一个单 > 引号字符为文字字符串命令并允许在 file-set > 中使用双引号扩起文件名称。 > > 某些范例可能有助: > FOR /F "eol=; tokens=2,3* delims=, " %i in (myfile.txt) do @echo %i %j %k > > 会分析 myfile.txt 中的每一行,忽略以分号打头的那些行,将 > 每行中的第二个和第三个符号传递给 for 函数体,用逗号和/或 > 空格分隔符号。请注意,此 for 函数体的语句引用 %i 来 > 获得第二个符号,引用 %j 来获得第三个符号,引用 %k > 来获得第三个符号后的所有剩余符号。对于带有空格的文件 > 名,你需要用双引号将文件名括起来。为了用这种方式来使 > 用双引号,还需要使用 usebackq 选项,否则,双引号会 > 被理解成是用作定义某个要分析的字符串的。 > > %i 在 for 语句中显式声明,%j 和 %k 是通过 > tokens= 选项隐式声明的。可以通过 tokens= 一行 > 指定最多 26 个符号,只要不试图声明一个高于字母 "z" 或 > "Z" 的变量。请记住,FOR 变量是单一字母、分大小写和全局的变量; > 而且,不能同时使用超过 52 个。 > > 还可以在相邻字符串上使用 FOR /F 分析逻辑,方法是, > 用单引号将括号之间的 file-set 括起来。这样,该字符 > 串会被当作一个文件中的一个单一输入行进行解析。 > > 最后,可以用 FOR /F 命令来分析命令的输出。方法是,将 > 括号之间的 file-set 变成一个反括字符串。该字符串会 > 被当作命令行,传递到一个子 CMD.EXE,其输出会被捕获到 > 内存中,并被当作文件分析。如以下例子所示: > > FOR /F "usebackq delims==" %i IN (`set`) DO @echo %i > > 会枚举当前环境中的环境变量名称。 > > 另外,FOR 变量参照的替换已被增强。你现在可以使用下列 > 选项语法: > > %~I - 删除任何引号("),扩展 %I > %~fI - 将 %I 扩展到一个完全合格的路径名 > %~dI - 仅将 %I 扩展到一个驱动器号 > %~pI - 仅将 %I 扩展到一个路径 > %~nI - 仅将 %I 扩展到一个文件名 > %~xI - 仅将 %I 扩展到一个文件扩展名 > %~sI - 扩展的路径只含有短名 > %~aI - 将 %I 扩展到文件的文件属性 > %~tI - 将 %I 扩展到文件的日期/时间 > %~zI - 将 %I 扩展到文件的大小 > %~$PATH:I - 查找列在路径环境变量的目录,并将 %I 扩展 > 到找到的第一个完全合格的名称。如果环境变量名 > 未被定义,或者没有找到文件,此组合键会扩展到 > 空字符串 > > 可以组合修饰符来得到多重结果: > > %~dpI - 仅将 %I 扩展到一个驱动器号和路径 > %~nxI - 仅将 %I 扩展到一个文件名和扩展名 > %~fsI - 仅将 %I 扩展到一个带有短名的完整路径名 > %~dp$PATH:I - 搜索列在路径环境变量的目录,并将 %I 扩展 > 到找到的第一个驱动器号和路径。 > %~ftzaI - 将 %I 扩展到类似输出线路的 DIR > > 在以上例子中,%I 和 PATH 可用其他有效数值代替。%~ 语法 > 用一个有效的 FOR 变量名终止。选取类似 %I 的大写变量名 > 比较易读,而且避免与不分大小写的组合键混淆。 ##### 一、参数 /d > FOR /D %variable IN (set) DO command [command-parameters] > 如果集中包含通配符,则指定与目录名匹配,而不与文件名匹配。 ``` @echo off for /d %%i in (c:\*) do echo %%i :: bat 或cmd 文件 %%i , 命令行 %i pause for /d %%i in (???) do echo %%i pause ::通配符 ? 一个字符 * 任意个字符 ``` ##### 二、参数 /R > FOR /R [[drive:]path] %variable IN (set) DO command [command-parameters] > 检查以 [drive:]path 为根的目录树,指向每个目录中的FOR 语句。如果在 /R 后没有指定目录,则使用当前 > 目录。如果集仅为一个单点(.)字符,则枚举该目录树。 ``` @echo off for /r c:\ %%i in (*.exe) do echo %%i pause for /r c:\ %%i in (boot.ini) do echo %%i ::枚举了 c 盘所有目录,改为以下 pause for /r c:\ %%i in (py.exe) do if exist %%i echo %%i pause ``` ##### 三、参数 /L > FOR /L%variable IN (start,step,end) DO command [command-parameters] > > 该集表示以增量形式从开始到结束的一个数字序列。因此,(1,1,5) 将产生序列 1 2 3 4 5,(5,-1,1) 将产生序列 (5 4 3 2 1) ``` @echo off for /l %%i in (1,1,5) do @echo %%i pause ``` ##### 四、参数 /F > FOR /F ["options"] %variable IN (file-set) DO command [command-parameters] > FOR /F ["options"] %variable IN ("string") DO command [command-parameters] > FOR /F ["options"] %variable IN ('command') DO command [command-parameters > > 带引号的字符串"options"包括一个或多个指定不同解析选项的关键字。这些关键字为 : > eol=c - 指一个行注释字符的结尾(就一个) > skip=n - 指在文件开始时忽略的行数。 > delims=xxx - 指分隔符集。这个替换了空格和跳格键的默认分隔符集。 > tokens=x,y,m-n - 指每行的哪一个符号被传递到每个迭代的 for 本身。这会导致额外变量名称的分配。 > > m-n格式为一个范围。通过 nth 符号指定 mth。如果符号字符串中的最后一个字符星号, 那么额外的变量将在最后一个符号解析之后分配并接受行的保留文本。 > usebackq - 使用后引号(键盘上数字 1 左面的那个键 ` )未使用参数 usebackq 时:file-set 表示文 ` > > `件,但不能含有空格 > 双引号表示字符串,即"string" > 单引号表示执行命令,即'command' > 使用参数 usebackq 时:file-set 和"file-set"都表示文件 > 当文件路径或名称中有空格时,就可以用双引号括起来 > 单引号表示字符串,即'string' > 后引号表示命令执行,即`command` ``` @echo off rem 首先建立临时文件 test.txt echo ;注释行,这是临时文件,用完删除 >test.txt echo 11 段 12 段 13 段 14 段 15 段 16 段 >>test.txt echo 21 段,22 段,23 段,24 段,25 段,26 段 >>test.txt echo 31 段-32 段-33 段-34 段-35 段-36 段 >>test.txt FOR /F "eol=; tokens=1,3* delims=,- " %%i in (test.txt)do echo %%i %%j %%k Pause Del test.txt ``` ### 0x03 FOR 命令中的变量 ##### 一、 ~I - 删除任何引号("),扩展 %I ``` @echo off echo ^"1111>temp.txt echo "2222">>temp.txt echo 3333^">>temp.txt echo "4444"44>>temp.txt echo ^"55"55"55>>temp.txt rem 上面建立临时文件,注意不成对的引号要加转义字符 ^ ,重定向符号前不要留空格 FOR /F "delims=" %%i IN (temp.txt) DO echo %%~i pause del temp.txt 输出: 1111 2222 3333" 4444"44 55"55"55 ``` 删除引号规则如下(BAT 兄补充!) 1、若字符串首尾同时存在引号,则删除首尾的引号; 2、若字符串尾不存在引号,则删除字符串首的引号; 3、如果字符串中间存在引号,或者只在尾部存在引号,则不删除。 ##### 二、 %~fI - 将 %I 扩展到一个完全合格的路径名 ``` @echo off FOR /F "delims==" %%i IN ('dir /b') DO @echo %%~fi pause ``` ##### 三、 %~dI - 仅将 %I 扩展到一个驱动器号 ``` @echo off FOR /F "delims==" %%i IN ('dir /b') DO @echo %%~di pause :: 仅输入磁盘目录 如 C: ``` ##### 四、 %~pI - 仅将 %I 扩展到一个路径 ``` @echo off FOR /F "delims==" %%i IN ('dir /b') DO @echo %%~pi pause :路径 \Users\Leon\Desktop\ ``` ##### 五、 %~nI - 仅将 %I 扩展到一个文件名 ``` @echo off FOR /F "delims==" %%i IN ('dir /b') DO @echo %%~ni pause :文件名无扩展后缀 ``` ##### 六、 %~xI - 仅将 %I 扩展到一个文件扩展名 只打印文件的扩展名 ##### 七、 %~sI - 扩展的路径只含有短名 打印绝对短文件名 ##### 八、 %~aI - 将 %I 扩展到文件的文件属性 打印文件的属性 ##### 九、 %~tI - 将 %I 扩展到文件的日期/时间 打印文件建立的日期 ##### 十、 %~zI - 将 %I 扩展到文件的大小 打印文件的大小 ##### 十一、 %~$PATH:I 在 PATH 变量里指定的路径里搜索 notepad.exe 文件,如果有 notepad.exe 则会把 他所在绝对路径打印出来,没有就打印一个错误! ``` @echo off FOR /F "delims=" %%i IN (“notepad.exe”) DO echo %%~$PATH:i pause ``` ### 0x04 批处理中的变量 ##### 一、系统变量 不需要赋值,调用而以 ``` %ALLUSERSPROFILE% 本地 返回“所有用户”配置文件的位置。 %APPDATA% 本地 返回默认情况下应用程序存储数据的位置。 %CD% 本地 返回当前目录字符串。 %CMDCMDLINE% 本地 返回用来启动当前的 Cmd.exe 的准确命令行。 %CMDEXTVERSION% 系统 返回当前的“命令处理程序扩展”的版本号。 %COMPUTERNAME% 系统 返回计算机的名称。 %COMSPEC% 系统 返回命令行解释器可执行程序的准确路径。 %DATE% 系统 返回当前日期。 %ERRORLEVEL% 系统 返回上一条命令的错误代码。通常用非零值表示错误。 %HOMEDRIVE% 系统 返回连接到用户主目录的本地工作站驱动器号。 %HOMEPATH% 系统 返回用户主目录的完整路径。 %LOGONSERVER% %NUMBER_OF_PROCESSORS% %OS% %PATH% %PATHEXT% 系统 返回操作系统认为可执行的文件扩展名的列表。 %PROCESSOR_ARCHITECTURE% 系统 返回处理器的芯片体系结构。 %PROCESSOR_IDENTFIER% 系统 返回处理器说明。 %PROCESSOR_LEVEL% 系统 返回计算机上安装的处理器的型号。 %PROCESSOR_REVISION% 系统 返回处理器的版本号。 %PROMPT% 本地 返回当前解释程序的命令提示符设置。由 Cmd.exe 生成。 %RANDOM% 系统 返回 0 到 32767 之间的任意十进制数字。由 Cmd.exe 生成。 %SYSTEMDRIVE% 系统 返回包含 Windows server operating system 根目录(即系统根目录) %SYSTEMROOT% 系统 返回 Windows server operating system 根目录的位置。 %TEMP% 和 %TMP% 系统和用户 返回对当前登录用户可用的应用程序所使用的默认临时目录。 %TIME% 系统 返回当前时间。 %USERDOMAIN% 本地 返回包含用户帐户的域的名称。 %USERNAME% 本地 返回当前登录的用户的名称。 %USERPROFILE% 本地 返回当前用户的配置文件的位置。 %WINDIR% 系统 返回操作系统目录的位置。 ``` %1 %2 %3 %4 %5第几个参数 ``` @echo off echo %1 %2 %3 %4 echo %1 echo %2 echo %3 echo %4 ::保存为test.BAT 进入 CMD 输入 test.bat 我是第一个参数 我是第二个参数 我是第三个参数 我是第四个参数 ``` %* 显示全部参数 %0 返回批处理所在绝对路径 或者无限循环执行 BAT ``` @echo off echo %0 pause @echo off net user %0 ``` ##### 二、自定义变量 由我们来给他赋予值的变量 ``` @echo off set var=我是值 echo %var% pause ``` 让用户手工输入变量的值 ``` @echo off set /p var=请输入变量的值 echo %var% pause ``` ### 0x05 set 命令详解 ##### 一、用 set 命令设置自定义变量 > 显示、设置或删除 cmd.exe 环境变量。 > > SET [variable=[string]] > > variable 指定环境变量名。 > string 指定要指派给变量的一系列字符串。 > > 要显示当前环境变量,键入不带参数的 SET。 > > 可仅用一个变量激活 SET 命令,等号或值不显示所有前缀匹配 > SET 命令已使用的名称的所有变量的值。例如: > > SET P > > 会显示所有以字母 P 打头的变量 > > 在 SET 命令中添加了两个新命令行开关: > > SET /A expression > SET /P variable=[promptString] ##### 二、用 set 命令进行简单计算 > /A 命令行开关指定等号右边的字符串为被评估的数字表达式。该表达式 > 评估器很简单并以递减的优先权顺序支持下列操作: > > () - 分组 > ! ~ - - 一元运算符 > * / % - 算数运算符 > + - - 算数运算符 > << >> - 逻辑移位 > & - 按位“与” > ^ - 按位“异” > | - 按位“或” > = *= /= %= += -= - 赋值 > &= ^= |= <<= >>= > , - 表达式分隔符 > 注意:DOS 计算只能精确到整数 ``` @echo off set /p input=请输入计算表达式: set /a var=%input% echo 计算结果:%input%=%var% pause ``` ``` @echo off set /p n=请输入 2 的几次方 : set /a num=1^<^<n echo %num% pause ``` ##### 三、用 set 命令进行字符串处理 ###### 1、字符串替换 > %PATH:str1=str2% 字符串变量%PATH%中的 str1 替换为 str2 ``` @echo off set a= bbs.verybat. cn echo 替换前的值 : "%a%" set var=%a: =% echo 替换后的值 : "%var%" pause ::输出bbs.verybat.cn ``` ###### 2、字符串截取 > 截取功能统一语法格式为:%a:~[m[,n]]% > > 方括号表示可选,%为变量标识符,a 为变量名,不可少,冒号用于分隔变量名和说明部分 , > 符号~可以简单理解为“偏移”即可,m 为偏移量(缺省为 0),n 为截取长度(缺省为全部) 跳过一个,取两个 ``` @echo off set a=bbs.verybat.cn set var=%a:~1,2% echo %var% pause ``` 取最后3个 ``` @echo off set a=bbs.verybat.cn set var=%a:~3% echo % ``` 从第几个开始, 不要最后几个 ``` @echo off set a=bbs.verybat.cn set var=%a:~2,-3% echo %var% pause ``` 求字符串单长度 ``` @echo off set /p str=请输入任意长度的字符串 : echo 你输入了字符串:"%str%" if not defined str(pause& goto :eof) set num=0 :len set /a num+=1 set str=%str:~0,-1% if defined str goto len echo 字符串长度为:%num% pause ``` ### 0x06 if 命令讲解 ##### 第一种用法:IF [NOT] ERRORLEVEL number command ``` @echo off net user IF %ERRORLEVEL% == 0 echo net user 执行成功了! pause ``` ##### 第二种用法:IF [NOT] string1==string2 command ``` @echo off set /p var=请输入第一个比较字符 : set /p var2=请输入第二个比较字符 : if %var% == %var2% (echo 我们相等) ELSE echo 我们不相等 pause ``` 上面这个例子 判断你输入的值是不是相等,但是你如果输入相同的字符,但是如果其中一个后面打了一个空格, 这个例子还是会认为相等,如何让有空格的输入不相等呢?我们在比较字符上加个双引号 ``` @echo off set /p var=请输入第一个比较字符 : set /p var2=请输入第二个比较字符(多输入个空格试试 ): if "%var%" == "%var2%" (echo 我们相等) ELSE echo 我们不相等 pause ``` ##### 第三种用法:IF [NOT] EXISTfilename command 判断某个文件或者文件夹是否存在 ``` @echo off if exist "c:\test" (echo 存在文件) ELSE echo 不存在文件 pause ``` ##### 第四种用法:IF 增强的用法 > IF [/I]string1 compare-op string2 command > IF CMDEXTVERSION number command > IF DEFINED variable command 后面两个用法,跟前面的类似,不做介绍, ``` @echo off if a == A (echo 我们相等) ELSE echo 我们不相等 pause ``` 不相等 ``` @echo off if /i a == A (echo 我们相等) ELSE echo 我们不相等 pause ``` 加上/I 不区分大小 结果 相等 **判断数字的符号** > EQU - 等于 > NEQ - 不等于 > LSS - 小于 > LEQ - 小于或等于 > GTR- 大于 > GEQ - 大于或等于 ``` @echo off set /p var=请输入一个数字 : if %var% LEQ 4 (echo 我小于等于 4) ELSE echo 我不小于等于 4 pause ``` ### 0x07 DOS 编程高级技巧 ##### 一、界面设计 ``` @echo off cls title 终极多功能修复 :menu cls color 0A echo. echo ============================== echo 请选择要进行的操作,然后按回车 echo ============================== echo. echo 1.网络修复及上网相关设置,修复 IE,自定义屏蔽网站 echo. echo 2.病毒专杀工具,端口关闭工具,关闭自动播放 echo. echo 3.清除所有多余的自启动项目,修复系统错误 echo. echo 4.清理系统垃圾,提高启动速度 echo. echo Q.退出 echo. echo. :cho set choice= set /p choice= 请选择 : IF NOT "%choice%"=="" SET choice=%choice:~0,1% if /i "%choice%"=="1" goto ip if /i "%choice%"=="2" goto setsave if /i "%choice%"=="3" goto kaiji if /i "%choice%"=="4" goto clean if /i "%choice%"=="Q" goto endd echo 选择无效,请重新输入 echo. goto cho :ip echo ip pause goto :menu :setsave echo setsave pause goto :menu :kaiji echo kaiji pause goto :menu :clean echo clean pause goto :menu :endd exit ``` ##### 二、 if …else…条件语句 ``` IF EXIST filename ( del filename ) ELSE ( echo filename missing ) ``` ##### 三、循环语句 > FOR /L%variable IN (start,step,end) DO command [command-parameters] > > FOR %%variable IN (set) DO command [command-parameters] > > FOR /R[[drive:]path] %variable IN (set) DO command [command-parameters] ``` @echo off set var=0 rem ************循环开始了 :continue set /a var+=1 echo 第%var%此循环 if %var% lss 100 goto continue rem ************循环结束了 echo 循环执行完毕 pause ``` ##### 四、子程序 > CALL:label arguments > :label > command1 > command2 > ... > commandn > goto :eof ``` @echo off call :sub return 你好 echo 子程序返回值:%return% pause :sub set %1=%2 goto :eof 运行结果:你好 ``` 设计一个求多个整数相加的子程序 ``` @echo off set sum=0 call :sub sum 10 20 35 echo 数据求和结果:%sum% pause :sub rem 参数 1 为返回变量名称 set /a %1=%1+%2 shift /2 if not "%2"=="" goto sub goto :eof ``` ##### 五、用 ftp 命令实现自动下载 ``` ftp #进入ftp open 90.52.8.3 #打开 ip user iware #用户为 iware password8848 #密码 bin #二进制传输模式 prompt cd tmp1 #切换至 iware 用户下的 tmp1 目录 pwd lcd d:\download #本地目录 mget * #下载 tmp1 目录下的所有文件 bye #退出 ftp ``` ##### 六、调用 VBScript 程序 > 用法:CScript scriptname.extension [option...] [arguments...] > > 选项: > //B 批模式:不显示脚本错误及提示信息 > //D 启用 Active Debugging > //E:engine 使用执行脚本的引擎 > //H:CScript 将默认的脚本宿主改为 CScript.exe > //H:WScript 将默认的脚本宿主改为 WScript.exe (默认) > //I 交互模式(默认,与 //B 相对) > //Job:xxxx 执行一个 WSF 工作 > //Logo 显示徽标(默认) > //Nologo 不显示徽标:执行时不显示标志 > //S 为该用户保存当前命令行选项 > //T:nn 超时设定秒:允许脚本运行的最长时间 > //X 在调试器中执行脚本 > //U 用 Unicode 表示来自控制台的重定向 I/O ##### 七、将批处理转化为可执行文件 BAT2EXE第三方工具 > 在 DOS 环境下,可执行文件的优先级由高到低依次为.com>.exe>.bat>.cmd ##### 八、时间延迟 ``` @echo off chcp 65001 echo 延时前!%time% ping /n 5 127.0.0.1 >nul echo 延时后!%time% pause echo 延时前!%time% for /l %%i in (1,1,5000) do echo %%i>nul echo 延时后!%time% pause ``` ##### 九、模拟进度条 ``` @echo off mode con cols=113 lines=15 &color 9f chcp 65001 cls echo. echo 程序正在初始化. . . echo. echo ┌──────────────────────────────────────┐ set /p a=■<nul for /L %%i in (1 1 38) do set /p a=■<nul&ping /n 1 127.0.0.1>nul echo 100%% echo └──────────────────────────────────────┘ pause ```